




















36272220201 Kenmore Range - Instructions
Keep searches simple. Use keywords, e.g. "leaking", "pump", "broken" or "fit".
No burner
I just put everything on it and lighted match and problem solved! Easy fix!
Parts Used:

-
ESTELA E from HOUSTON, TX
-
Difficulty Level:Very Easy
-
Total Repair Time:Less than 15 mins
2 of 2 people
found this instruction helpful.
Was this instruction helpful to you?
Thank you for voting!
No problem
I used a nutdriver to remove the natural gas orifice and I placed the other liquid gas orifice
Parts Used:
-
Laurindalva from LODI, NJ
-
Difficulty Level:Really Easy
-
Total Repair Time:15 - 30 mins
-
Tools:Nutdriver
2 of 2 people
found this instruction helpful.
Was this instruction helpful to you?
Thank you for voting!
Burner had uneven flames
-
Akshay from Bridgeton, NJ
-
Difficulty Level:Really Easy
-
Total Repair Time:Less than 15 mins
3 of 5 people
found this instruction helpful.
Was this instruction helpful to you?
Thank you for voting!
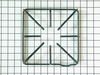
Grate Size
The grates are slightly smaller then the original Kenmore parts and they slide slightly. I purchased a full set of 4 grates - part number PS244182
Parts Used:
-
Clyde from ALLEGAN, MI
-
Difficulty Level:Really Easy
-
Total Repair Time:Less than 15 mins
2 of 2 people
found this instruction helpful.
Was this instruction helpful to you?
Thank you for voting!
The eye would not light
-
Solomon A from COLLEGE PARK, GA
-
Difficulty Level:Really Easy
-
Total Repair Time:30 - 60 mins
2 of 2 people
found this instruction helpful.
Was this instruction helpful to you?
Thank you for voting!
lights blown out

-
Gerald from WINTERVILLE, GA
-
Difficulty Level:Very Easy
-
Total Repair Time:Less than 15 mins
6 of 14 people
found this instruction helpful.
Was this instruction helpful to you?
Thank you for voting!
Digital clock no longer worked
No longer carry the one to our stove so it was substituted with Nafisa on it. You could see all the electronics so we had to pry the old face off the old one blew it in place, but a clock was reversed from timer, but it works.
Parts Used:
-
Dolores from AVOCA, IA
-
Difficulty Level:A Bit Difficult
-
Total Repair Time:More than 2 hours
-
Tools:Screw drivers
2 of 2 people
found this instruction helpful.
Was this instruction helpful to you?
Thank you for voting!
broke tubes while cleaning under top
was still using back burners while waiting for parts (after safety check). I unplugged the electric for the igniters, raised top, installed tubes, checked for leaks with soap solution, closed top, plugged in electric tested burners. Got a big hug and kiss from my wife.
Parts Used:
-
Sally from Bakersfield, CA
-
Difficulty Level:Really Easy
-
Total Repair Time:Less than 15 mins
-
Tools:Wrench set
2 of 3 people
found this instruction helpful.
Was this instruction helpful to you?
Thank you for voting!
Screws fell into a black hole and trouble threading the thermostate
My husband and I probably could have done the repair in 15 minutes except for the difficulty lifting up the range top, dropping the screws into the range where they could not be retreived, threading the thermostate into the little holes from the top to the inside of the oven and then trying to hook the range top back into place. Even with all the difficulties we still accomplished the task in one hour. Thank goodness we had 4 extra screws that worked (actually only takes 2 but of the 6 we had, 4 fell into a place you could not reach into). Glue on the end of the screw driver finally kept the screws from falling into the black hole. It was an adventure and would do it again.
Parts Used:
-
Lenora from Crowley, TX
-
Difficulty Level:Really Easy
-
Total Repair Time:30 - 60 mins
-
Tools:Screw drivers
4 of 10 people
found this instruction helpful.
Was this instruction helpful to you?
Thank you for voting!
Light burnt out.
Turned the wire protector to the side. Turned out the old bulb and replaced it with the new. Turned the wire protector back in place and I'm like new.
Parts Used:
-
Roscoe G from ROCHESTER, NY
-
Difficulty Level:Very Easy
-
Total Repair Time:Less than 15 mins
2 of 4 people
found this instruction helpful.
Was this instruction helpful to you?
Thank you for voting!
Only A "Cosmetic" Replacement.
No job here. . . . Just sat new parts on to replace old ugly parts.
Parts Used:
-
Jimmy from Bonifay, FL
-
Difficulty Level:Really Easy
-
Total Repair Time:Less than 15 mins
1 person
found this instruction helpful.
Was this instruction helpful to you?
Thank you for voting!
The old burners were damaged by the prior owners.
The repair was extremely easy. Just removed the old burners and dropped in the new ones. No tools needed.
Parts Used:
-
Mohammad from BARTLETT, IL
-
Difficulty Level:Very Easy
-
Total Repair Time:Less than 15 mins
1 person
found this instruction helpful.
Was this instruction helpful to you?
Thank you for voting!
Burners wouldn't light
Had two burners on the stove that would not light. Had tried cleaning them but they still did not ignite. Replaced both burner heads. Once replaced. they ignited right away and have worked ever since.
Parts Used:
-
Robert from SOUTH ELGIN, IL
-
Difficulty Level:Very Easy
-
Total Repair Time:Less than 15 mins
1 person
found this instruction helpful.
Was this instruction helpful to you?
Thank you for voting!
while cleaning I broke the tubes either lifting or closing the top.
I bent the tubes very slghtly to rech the area of attachment. I first screwed them with my hand then tightened them with an adjstable wrench. It was really simple and fast.
Parts Used:
-
DAPHNE from CHICAGO, IL
-
Difficulty Level:Really Easy
-
Total Repair Time:15 - 30 mins
-
Tools:Wrench (Adjustable)
2 of 4 people
found this instruction helpful.
Was this instruction helpful to you?
Thank you for voting!
tube that sends gas to burners broke both left and right front this happen due to opening the range hood to clean inside
I turn gas off to the appliance then I remove the old gas lines and installed the new ones. I did find it easlier to attach the line at the burner knob first then attach it to the burner.
Parts Used:
-
LEAH from YUMA, AZ
-
Difficulty Level:A Bit Difficult
-
Total Repair Time:15 - 30 mins
-
Tools:Pliers, Screw drivers, Socket set, Wrench (Adjustable)
1 person
found this instruction helpful.
Was this instruction helpful to you?
Thank you for voting!