




















33346 General Electric Refrigerator - Instructions
Keep searches simple. Use keywords, e.g. "leaking", "pump", "broken" or "fit".
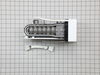
my old ice maker leaked at the bottom
it was really easy changing the ice maker. the only trouble i had was the wiring. it was very stiff and hard to route. it did not work at first but that was my fault did not have the connector plugged in all the way.since then it works great.
Parts Used:
-
harry from terre haute, IN
-
Difficulty Level:Really Easy
-
Total Repair Time:Less than 15 mins
-
Tools:Nutdriver
7 of 9 people
found this instruction helpful.
Was this instruction helpful to you?
Thank you for voting!
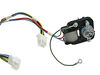
Evaporator fan motor quit and would not circulate cold air from coils.
Remove shelves and rear panels to get to motor. Motor is held in place on shroud by simple strap. Remove fan blade, then un hook strap, remove and save rubber spacers on old motor to reuse to remount new motor. New motor Mew motor has wiring harness that is universal. Cut out the three wires that go to the new motor leaving long as possible, cut wires from old motor as long as possible, strip ends of all wires 1/2 inch, connect wires by color,slip into provided wire connectors and crimp. Pull on wires to insure connection. Tie wires together so they don't touch the coils. Plug in and check operation. If all is working unplug and replace all covers and shelves. Plug back in and it will take few hours to reach operating temperature. Video of side by side repair shows easy removal of panels and motor.
Parts Used:
-
Denver from BLAIRSVILLE, GA
-
Difficulty Level:Really Easy
-
Total Repair Time:30 - 60 mins
-
Tools:Nutdriver
6 of 7 people
found this instruction helpful.
Was this instruction helpful to you?
Thank you for voting!
I replaced the icemaker
I removed the two screws and unplugged it. I then attached the pigtail to the appliance, then to the fridge. I had to push the excess wire harness into the hole in the back. It took a few minutes to move the rest of the harness out of the way by curving it upward and securing it with a nylon tie.I ordered the ice maker from Part Select on Sunday night and it arrived at 8:32 Tuesday morning, THANK YOU! I ordered very simple weed cutter parts from Sears a week ago and they haven't even shipped yet!
Parts Used:
-
Michele from Smithfield, UT
-
Difficulty Level:Easy
-
Total Repair Time:15 - 30 mins
-
Tools:Nutdriver
5 of 5 people
found this instruction helpful.
Was this instruction helpful to you?
Thank you for voting!
A glass insert/shelf broke when were cleaning it.
It was very simple-it is just an insert glass shelf above the vegetable drawers. But, it was fairly easy to identify on your website and delivered in about two days.
Parts Used:

-
David from Fairlawn, OH
-
Difficulty Level:Really Easy
-
Total Repair Time:Less than 15 mins
7 of 11 people
found this instruction helpful.
Was this instruction helpful to you?
Thank you for voting!
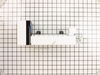
Replace ice maker which was splashing water
Turn off ice maker
Slide wire harness shield off connector
Disconnected harness
Loosened 2 wall screws
Remove old ice maker
Installed new one reversing process
Slide wire harness shield off connector
Disconnected harness
Loosened 2 wall screws
Remove old ice maker
Installed new one reversing process
Parts Used:
-
John from PHOENIX, AZ
-
Difficulty Level:Really Easy
-
Total Repair Time:15 - 30 mins
-
Tools:Screw drivers, Wrench set
5 of 5 people
found this instruction helpful.
Was this instruction helpful to you?
Thank you for voting!
Ice maker stopped working (Very oxidized residue)
I removed the old ice maker and unplugged the cable. Screwed in the new one with a 1/4 nut driver at the 2 mounting screws, plugged cable in. Checked ice maker with a small level before final. All Ok and after night I had Ice and it has been working great since.
Parts Used:
-
Robert from Woodstock, IL
-
Difficulty Level:Really Easy
-
Total Repair Time:Less than 15 mins
-
Tools:Nutdriver
8 of 14 people
found this instruction helpful.
Was this instruction helpful to you?
Thank you for voting!
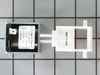
ice maker would not dispense cubes, stuck on crushed ice
turn off ice maker, unplug electoral connection, under bottom of ice maker, remove two screws (hex) under bottom of ice maker, lift up on it to unhook it, take it out. (dump out all ice ). remove back plate on back of ice maker (two screws), the solenoid is held in place with two brass screws, remove them, then remove ground wire from solenoid and two wires, that connect to it,(make a note of how wires go back !). put it all back together and your good to go. . i dont think its really the solenoid that goes out, its the housing that encases it, and you have to buy another solenoid thats encased. good luck
Parts Used:
-
steven from TONEY, AL
-
Difficulty Level:A Bit Difficult
-
Total Repair Time:1- 2 hours
-
Tools:Pliers, Screw drivers, Socket set
5 of 6 people
found this instruction helpful.
Was this instruction helpful to you?
Thank you for voting!
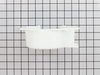
crusher housing cracked
Removed ice tray, disassembled ice tray assembly and crusher housing making sure to note the spring location, spring etc, installed new plastic housing making sure to reinstall the spring properly and the fixed crusher blade into the notch cutout., reassembled ice tray.
Parts Used:
-
Adam from Clayton, NC
-
Difficulty Level:Easy
-
Total Repair Time:15 - 30 mins
-
Tools:Nutdriver, Screw drivers
5 of 6 people
found this instruction helpful.
Was this instruction helpful to you?
Thank you for voting!
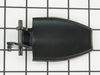
Broke the actuator
I unplugged the fridge and removed the dispenser's drip plate. There are 3 screws holding the front fascia. I carefully slid the fascia up to removed it. I unplugged it from what looks like a circuit board from the dispenser. Remove 3 more screws that held the board exposing the ice dispenser's hole and the water actuator. To give myself a little more room to work, I disconnected the board from the fridge. Attempted to removed the water hose but i couldn't, but found out didn't need to. I used a longer philip's screwdriver to unscrew two very small plates that were holding the actuator in place. Need a magnitized screwdriver for this, my hands are too big to reach in there. It took about 15 minutes. NO extra parts or additional parts to order.
Parts Used:
-
Darwin from Delano, CA
-
Difficulty Level:Easy
-
Total Repair Time:15 - 30 mins
-
Tools:Screw drivers
5 of 6 people
found this instruction helpful.
Was this instruction helpful to you?
Thank you for voting!
Broken water dispenser actuator
No previous experience with this appliance, a 36 inch side by side unit. Had to determine how to access the area to replace the part. This is done from the front with the door closed. The bottom shelf in the dispenser area elevates and slips out. Retainer screws are then evident. Remove screws that hold trim and then unplug the electric attachment for the switches from the trim which contains the light and selection controls. Next remove the screws placed around the circuit board holder. This then allows the section attaching the ice dispenser and water dispenser to be pulled forward. Do not disconnect the water tube. Two small metal retainers for the water dispenser can then be removed (three small screws) carefully. Remove the broken part of the old actuator and place the new one in the slots. Replace the retainers (start the retainer screws by hand unless you have a magnetic screwdriver). Replace the section holding the circuit board; then the trim and the bottom shelf. Easier than anticipated.
Parts Used:
-
Thornton from Cadiz, KY
-
Difficulty Level:A Bit Difficult
-
Total Repair Time:30 - 60 mins
-
Tools:Screw drivers
4 of 4 people
found this instruction helpful.
Was this instruction helpful to you?
Thank you for voting!
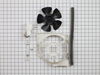
fan motor quit working
A little difficult getting out due to restricted space, I took off the fan blade, that gave extra working room. Then it went well going back together,and it all worked as advertised. Thanks. p
Parts Used:
-
Phillip from SUNDANCE, WY
-
Difficulty Level:Really Easy
-
Total Repair Time:30 - 60 mins
-
Tools:Nutdriver, Pliers, Screw drivers, Socket set, Wrench (Adjustable)
4 of 4 people
found this instruction helpful.
Was this instruction helpful to you?
Thank you for voting!
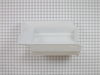
A 2" x 4" section on the bottom of the ice container bucket broke out.
Simply detached the old ice container by removing four screws and removing one screw holding the lever onto the bottom of the container. A bit of advice; make sure you note how the spring is attached to the lever before removing the screw. It took me a bit to determine how the spring activated the lever when I was reattaching it to the bottom of the container. Also, double check your order before you finalize it. I must have inadvertently hit the item twice so I received two of them. This resulted in me having to return one item and paying for extra shipping both ways. I received the part within two days of my order. It was a very fast turn-around. Also, when I realized that I received two parts and had to call to explain the situation, I found the person on the phone to be extremely helpful and courteous. She sent me information regarding how to return the product and didn't ridicule me once for my stupidity.
Parts Used:
-
David from Owensboro, KY
-
Difficulty Level:Easy
-
Total Repair Time:15 - 30 mins
-
Tools:Screw drivers
5 of 7 people
found this instruction helpful.
Was this instruction helpful to you?
Thank you for voting!
8 loud pops and then dump ice .
Turn off power. Remove ice tray. Back out the two screws with nut driver and just lift ice maker off screws. Do not bend the water fill tube in the back . Now unplug the wire and remove ice maker .
To replace, match the color of wires on plug. Adjust wires in place and water fill tube and back on to the screws. Hold in place and snug screws. Turn power back on. In 4 to 5 hours your ice will start .
FED-EX UT to MN was 13 days to deliver .
To replace, match the color of wires on plug. Adjust wires in place and water fill tube and back on to the screws. Hold in place and snug screws. Turn power back on. In 4 to 5 hours your ice will start .
FED-EX UT to MN was 13 days to deliver .
Parts Used:
-
Douglas from INVER GROVE, MN
-
Difficulty Level:Very Easy
-
Total Repair Time:Less than 15 mins
-
Tools:Nutdriver
4 of 4 people
found this instruction helpful.
Was this instruction helpful to you?
Thank you for voting!
Ice not dispensing
Ice was not dispensing. Examined the ice bin and auger, noted that the plastic ring that holds the auger at the front of the bin was broken all the way around. Pulled out old bin, making sure the ice fill level was raised all the way up, and pushed in the new bin. The new bin filled with ice, which promptly turned into a solid mass of ice because the ice maker was also faulty. I replaced that as well and have not had any issues.
Parts Used:
-
Will from Katy, TX
-
Difficulty Level:Very Easy
-
Total Repair Time:Less than 15 mins
4 of 4 people
found this instruction helpful.
Was this instruction helpful to you?
Thank you for voting!
ice maker went bad
take the ice bin out of freezer. there are 2- 1/4" screws. these screws only need to be loosened a few turns. the ice maker can be slightly lifted up and will come off the screws. unhook the wire harness. take the "L" bracket off the old ice maker and put on the new one. set the new ice maker in. hook up the wire harness. put the new ice maker over the screws, tuck the wires out of the way and pull down into place. tighten the screws.
Parts Used:
-
nathan from gillette, WY
-
Difficulty Level:Really Easy
-
Total Repair Time:Less than 15 mins
-
Tools:Nutdriver
4 of 5 people
found this instruction helpful.
Was this instruction helpful to you?
Thank you for voting!