




















2537041241D Kenmore Refrigerator - Instructions
Keep searches simple. Use keywords, e.g. "leaking", "pump", "broken" or "fit".
Ice maker line was freezing
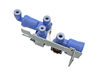
Pulled the unit out from the wall and with a flat head screwdriver and a utility knife I replaced the valve assembly. It was no problem at all.
Parts Used:
-
John from Ellsworth, WI
-
Difficulty Level:Easy
-
Total Repair Time:15 - 30 mins
-
Tools:Screw drivers
5 of 6 people
found this instruction helpful.
Was this instruction helpful to you?
Thank you for voting!
I had a broken fan blade due to ice build up from a leaking ice maker.
1. I took out one screw on the ice maker and loosened the other two screws and unplugged and removed the ice maker.
2. Next I took out 2 screws from the bottom of the auger drive box and unplugged the wiring harness and removed the box. The wiring harness was a little tricky. The lock on the plug pushes in to unlock even though it looks like it pulls out,.
3.next you must remove 2 screws from the left side bracket that holds the auger box and remove the bracket.
4.Now take out 8 screws that hold the back panel in place and remove the back panel.
5. now your looking at the evaporator fan blade and motor. The simple way to replace the fan blade is to unplug the motor and remove it from the freezer. It just sits in with nothing holding it. The fan requires a little pressure but should pull right off. Install new fan blade and put everything back in the same order it was removed.
2. Next I took out 2 screws from the bottom of the auger drive box and unplugged the wiring harness and removed the box. The wiring harness was a little tricky. The lock on the plug pushes in to unlock even though it looks like it pulls out,.
3.next you must remove 2 screws from the left side bracket that holds the auger box and remove the bracket.
4.Now take out 8 screws that hold the back panel in place and remove the back panel.
5. now your looking at the evaporator fan blade and motor. The simple way to replace the fan blade is to unplug the motor and remove it from the freezer. It just sits in with nothing holding it. The fan requires a little pressure but should pull right off. Install new fan blade and put everything back in the same order it was removed.
Parts Used:

-
gary from ARANSAS PASS, TX
-
Difficulty Level:Easy
-
Total Repair Time:30 - 60 mins
-
Tools:Nutdriver
5 of 7 people
found this instruction helpful.
Was this instruction helpful to you?
Thank you for voting!
Icemaker worked sporadically, infrequently, not at all
Not knowing the history of the refrigerator/freezer and observing that the icemaker would cycle (ice ejector fingers would rotate when the off/on arm was toggled), I concluded that the water valve must have some hard water scale in it which was causing it to stick. I replaced the water valve and the exact same behavior continued. By elimination, I concluded that the microswitch in the icemaker must be sticking. I removed the icemaker, used a hair blow-dryer to heat/dry out the microswitches and then a little shot of WD-40 on the mechanical arms, switches, and cams fixed it.
Parts Used:
-
Allen from Palmer Lake, CO
-
Difficulty Level:Easy
-
Total Repair Time:More than 2 hours
-
Tools:Nutdriver, Screw drivers, Wrench (Adjustable)
5 of 7 people
found this instruction helpful.
Was this instruction helpful to you?
Thank you for voting!
Leaking water valve
I ordered the part from PartSelect using the part number located on the valve itself. The part was delivered in less than 48 hours from the time I entered it. Replacing the valve was easy and went according to the online video instructions provided by PartSelect. The only thing extra was that I had to replace the brass compression fitting on the copper tubing connected to the inlet of the valve. The old one would not seal properly. The compression fitting was about $1.50 at Home Depot. This is my third purchase from PartSelect and I continue to be impressed by them.
Parts Used:
-
Robert from Liberty Twp, OH
-
Difficulty Level:Easy
-
Total Repair Time:30 - 60 mins
-
Tools:Nutdriver, Wrench (Adjustable)
5 of 7 people
found this instruction helpful.
Was this instruction helpful to you?
Thank you for voting!
freezer filled up with ice leaking from ice maker shut off valve bad
It was real easy took the lines off one by one put them on the new unit one by one same with the three plugs than tighten new unit back on fridge.
Parts Used:
-
Harry from Orange City, FL
-
Difficulty Level:Really Easy
-
Total Repair Time:15 - 30 mins
-
Tools:Screw drivers, Wrench (Adjustable)
5 of 8 people
found this instruction helpful.
Was this instruction helpful to you?
Thank you for voting!
freezer was causing frost and ice
i put casket on i notice when i received casket in shipping box was bent on the end of the casket 's did not solve problem casket not flush air is due to damage from shipping in the box not happy with the product.
Parts Used:

-
MICHAEL from STATEN ISLAND, NY
-
Difficulty Level:Really Easy
-
Total Repair Time:Less than 15 mins
4 of 5 people
found this instruction helpful.
Was this instruction helpful to you?
Thank you for voting!
Gasket was torn and leaking cold air causing condensation and water dripping when door was opened.

-
Michael from GRAY, ME
-
Difficulty Level:Very Easy
-
Total Repair Time:Less than 15 mins
3 of 3 people
found this instruction helpful.
Was this instruction helpful to you?
Thank you for voting!
Water filter would not disconnect from OEM Water Filter Base
Disconnect the two water supply tubes at the base of the Water Filter Base. Using a 7/16" open end wrench, press up on the blue "O" rings to disconnect the tubes. Use a Using an 8" long magnetic phillips head screw driver I was able to unscrew the 4 short screws holding the original water filter base and the immovable attached water filter. Replacement was easy. Simply slide the new base into the fixed slot on the refrigerator and reinstall the 4 holding screws. Reconnect the water supply tubes to the Water Filter Base. Install a new water filter.
Parts Used:

-
Richard from SEATTLE, WA
-
Difficulty Level:Really Easy
-
Total Repair Time:Less than 15 mins
-
Tools:Screw drivers
3 of 4 people
found this instruction helpful.
Was this instruction helpful to you?
Thank you for voting!
Water was leaking from the old valve
Watched the video on your website and you can’t go wrong.
Thanks for being there
Mike
Thanks for being there
Mike
Parts Used:
-
Michael from Double springs, AL
-
Difficulty Level:Very Easy
-
Total Repair Time:Less than 15 mins
-
Tools:Nutdriver, Pliers, Wrench (Adjustable)
3 of 4 people
found this instruction helpful.
Was this instruction helpful to you?
Thank you for voting!
NO PROBLEM JUST DECIDED IT WAS TIME TO CHANGE FILTER

-
Gregory from POTTSTOWN, PA
-
Difficulty Level:Really Easy
-
Total Repair Time:Less than 15 mins
3 of 4 people
found this instruction helpful.
Was this instruction helpful to you?
Thank you for voting!
Icemaker was producing hollow ice due to water was free flowing out the water dispenser during fill time for icemaker.
Removed old water valve w/ screwdriver, cut threads off old hose (as they just plug straight into new valve) & pushed hoses into new water valve. Solved both problems!!!!
Parts Used:
-
Melissa from Olden, TX
-
Difficulty Level:Really Easy
-
Total Repair Time:15 - 30 mins
-
Tools:Screw drivers
3 of 4 people
found this instruction helpful.
Was this instruction helpful to you?
Thank you for voting!
No water to ice maker
Repair was easy. Unplug refrigerator, turn off water to ice maker, remove back panel, disconnect water inlet valve, disconnect water supplies and electrical connections. Cut ends off tubing to modify to new part connections, connect tubing, connect electrical supplies, reinstall back panel, plug refrigerator in, turn water supply back on. We made sure that there was no ice build up in the supply tube into the ice maker and made sure that everything worked correctly before putting it all back together. It was an easy repair.
Parts Used:
-
Joel from SODUS POINT, NY
-
Difficulty Level:Really Easy
-
Total Repair Time:30 - 60 mins
-
Tools:Nutdriver, Wrench (Adjustable)
3 of 4 people
found this instruction helpful.
Was this instruction helpful to you?
Thank you for voting!
Ice maker was over filling.
Old valve comes out with 2 screws, water lines removed and reinstalled on new valve just as they came off the old valve. Entire job took less than 10 minutes. Very easy replacement.
Parts Used:
-
Richard from Marco Island, FL
-
Difficulty Level:Easy
-
Total Repair Time:Less than 15 mins
-
Tools:Screw drivers
5 of 10 people
found this instruction helpful.
Was this instruction helpful to you?
Thank you for voting!
Torn Freezer Drawer Gasket
Remove the freezer drawer by unscrewing the two 12mm screws on both sides of the drawer.
Lift the drawer up out of the slots the frame and away.
Lay the drawer on a padded surface to protect the drawer cover finish.
Pull the old gasket out of the drawer and discard.
Position the new gasket around the edge of the drawer. Starting at one corner press the gasket into the slot in the drawer edge. Continue working the gasket until you return to the starting point.
Inspect the gasket to ensure it is seated in the slot completely.
Return the drawer to the refrigerator, placing the lugs on the drawer into the slots of the frame and insert the screws to their original position and tighten securely.
Inspect the drawer for proper level/sealing in the freezer drawer position. Adjust as necessary.
Lift the drawer up out of the slots the frame and away.
Lay the drawer on a padded surface to protect the drawer cover finish.
Pull the old gasket out of the drawer and discard.
Position the new gasket around the edge of the drawer. Starting at one corner press the gasket into the slot in the drawer edge. Continue working the gasket until you return to the starting point.
Inspect the gasket to ensure it is seated in the slot completely.
Return the drawer to the refrigerator, placing the lugs on the drawer into the slots of the frame and insert the screws to their original position and tighten securely.
Inspect the drawer for proper level/sealing in the freezer drawer position. Adjust as necessary.
Parts Used:
-
Billy from FAYETTEVILLE, NC
-
Difficulty Level:A Bit Difficult
-
Total Repair Time:15 - 30 mins
-
Tools:Socket set
3 of 5 people
found this instruction helpful.
Was this instruction helpful to you?
Thank you for voting!
Previous seal had a tear and cold air was leaking around seal
Pulled the old seal out of the groove. Placed new seal in the groove. New seal has to be heated and massaged to get it into proper form so it does not leak. I have been continuously heating and massaging to get the seal to get it in the proper form. Been working on it for a week. Almost there.
Parts Used:
-
Daniel from Hampton, NH
-
Difficulty Level:A Bit Difficult
-
Total Repair Time:1- 2 hours
2 of 2 people
found this instruction helpful.
Was this instruction helpful to you?
Thank you for voting!