




















25368892014 Kenmore Refrigerator - Instructions
Keep searches simple. Use keywords, e.g. "leaking", "pump", "broken" or "fit".
Freezer compartment works but gets frost and ice buildup. Then the refrigerator compartment fails to get cold. Milk would spoil but freezer stayed frozen.
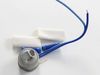
After watching numerous YouTube videos I realized that my problem was either the timer or the thermostat. I purchased both for above $70 total and decided it was worth the gamble to self- repair it instead of buying a new refrigerator for $700 plus taxes and delivery charges. The videos were right on with excellent directions for replacing these 2 products. Only has one problem… the shrink wrap that came with the thermostat is very thick and will NOT shrink with a hairdryer. I hade to run to ACE Hardware to buy a heat gun and more shrink wrap
Parts Used:
-
Tracy from SALOME, AZ
-
Difficulty Level:Really Easy
-
Total Repair Time:1- 2 hours
-
Tools:Pliers, Socket set
4 of 4 people
found this instruction helpful.
Was this instruction helpful to you?
Thank you for voting!
Freezer was not defrosting
Turned off fridge circuit breaker
Removed all food from freezer and put in cooler.
Removed shelves from freezer
Removed ice maker
Removed 2 hex head screws
Tilted back evaporator cover and tried to unplug connection.
Found connection was iced over with a huge block of ice coming from water inlet to ice maker
Spent several hours trying to melt and chip away ice without damaging fridge.
Finally was able to break up ice with long flat head screwdriver and hammer.
Unplugged connector and was able to remove evaporator cover.
Cut wires near thermostat and removed
Stripped wire as needed and crimped new thermostat in place.
Used heat gun and lighter to melt heat shrink. This took a long time and required a lot more heat than expected.
Reconnected evaporator cover connection and reattached cover.
Reinstalled ice maker
Reinstalled shelves.
Put food back in
Turned circuit breaker back on.
Removed all food from freezer and put in cooler.
Removed shelves from freezer
Removed ice maker
Removed 2 hex head screws
Tilted back evaporator cover and tried to unplug connection.
Found connection was iced over with a huge block of ice coming from water inlet to ice maker
Spent several hours trying to melt and chip away ice without damaging fridge.
Finally was able to break up ice with long flat head screwdriver and hammer.
Unplugged connector and was able to remove evaporator cover.
Cut wires near thermostat and removed
Stripped wire as needed and crimped new thermostat in place.
Used heat gun and lighter to melt heat shrink. This took a long time and required a lot more heat than expected.
Reconnected evaporator cover connection and reattached cover.
Reinstalled ice maker
Reinstalled shelves.
Put food back in
Turned circuit breaker back on.
Parts Used:
-
David from N KINGSTOWN, RI
-
Difficulty Level:A Bit Difficult
-
Total Repair Time:More than 2 hours
-
Tools:Nutdriver, Pliers, Screw drivers
4 of 4 people
found this instruction helpful.
Was this instruction helpful to you?
Thank you for voting!
Refrigerator had not been cooling
Discovered the coil was covered with 1/2 inch of ice because defrost cycle had not been working. Replacing the defrost timer and melting ice with hair dryer fixed problem. Hooray!
Parts Used:
-
William from BASKING RIDGE, NJ
-
Difficulty Level:A Bit Difficult
-
Total Repair Time:1- 2 hours
-
Tools:Nutdriver, Screw drivers
5 of 7 people
found this instruction helpful.
Was this instruction helpful to you?
Thank you for voting!
The meat drawer slide had broken and the drawer would fall down everytime you opened it.
Pulled the drawer out, lifted the shelf out of the refrigerator, unscrewed drawer slides from shelf and rescrewed the new drawer slides and returned the shelf, drawer, and the job was finished. Thank you so very much for your speedy delivery.
Parts Used:
-
kathleen from cypress, CA
-
Difficulty Level:Really Easy
-
Total Repair Time:15 - 30 mins
-
Tools:Screw drivers
4 of 5 people
found this instruction helpful.
Was this instruction helpful to you?
Thank you for voting!
We, have two children and thay pulled strech, and finally broke them.
I tied in to your web site orderd the parts the part were here in a day 1/2open cartons expecting to be broke but to my suprised they were in great shape and then fit perfectly the first time love your company.
Parts Used:
-
DESAL from TISHOMINGO, OK
-
Difficulty Level:Really Easy
-
Total Repair Time:Less than 15 mins
7 of 14 people
found this instruction helpful.
Was this instruction helpful to you?
Thank you for voting!
Gasket is stiff
Used hair dryer to warm up the gasket and it installed easily. Shelf just slid right in.
Parts Used:
-
Karen from ALTUS, OK
-
Difficulty Level:Really Easy
-
Total Repair Time:15 - 30 mins
5 of 8 people
found this instruction helpful.
Was this instruction helpful to you?
Thank you for voting!
drawer support rail was broken
Took one screw out to remove the old rail off by removing one screw placed the new one into the slot and replaced the screw and put the drawer back into the refrigerator
Parts Used:
-
Earl from Peoria, IL
-
Difficulty Level:Really Easy
-
Total Repair Time:Less than 15 mins
-
Tools:Screw drivers
4 of 5 people
found this instruction helpful.
Was this instruction helpful to you?
Thank you for voting!
Had no freezer shelf.
I had to cut a little of of the ends of the shelf to make it fit. I used an angle grinder to get the job done and the shelf fits perfectly. By the way I paid for 3-5 day shipping and got it the very next day can't ask for better service than that.
Parts Used:

-
Bettie from Toledo, OH
-
Difficulty Level:Easy
-
Total Repair Time:15 - 30 mins
5 of 8 people
found this instruction helpful.
Was this instruction helpful to you?
Thank you for voting!
Freezer came with no shelf
The shelf fit perfectly right out of the box. It was as if it was made for it. No tools needed except for the box cutter to open the shipping carton.
Parts Used:
-
Henry from South Lyon, MI
-
Difficulty Level:Really Easy
-
Total Repair Time:Less than 15 mins
4 of 5 people
found this instruction helpful.
Was this instruction helpful to you?
Thank you for voting!
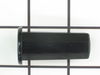
The refrigerator door did not come for the opening swing to be reversed
I ordered four bearing hinges and drill holes for the hinges on top and bottom of frezer and fridge doors insert the bearing hinges on the holes and all the other part on the door were able to reversed.
Parts Used:
-
Benjamin from Jersey City, NJ
-
Difficulty Level:Easy
-
Total Repair Time:1- 2 hours
-
Tools:Nutdriver, Screw drivers, Socket set
10 of 24 people
found this instruction helpful.
Was this instruction helpful to you?
Thank you for voting!
The door gasket was not working at all
I watched and followed the instructions on YouTube ?? very easy
Parts Used:

-
Bobbie from ARLETA, CA
-
Difficulty Level:Really Easy
-
Total Repair Time:15 - 30 mins
3 of 3 people
found this instruction helpful.
Was this instruction helpful to you?
Thank you for voting!
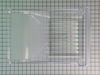
Front upper edge of crisperpan was broken
-
Richard from DAYTON, OH
-
Difficulty Level:Very Easy
-
Total Repair Time:Less than 15 mins
4 of 6 people
found this instruction helpful.
Was this instruction helpful to you?
Thank you for voting!
None
Real easy took out the broken ones and replaced with the new ones.
Parts Used:
-
Edward from DUMAS, TX
-
Difficulty Level:Really Easy
-
Total Repair Time:Less than 15 mins
4 of 6 people
found this instruction helpful.
Was this instruction helpful to you?
Thank you for voting!
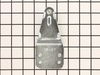
The original part was plastic/and broke
unscrewed to little bolts and installed the new/metal part we got rfom partselect.If we may say.this is a great company to buy from! Fast!
Parts Used:
-
John from Lancaster, CA
-
Difficulty Level:Really Easy
-
Total Repair Time:Less than 15 mins
-
Tools:Socket set
4 of 6 people
found this instruction helpful.
Was this instruction helpful to you?
Thank you for voting!
Bin had broken.
Replacement was a snap! Literally! OK there were two snaps. One on each side.
Parts Used:
-
Ralph from Shelby Twp, MI
-
Difficulty Level:Really Easy
-
Total Repair Time:Less than 15 mins
3 of 3 people
found this instruction helpful.
Was this instruction helpful to you?
Thank you for voting!