




















25367962801 Kenmore Refrigerator - Instructions
Keep searches simple. Use keywords, e.g. "leaking", "pump", "broken" or "fit".
Door sagging, creating a gap to let in condensation
You tube is my best friend for DIY repair. I supported the door with wood blocks, removed the bottom bracket and was able to slide the refrigerator door down and out without removing the freezer door. Replaced both hinge bearings and door stop and washer on bottom hinge and slid the door back into place. Door is very light when empty. Fast and easy, door opens and closes smoothly and no problem with condensation anymore.
Parts Used:

-
amy from SOMERVILLE, MA
-
Difficulty Level:Really Easy
-
Total Repair Time:15 - 30 mins
-
Tools:Screw drivers, Socket set
4 of 4 people
found this instruction helpful.
Was this instruction helpful to you?
Thank you for voting!
Broken Crisper Glass
Very easy. Watched a video on your site prior to getting the glass replacement. Removed the crisper drawers. Placed the glass in the front and placed it down. Took just a few minutes. Love your site and will come back again when needed. Thank-you.
Parts Used:

-
Wendy from OCALA, FL
-
Difficulty Level:Very Easy
-
Total Repair Time:Less than 15 mins
4 of 4 people
found this instruction helpful.
Was this instruction helpful to you?
Thank you for voting!
Freezer was not defrosting
Turned off fridge circuit breaker
Removed all food from freezer and put in cooler.
Removed shelves from freezer
Removed ice maker
Removed 2 hex head screws
Tilted back evaporator cover and tried to unplug connection.
Found connection was iced over with a huge block of ice coming from water inlet to ice maker
Spent several hours trying to melt and chip away ice without damaging fridge.
Finally was able to break up ice with long flat head screwdriver and hammer.
Unplugged connector and was able to remove evaporator cover.
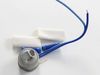
Cut wires near thermostat and removed
Stripped wire as needed and crimped new thermostat in place.
Used heat gun and lighter to melt heat shrink. This took a long time and required a lot more heat than expected.
Reconnected evaporator cover connection and reattached cover.
Reinstalled ice maker
Reinstalled shelves.
Put food back in
Turned circuit breaker back on.
Removed all food from freezer and put in cooler.
Removed shelves from freezer
Removed ice maker
Removed 2 hex head screws
Tilted back evaporator cover and tried to unplug connection.
Found connection was iced over with a huge block of ice coming from water inlet to ice maker
Spent several hours trying to melt and chip away ice without damaging fridge.
Finally was able to break up ice with long flat head screwdriver and hammer.
Unplugged connector and was able to remove evaporator cover.
Cut wires near thermostat and removed
Stripped wire as needed and crimped new thermostat in place.
Used heat gun and lighter to melt heat shrink. This took a long time and required a lot more heat than expected.
Reconnected evaporator cover connection and reattached cover.
Reinstalled ice maker
Reinstalled shelves.
Put food back in
Turned circuit breaker back on.
Parts Used:
-
David from N KINGSTOWN, RI
-
Difficulty Level:A Bit Difficult
-
Total Repair Time:More than 2 hours
-
Tools:Nutdriver, Pliers, Screw drivers
4 of 4 people
found this instruction helpful.
Was this instruction helpful to you?
Thank you for voting!
Fridge would not cool at all, because the compressor was not running. Fan running, lights working, just no cool.
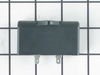
Remove the cardboard access cover at the bottom back of the fridge. On the left side, locate the run capacitor. Remove it by prying it loose from its socket, after first removing the wire hold down clamp. One wonders why the clamp is there, which makes it difficult to get the run capacitor out. Be careful not to disrupt in any way the copper refrigerant tubes. If you mess them up, you will have wasted your time and effort trying to repair the machine. I was lucky, since a failed run capacitor is the problem only about 12% of the time, based on what I’ve read. Hallelujah! It was the problem with my fridge.
Parts Used:
-
David from ABINGDON, VA
-
Difficulty Level:Easy
-
Total Repair Time:15 - 30 mins
-
Tools:Screw drivers
4 of 4 people
found this instruction helpful.
Was this instruction helpful to you?
Thank you for voting!
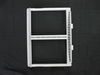
Broken crisper pan cover.
Put crisper cover in place and positioned glass cover.
Parts Used:
-
Kenneth from OCALA, FL
-
Difficulty Level:Very Easy
-
Total Repair Time:Less than 15 mins
5 of 7 people
found this instruction helpful.
Was this instruction helpful to you?
Thank you for voting!
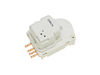
freezer defrost would melt the food
Looked up similar problems and found it to be the defrost timer. All I had to do was remove the plastic portion in the fridge section to get to the old timer. Popped the new one in and put it back together. Works great now. Would have been almost $150 to have a repair company come out and fix it.
Parts Used:
-
Joseph from West Allis, WI
-
Difficulty Level:Really Easy
-
Total Repair Time:Less than 15 mins
-
Tools:Nutdriver
4 of 5 people
found this instruction helpful.
Was this instruction helpful to you?
Thank you for voting!
Had no freezer shelf.
I had to cut a little of of the ends of the shelf to make it fit. I used an angle grinder to get the job done and the shelf fits perfectly. By the way I paid for 3-5 day shipping and got it the very next day can't ask for better service than that.
Parts Used:

-
Bettie from Toledo, OH
-
Difficulty Level:Easy
-
Total Repair Time:15 - 30 mins
5 of 8 people
found this instruction helpful.
Was this instruction helpful to you?
Thank you for voting!
Freezer came with no shelf
The shelf fit perfectly right out of the box. It was as if it was made for it. No tools needed except for the box cutter to open the shipping carton.
Parts Used:
-
Henry from South Lyon, MI
-
Difficulty Level:Really Easy
-
Total Repair Time:Less than 15 mins
4 of 5 people
found this instruction helpful.
Was this instruction helpful to you?
Thank you for voting!
Freezer too cold
Removed the housing with the light, 4 hexhead screws. This exposed the defrost timer, removed 2 hexhead screws, electrical connector and reassembled the unit.
Great resource and service, thank you.
Great resource and service, thank you.
Parts Used:
-
Curt from Maple Grove, MN
-
Difficulty Level:Really Easy
-
Total Repair Time:15 - 30 mins
-
Tools:Nutdriver
3 of 3 people
found this instruction helpful.
Was this instruction helpful to you?
Thank you for voting!
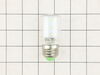
Freezer light bulb went out.
-
Callie J. from YORKTOWN, VA
-
Difficulty Level:Very Easy
-
Total Repair Time:Less than 15 mins
4 of 6 people
found this instruction helpful.
Was this instruction helpful to you?
Thank you for voting!
The door gasket was not working at all
I watched and followed the instructions on YouTube ?? very easy
Parts Used:

-
Bobbie from ARLETA, CA
-
Difficulty Level:Really Easy
-
Total Repair Time:15 - 30 mins
3 of 3 people
found this instruction helpful.
Was this instruction helpful to you?
Thank you for voting!
Freezer icing up and refrigerator section not cold
Removed four screws for cover on refrigerator temperature controls, unpluged old timer and pluged in new timer. Replaced cover and screws.
Parts Used:
-
Les from Fenton, MO
-
Difficulty Level:Really Easy
-
Total Repair Time:Less than 15 mins
-
Tools:Nutdriver
3 of 3 people
found this instruction helpful.
Was this instruction helpful to you?
Thank you for voting!
None
Real easy took out the broken ones and replaced with the new ones.
Parts Used:
-
Edward from DUMAS, TX
-
Difficulty Level:Really Easy
-
Total Repair Time:Less than 15 mins
4 of 6 people
found this instruction helpful.
Was this instruction helpful to you?
Thank you for voting!
Front upper edge of crisperpan was broken
-
Richard from DAYTON, OH
-
Difficulty Level:Very Easy
-
Total Repair Time:Less than 15 mins
4 of 6 people
found this instruction helpful.
Was this instruction helpful to you?
Thank you for voting!
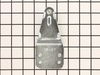
The original part was plastic/and broke
unscrewed to little bolts and installed the new/metal part we got rfom partselect.If we may say.this is a great company to buy from! Fast!
Parts Used:
-
John from Lancaster, CA
-
Difficulty Level:Really Easy
-
Total Repair Time:Less than 15 mins
-
Tools:Socket set
4 of 6 people
found this instruction helpful.
Was this instruction helpful to you?
Thank you for voting!