




















25360534408 Kenmore Refrigerator - Instructions
Keep searches simple. Use keywords, e.g. "leaking", "pump", "broken" or "fit".
Top cools bottom is weak
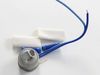
Unplug, remove 2 screws off back panel inside the freezer. Cut wires on old one and crimped in new one. Light to melt the shrink wrap that came with it. Pretty easy.
Parts Used:
-
JUSTIN from NEW BRAUNFELS, TX
-
Difficulty Level:Very Easy
-
Total Repair Time:15 - 30 mins
-
Tools:Nutdriver, Pliers
3 of 3 people
found this instruction helpful.
Was this instruction helpful to you?
Thank you for voting!
Repaired Oven Range Light Bulb
The bulb has a plastic clear cover. That cover can just be carefully removed using a screwdriver. It's held in by a metal bracket. After you remove the cover. You'll just need to replace the bulb and then re-install the cover and bracket.
Parts Used:

-
Alan from SAN MATEO, CA
-
Difficulty Level:Very Easy
-
Total Repair Time:Less than 15 mins
-
Tools:Screw drivers
3 of 3 people
found this instruction helpful.
Was this instruction helpful to you?
Thank you for voting!
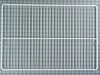
I purchased a new frigh as a back-up downstairs that came with only two shelves. Since I wanted to used it for pop and beer, two more shelves would separate them well.
1.unpack box.
2. slide out of plastic bag.
3. open refirgheratior door.
4. slide in shelves.
5. fill with stuff.
6.figure out a way to reuse packing.
2. slide out of plastic bag.
3. open refirgheratior door.
4. slide in shelves.
5. fill with stuff.
6.figure out a way to reuse packing.
Parts Used:
-
David from Sioux Falls, SD
-
Difficulty Level:Really Easy
-
Total Repair Time:Less than 15 mins
9 of 21 people
found this instruction helpful.
Was this instruction helpful to you?
Thank you for voting!
Freezer too cold
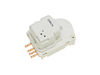
Removed the housing with the light, 4 hexhead screws. This exposed the defrost timer, removed 2 hexhead screws, electrical connector and reassembled the unit.
Great resource and service, thank you.
Great resource and service, thank you.
Parts Used:
-
Curt from Maple Grove, MN
-
Difficulty Level:Really Easy
-
Total Repair Time:15 - 30 mins
-
Tools:Nutdriver
3 of 3 people
found this instruction helpful.
Was this instruction helpful to you?
Thank you for voting!
Freezer icing up and refrigerator section not cold
Removed four screws for cover on refrigerator temperature controls, unpluged old timer and pluged in new timer. Replaced cover and screws.
Parts Used:
-
Les from Fenton, MO
-
Difficulty Level:Really Easy
-
Total Repair Time:Less than 15 mins
-
Tools:Nutdriver
3 of 3 people
found this instruction helpful.
Was this instruction helpful to you?
Thank you for voting!
Old Defrost Timer Noisy During Operation
First I removed the plastic grill (pulled out, no screws) from bottom of refrigerator, then I removed electrical plug & two screws from old timer (timer located on the front inside left lower side of refrigerator). Installed in reverse order.
Parts Used:
-
Vernon from Granada Hills, CA
-
Difficulty Level:Easy
-
Total Repair Time:15 - 30 mins
-
Tools:Socket set
3 of 3 people
found this instruction helpful.
Was this instruction helpful to you?
Thank you for voting!
Freezer frosted up, refrigerator compartment heated up
I removed the housing at the top of the refrigerator compartment that contained the reefer light and temperature adjustment knob. This required a small nut-driver. Inside, I found the old defrost control, unplugged it, unscrewed it with a Phillips screwdriver, and replaced it with the replacement part. Then I replaced the housing to its original position.
Parts Used:
-
James from Hanover, ME
-
Difficulty Level:Really Easy
-
Total Repair Time:15 - 30 mins
-
Tools:Nutdriver, Screw drivers
3 of 3 people
found this instruction helpful.
Was this instruction helpful to you?
Thank you for voting!
i smell very bad smell coming from refrigerator
I started look inside ,disconnected power, and open all possible compartments to see any burned part. Fortunately I fined a small part look like melted and then i went online and make my research .Then i ordered that part and change it.
Parts Used:
-
Arsen from Glendale, CA
-
Difficulty Level:Really Easy
-
Total Repair Time:15 - 30 mins
-
Tools:Pliers, Screw drivers
7 of 16 people
found this instruction helpful.
Was this instruction helpful to you?
Thank you for voting!
The refrigerator wasn't cold enough.
I removed the plastic shroud on the ceiling of the refigerator, unscrewed and unplugged the old defrost timer, and replaced it with the new one. I reinstalled the shroud with the new timer installed.
Parts Used:
-
John from San Diego, CA
-
Difficulty Level:Really Easy
-
Total Repair Time:Less than 15 mins
-
Tools:Screw drivers
3 of 4 people
found this instruction helpful.
Was this instruction helpful to you?
Thank you for voting!
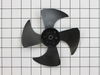
fan blade broke
-
Kevin from ST PETERSBURG, FL
-
Difficulty Level:Very Easy
-
Total Repair Time:Less than 15 mins
-
Tools:Pliers
3 of 4 people
found this instruction helpful.
Was this instruction helpful to you?
Thank you for voting!
top shelf broke; replaced it
It just snaps in place, no biggie. What was a big deal was... that I ordered the part one day at like 2pm and got it the next day by about 2pm. That was very strange!!! Never expected that sort of delivery. Very nice!
Parts Used:
-
Kristy from Woodbridge, VA
-
Difficulty Level:Really Easy
-
Total Repair Time:Less than 15 mins
3 of 4 people
found this instruction helpful.
Was this instruction helpful to you?
Thank you for voting!
Freezer froze up/ Fridge ran warm
Thawed out freezer, I recommend laying a couple old towels in freezer to soak up melted ice. Replaced old thermostat with new part. Removed 2 screws, removed back plate, unplugged 2 connectors and cut 2 wires. Crimped in new thermostat and repositioned to original part location. Reconnected plugs as I reinstalled back plate. Installed 2 screws and connected power. Works like new! Trouble shooting and part installation video is very helpful, great site!
Parts Used:
-
will from bushnell, IL
-
Difficulty Level:Very Easy
-
Total Repair Time:Less than 15 mins
-
Tools:Nutdriver
2 of 2 people
found this instruction helpful.
Was this instruction helpful to you?
Thank you for voting!
the freezer frosted up and the fridge was not getting cold.
-
Sherry from Newberry, SC
-
Difficulty Level:Easy
-
Total Repair Time:30 - 60 mins
-
Tools:Nutdriver
2 of 2 people
found this instruction helpful.
Was this instruction helpful to you?
Thank you for voting!
Fan was off kilter and began rubbing the frame which is caused it to slow down and make an disturbing audible noise.
Before buying the part, I watched your video and realized it was extremely simple to remove and replace. Item was to take 7-10 days and I received it in 4. Took longer than 15 minutes because I had to move the fridge forward, get my tools and a vacuum, get a cup of coffee and get to it. Very easy and the video was exactly step by step. It took longer to vacuum all of the dust bunnies than to replace the part.
Honestly, I was in the market to buy a new refrigerator but now I believe I'll wait several more years. Thank you for your support.
Honestly, I was in the market to buy a new refrigerator but now I believe I'll wait several more years. Thank you for your support.
Parts Used:
-
Martin from N HOLLYWOOD, CA
-
Difficulty Level:Really Easy
-
Total Repair Time:30 - 60 mins
-
Tools:Screw drivers, Socket set
2 of 2 people
found this instruction helpful.
Was this instruction helpful to you?
Thank you for voting!
Refigerator not cooling
I followed your video instructions, is very important to have this information.
Parts Used:
-
Carlos from MOSINEE, WI
-
Difficulty Level:Really Easy
-
Total Repair Time:30 - 60 mins
-
Tools:Screw drivers
2 of 2 people
found this instruction helpful.
Was this instruction helpful to you?
Thank you for voting!