




















25358672891 Kenmore Refrigerator - Instructions
Keep searches simple. Use keywords, e.g. "leaking", "pump", "broken" or "fit".
The fridge motor was running constantly and the fridge was warm inside
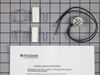
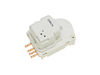
I secured the power to the fridge. I took the metal panel which covers the cooling coils in the freezer off by removing the the 6 sheet metal screws. I used a standard hair dryer to melt the ice block which had formed due to the failure of the defrost timer. I replace the defrost timer, which was located behind the left front wheel of the unit. Finding the timer was the hardest part of the job. Since I was having trouble with the defrost cycle I also decided to replace the defrost thermostat due to its age. The most important item I would like to share is once all the work is done and the panel is back in the freezer, the power is restored take a straight slot screw driver and give the defrost timer about an eighth of a turn clockwise to ensure it starts. Then mark it with a sharpe and check it in 3 or 4 hours to make sure it is running. I did not do this on the one I installed and the freezer did not go into the defrost cycle. Once I got the timer started, well the ice cream stay frozen. BE SURE NOT TO WORK ON YOUR EQUIPMENT WITH IT PLUGGED INTO POWER SOURCE!!!
Jim
Jim
Parts Used:
-
James from Brighton, TN
-
Difficulty Level:Really Easy
-
Total Repair Time:30 - 60 mins
-
Tools:Screw drivers
9 of 10 people
found this instruction helpful.
Was this instruction helpful to you?
Thank you for voting!
Condensor fan motor failed
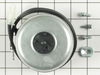
Removed the old fan--three small nuts and snap off connection. Ordered part and received the next day. Your company is great!!
Parts Used:
-
Guy from Califon, NJ
-
Difficulty Level:Easy
-
Total Repair Time:15 - 30 mins
-
Tools:Nutdriver
11 of 16 people
found this instruction helpful.
Was this instruction helpful to you?
Thank you for voting!
Replacing Icemaker
Pull refrigerator from wall and disconnect the water line and unplug the power.
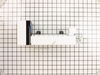
On top of the icemaker, two machine screws hold the icemaker to the side of the refrigerator. You will have to feel around to find the machine screws, but once you do, it is simple to slip the appropriate size socket over the hex heads. I found it helpful to have an extension on the socket wrench. Disconnect the power cable inside the refrigerator (there are little pressure clips on the side that help release the cable) and move it out of the way for the time-being.
Back out both machine screws several turns, but do not remove them completely. The icemaker slips over the screws, so leaving them in the side of the refrigerator makes that process a lot easier. Hand tighten the machine screws once you have positioned the new icemaker in place. One thing to be sure and do is make sure the water line hose coming out of the back of the refrigerator inside is on top of the icemaker. It fits into a slot in the top of the icemaker - failing to do this will result in water pouring into the freezer compartment, not into the icemaker..
Reconnect the power cable to the new icemaker and tuck it up behind the icemaker assembly. Tighten the machine screws completely, but do not over-tighten.
Reconnect the water line on the back of the refrigerator at the wall, and plug in the refrigerator. You should hear the unit fill immediately.
In about an hour you should have ice filling the bin. Enjoy!
On top of the icemaker, two machine screws hold the icemaker to the side of the refrigerator. You will have to feel around to find the machine screws, but once you do, it is simple to slip the appropriate size socket over the hex heads. I found it helpful to have an extension on the socket wrench. Disconnect the power cable inside the refrigerator (there are little pressure clips on the side that help release the cable) and move it out of the way for the time-being.
Back out both machine screws several turns, but do not remove them completely. The icemaker slips over the screws, so leaving them in the side of the refrigerator makes that process a lot easier. Hand tighten the machine screws once you have positioned the new icemaker in place. One thing to be sure and do is make sure the water line hose coming out of the back of the refrigerator inside is on top of the icemaker. It fits into a slot in the top of the icemaker - failing to do this will result in water pouring into the freezer compartment, not into the icemaker..
Reconnect the power cable to the new icemaker and tuck it up behind the icemaker assembly. Tighten the machine screws completely, but do not over-tighten.
Reconnect the water line on the back of the refrigerator at the wall, and plug in the refrigerator. You should hear the unit fill immediately.
In about an hour you should have ice filling the bin. Enjoy!
Parts Used:
-
Richard Allen from PHOENIX, AZ
-
Difficulty Level:Really Easy
-
Total Repair Time:30 - 60 mins
-
Tools:Socket set
8 of 8 people
found this instruction helpful.
Was this instruction helpful to you?
Thank you for voting!
Ice maker failed
Watched YouTube video. Very easy. Used my cell phone camera in ‘selfie’ mode propped up in the upper right hand corner of freezer to see the 2 hidden screws.
Parts Used:
-
Mary from SOUTH LYON, MI
-
Difficulty Level:Easy
-
Total Repair Time:Less than 15 mins
-
Tools:Nutdriver, Screw drivers
9 of 11 people
found this instruction helpful.
Was this instruction helpful to you?
Thank you for voting!
Had no ice water. Replaced door gasket. Broken Drawer
First I turned off the water feed and remove the plug from receptacle and wires from valve. Replaced water valve and reconnected wires to valve.
Replaced inside drawer.
Remove screwes under door gasket, replaced door gasket. No need to buy a new refrigerator right now.
Your parts manuals made it easy to find parts.
Replaced inside drawer.
Remove screwes under door gasket, replaced door gasket. No need to buy a new refrigerator right now.
Your parts manuals made it easy to find parts.
Parts Used:

-
Mary from Royersford, PA
-
Difficulty Level:Really Easy
-
Total Repair Time:1- 2 hours
-
Tools:Pliers, Screw drivers, Wrench (Adjustable), Wrench set
9 of 12 people
found this instruction helpful.
Was this instruction helpful to you?
Thank you for voting!
The drum ice maker broke in half so it couldn't dependent the ice.
I had removed the housing that the drum was in and taken the screws out to get to the broken drum. I removed it there was a set of 6 blades that crushed the ice that had to go back on the same order when I removed these I put them on a piece of wire in the order they came off (so I would get them back I the correct order). Then I reversed the order and reassembled it in the opposite direction . It was fairly easy to do. I'm a 68 year old disabled woman so if I could do it I'm sure you could to. Good luck. It cost me $14.00 if I had bought the whole assembly it would have been $150.00. So it was well worth my time and effort.
Parts Used:
-
ROWENA from WIGGINS, MS
-
Difficulty Level:Really Easy
-
Total Repair Time:30 - 60 mins
-
Tools:Screw drivers, Socket set
8 of 9 people
found this instruction helpful.
Was this instruction helpful to you?
Thank you for voting!
Ice Would Not Dispence
Took the ice storage bin out. Took the unit apart,and disamble the augar unit. Ordered parts from manufacture, which arrived in two days. As soon as I got the parts, I reassambled it. Work perfect. Good job!
Parts Used:
-
Jerry Baten from Pampa, TX
-
Difficulty Level:Really Easy
-
Total Repair Time:15 - 30 mins
-
Tools:Nutdriver, Pliers, Screw drivers, Wrench (Adjustable)
17 of 36 people
found this instruction helpful.
Was this instruction helpful to you?
Thank you for voting!
freezer and refrigerator too warm
I put the refrigerator and saw that the fan wasn't working so I change the fan and the problem still the same. I order a timer and thermostat and change them, nothing change so I order the capacitor and when I remove it I saw that the relay swith was burn out so I order a switch and evarything is ok.
The problem when the fan broke the compressor overheat and burn the swich.
I learn a lot and still saving money over these repair guy.
Thanks
The problem when the fan broke the compressor overheat and burn the swich.
I learn a lot and still saving money over these repair guy.
Thanks
Parts Used:
-
Joel from Sunny Isles Beach, FL
-
Difficulty Level:A Bit Difficult
-
Total Repair Time:15 - 30 mins
-
Tools:Nutdriver, Pliers
9 of 13 people
found this instruction helpful.
Was this instruction helpful to you?
Thank you for voting!
Bottom drawer broken from too many beer cans.
Unloaded the drawer, pulled it out, took off the front panel, put the panel in the new drawer, reloaded the drawer, and put it back into the fridge.
I had the new drawer back in the fridge before the wife even knew I had taken it out of the box. I have been banished from storing my beer in the bottom drawer sincs I broke the old one. This should be the last drawer repair that I have to make.
I had the new drawer back in the fridge before the wife even knew I had taken it out of the box. I have been banished from storing my beer in the bottom drawer sincs I broke the old one. This should be the last drawer repair that I have to make.
Parts Used:
-
Vince from New Palestine, IN
-
Difficulty Level:Really Easy
-
Total Repair Time:Less than 15 mins
7 of 7 people
found this instruction helpful.
Was this instruction helpful to you?
Thank you for voting!
upper storage drawer broke at the edges on the rail slide
Pulled the upper drawer out, slid the faceplate/handle up and out of the channel in the drawer. Took the new drawer and slid the faceplate/handle down into the channels and it was done.
Parts Used:
-
Raymond from Anton, TX
-
Difficulty Level:Really Easy
-
Total Repair Time:Less than 15 mins
7 of 7 people
found this instruction helpful.
Was this instruction helpful to you?
Thank you for voting!
ice maker quit making ice
I basically followed the instructions offered when i searched for the ice maker. It was relatively easy to do, I undid the 2 screws holding the ice maker to the side of the freezer, the was the tricky part, holding a mirror so i could see the slots of the screws. loosened them, disconnected the electrical connection and reversed the process for the install. It took about 25 minutes and i was back making ice.
Parts Used:
-
Barry from Middletown, DE
-
Difficulty Level:Easy
-
Total Repair Time:15 - 30 mins
-
Tools:Screw drivers
8 of 10 people
found this instruction helpful.
Was this instruction helpful to you?
Thank you for voting!
Oven light bulb went dark; it needed replacing

-
Lise from CEDAR GROVE, NJ
-
Difficulty Level:Very Easy
-
Total Repair Time:Less than 15 mins
10 of 17 people
found this instruction helpful.
Was this instruction helpful to you?
Thank you for voting!
Icemaker not pushing out ice
Consult the exploded view of the Ice Container on this site. A likely cause the end plate (17) is worn. This plate connects the rotating corkscrew to the final plastic worm that pushes the ice into the crusher and thence to your waiting glass. The worm alone will not do the trick. To replace this plate, you need to take out all of the screws you can see, including the one that holds the spring for the crusher select bar.. First, the front cover, then the plate, and finally, locking ring from the worm and the black housing for the crusher. Now you can remove the whole worm assembly. Using a cloth or rubber insulator to protect it, unscrew the end screw and slide off the crusher teeth. Store on the table as a unit to facilitate re-assembly. Slide off the old bar and worm, put them back, and re-assemble. Takes a little dexterity to get the crusher select bar back, but not hard. Easy job.
Parts Used:
-
Andrew from SALEM, MA
-
Difficulty Level:Really Easy
-
Total Repair Time:30 - 60 mins
-
Tools:Nutdriver, Pliers, Screw drivers
7 of 8 people
found this instruction helpful.
Was this instruction helpful to you?
Thank you for voting!
change water filter
-
Charles from Mt. Holly, NJ
-
Difficulty Level:Easy
-
Total Repair Time:Less than 15 mins
-
Tools:Pliers
9 of 14 people
found this instruction helpful.
Was this instruction helpful to you?
Thank you for voting!
my old ice maker leaked at the bottom
it was really easy changing the ice maker. the only trouble i had was the wiring. it was very stiff and hard to route. it did not work at first but that was my fault did not have the connector plugged in all the way.since then it works great.
Parts Used:
-
harry from terre haute, IN
-
Difficulty Level:Really Easy
-
Total Repair Time:Less than 15 mins
-
Tools:Nutdriver
7 of 9 people
found this instruction helpful.
Was this instruction helpful to you?
Thank you for voting!