




















25331840106 Kenmore Refrigerator - Instructions
Keep searches simple. Use keywords, e.g. "leaking", "pump", "broken" or "fit".
Freezer compartment warm / Ice cream soft
I worked for GM as a Frigidaire Tech, before starting my own business. I have retired now.
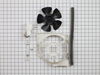
I took the three screws off the back of the bracket holding the motor. Disconected wire harness and pulled out the motor. Reverse to install. servantoftheking@hughes.net
I took the three screws off the back of the bracket holding the motor. Disconected wire harness and pulled out the motor. Reverse to install. servantoftheking@hughes.net
Parts Used:
-
George from McBee, SC
-
Difficulty Level:Really Easy
-
Total Repair Time:15 - 30 mins
-
Tools:Nutdriver, Socket set
9 of 15 people
found this instruction helpful.
Was this instruction helpful to you?
Thank you for voting!
Plastic support rail broke
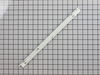
removed the top shelve. Unscrewed the broken support rail and replaced it with the new one.Put the shelve back and I was done
Parts Used:
-
Joanne from BOURG, LA
-
Difficulty Level:Very Easy
-
Total Repair Time:Less than 15 mins
-
Tools:Screw drivers
6 of 6 people
found this instruction helpful.
Was this instruction helpful to you?
Thank you for voting!
Evaporator fan motor quit and would not circulate cold air from coils.
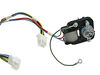
Remove shelves and rear panels to get to motor. Motor is held in place on shroud by simple strap. Remove fan blade, then un hook strap, remove and save rubber spacers on old motor to reuse to remount new motor. New motor Mew motor has wiring harness that is universal. Cut out the three wires that go to the new motor leaving long as possible, cut wires from old motor as long as possible, strip ends of all wires 1/2 inch, connect wires by color,slip into provided wire connectors and crimp. Pull on wires to insure connection. Tie wires together so they don't touch the coils. Plug in and check operation. If all is working unplug and replace all covers and shelves. Plug back in and it will take few hours to reach operating temperature. Video of side by side repair shows easy removal of panels and motor.
Parts Used:
-
Denver from BLAIRSVILLE, GA
-
Difficulty Level:Really Easy
-
Total Repair Time:30 - 60 mins
-
Tools:Nutdriver
6 of 7 people
found this instruction helpful.
Was this instruction helpful to you?
Thank you for voting!
Refrigerator Light bulb went out
I replaced the bulb using my hands to twist the bulb in the socket located at the top of the refrigerator.
Parts Used:

-
ANGELA from MEBANE, NC
-
Difficulty Level:Very Easy
-
Total Repair Time:Less than 15 mins
7 of 10 people
found this instruction helpful.
Was this instruction helpful to you?
Thank you for voting!
gasket tearing
grab gasket on a corner and pull...new gasket push raised rib into grove....your Done!!!
Parts Used:

-
Paul from AGAWAM, MA
-
Difficulty Level:Very Easy
-
Total Repair Time:Less than 15 mins
5 of 5 people
found this instruction helpful.
Was this instruction helpful to you?
Thank you for voting!
Broken drawer (original)
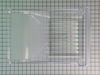
The repair was a simple replacement. The problem was that after waiting three weeks for the new drawer to arrive I had to call the company and ask what the delay was?? They said the first order was lost in the mail?? Second order arrived within a week. But we didn't enjoy having to wait this long.
Parts Used:
-
Jim from EUREKA, CA
-
Difficulty Level:Really Easy
-
Total Repair Time:Less than 15 mins
5 of 5 people
found this instruction helpful.
Was this instruction helpful to you?
Thank you for voting!
Job was really easy. Took less than 10 minutes
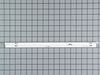
I easily removed the shelf, cleaned it, removed one screw, adjusted a tab that was bent, then installed new side rail with the screw that was removed and put back the shelf and storage bin. Everything worked perfectly. I must have saved $100 by doing it myself.
Parts Used:
-
Neil from Sayreville, NJ
-
Difficulty Level:Really Easy
-
Total Repair Time:Less than 15 mins
-
Tools:Screw drivers
5 of 5 people
found this instruction helpful.
Was this instruction helpful to you?
Thank you for voting!
very nioce rental unit, people slammed door w/Crisprers open
No big deal. Placed the order, got the replacement. Put them in and that was that! The great thing is, I have a perfect refrigerator for new renters. It would have been a lost rent without these easy to get parts. Thank you.
Parts Used:
-
Robert from Edenton, NC
-
Difficulty Level:Really Easy
-
Total Repair Time:Less than 15 mins
7 of 11 people
found this instruction helpful.
Was this instruction helpful to you?
Thank you for voting!
Freezer wouln't start
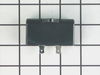
First I removed the clamp, pulled out the part, and diconnected the two wires on the side and a small screw. Reconnected the new part with the small screw, connected the wires and plugged the part back to the side of the motor. Whaa La, Done.
Parts Used:
-
Ivette from Grand Island, NY
-
Difficulty Level:Really Easy
-
Total Repair Time:Less than 15 mins
-
Tools:Screw drivers
7 of 11 people
found this instruction helpful.
Was this instruction helpful to you?
Thank you for voting!
Fridge made a hellacious noise and wasn't cooling well
From discussions with friends, I determined the problem might be easy to fix. The fridge made a lot of noise, but the compressor DID come on, and inside the freezer was cold, but the main fridge was warming.
After unplugging the fridge, I removed the fan assembly in the freezer (there were about 4 nuts and a couple of plugs to uncouple.
I could see right away the fan blades has broken off, but the motor looked good. The new new fan pushed easily onto the shift and fit perfectly in the housing.
I reinstalled the fan assembly, plugged in the fridge, and right away heard the new fan come on - very quietly. What was a roar became a whisper and the fridge was down to 38 degrees with a few hours.
After unplugging the fridge, I removed the fan assembly in the freezer (there were about 4 nuts and a couple of plugs to uncouple.
I could see right away the fan blades has broken off, but the motor looked good. The new new fan pushed easily onto the shift and fit perfectly in the housing.
I reinstalled the fan assembly, plugged in the fridge, and right away heard the new fan come on - very quietly. What was a roar became a whisper and the fridge was down to 38 degrees with a few hours.
Parts Used:

-
Bruce from MARTINEZ, CA
-
Difficulty Level:Really Easy
-
Total Repair Time:Less than 15 mins
-
Tools:Nutdriver
5 of 5 people
found this instruction helpful.
Was this instruction helpful to you?
Thank you for voting!
Shelf Retainer Bar
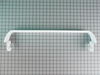
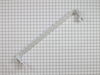
The retainer bar was so easy I installed it in less than 5 minutes.
I highly recommend Part Select service including, ordering, their knowledge and expertise of their products.
I highly recommend Part Select service including, ordering, their knowledge and expertise of their products.
Parts Used:
-
Doreen from NEWPORT, OR
-
Difficulty Level:Very Easy
-
Total Repair Time:30 - 60 mins
6 of 9 people
found this instruction helpful.
Was this instruction helpful to you?
Thank you for voting!
The retainer bar broke
Opened the box, took part to refridgerator and inserted retainer bar in place.
Parts Used:
-
Ann from West Valley City, UT
-
Difficulty Level:Really Easy
-
Total Repair Time:Less than 15 mins
8 of 15 people
found this instruction helpful.
Was this instruction helpful to you?
Thank you for voting!
inside door rack was missing
-
Manuel from El Mirage, AZ
-
Difficulty Level:Really Easy
-
Total Repair Time:Less than 15 mins
7 of 12 people
found this instruction helpful.
Was this instruction helpful to you?
Thank you for voting!
Left side rail support snapped off the lunchmeat drawer
Used a small screwdriver to disconnect the left side rail from and replaced with the new left side rail. Everything went smooth and from start to finish, replaced the piece in about 3 minutes. Works great now!
Parts Used:
-
Mary Lou from Scranton, PA
-
Difficulty Level:Really Easy
-
Total Repair Time:Less than 15 mins
-
Tools:Screw drivers
5 of 6 people
found this instruction helpful.
Was this instruction helpful to you?
Thank you for voting!
Left Support Rail broke
Most of my time was spent removing food items from the shelf that supported the rails. Once that was done, a quick removal of the screw, replace the left support rail and re-installing the screw. Done. I wish all of my repairs were so easy!
Parts Used:
-
Frank from Chicago, IL
-
Difficulty Level:Really Easy
-
Total Repair Time:Less than 15 mins
-
Tools:Screw drivers
4 of 4 people
found this instruction helpful.
Was this instruction helpful to you?
Thank you for voting!