




















2533180210B Kenmore Refrigerator - Instructions
Keep searches simple. Use keywords, e.g. "leaking", "pump", "broken" or "fit".
My gasket was worn out and torn.
The repair was much more simple to install than I would have imagined. I watched the video provided on your website. What a simple solution to a nagging problem. My fridge looks great again.
Parts Used:

-
Sharon from FREDONIA, KY
-
Difficulty Level:Very Easy
-
Total Repair Time:Less than 15 mins
1 person
found this instruction helpful.
Was this instruction helpful to you?
Thank you for voting!
GASKET OLD LEEKING OUT COLD AIR FROM FRIDGE FOOD WARM
SO SIMPLE I JUST FOLLOWED THE VIDEO THE PARTS SELECT PROVIDED ON THERE WEB SITE AND WALA DONE IN 5minutes Wow THAT EAZY NO TOOLS NESSECCARY JUST A SCREWDRIVER
Parts Used:
-
Ricky from BUENA PARK, CA
-
Difficulty Level:Very Easy
-
Total Repair Time:Less than 15 mins
1 person
found this instruction helpful.
Was this instruction helpful to you?
Thank you for voting!
Inconsistent freezer temp and freezer defrost issues
Used the symptoms list, ordered the corresponding parts and watched the videos. Great company! I'll be sharing this site.
Parts Used:
-
RUSSELL from MALDEN, IL
-
Difficulty Level:Very Easy
-
Total Repair Time:1- 2 hours
-
Tools:Nutdriver, Screw drivers
1 person
found this instruction helpful.
Was this instruction helpful to you?
Thank you for voting!
Refrigerator did not cycle
Installation was fairly straight forward. The major complaint is that the problem returned 2 weeks later. I don’t know if I care to re-invest in another switch.
Now what?
Now what?
Parts Used:
-
JACOB from YOUNGSTOWN, OH
-
Difficulty Level:Really Easy
-
Total Repair Time:30 - 60 mins
1 person
found this instruction helpful.
Was this instruction helpful to you?
Thank you for voting!
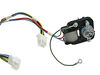
Freezer worked, no fridge
Removed panel over the motor in the freezer department. Removed screws holding the motor in, unplug wires. Reversed process to install motor.
Parts Used:
-
Adam from BERKSHIRE, NY
-
Difficulty Level:Very Easy
-
Total Repair Time:30 - 60 mins
-
Tools:Nutdriver, Pliers
1 person
found this instruction helpful.
Was this instruction helpful to you?
Thank you for voting!
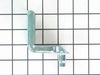
refer door hinges were lost during the move in to our first home.
The center door hinge was still attached to the refridgerator so I only had to install the bottom and top hinges. I also moved the door handles to the other side so the doors open the "right" way. The hinges were just 2 bolts and 3 screws. Now, just if the repair man from our home warrentee company would show up to fix the refridgerator. It's blowing hot air!!!
Parts Used:
-
edith from woodbridge, VA
-
Difficulty Level:Easy
-
Total Repair Time:15 - 30 mins
-
Tools:Nutdriver, Screw drivers
8 of 22 people
found this instruction helpful.
Was this instruction helpful to you?
Thank you for voting!
Fan motor in the freezer was not working. The freezer was still cool enough to keep the food froozen, but the refrigerator was not keeping the food cool and the liquids were getting warmer than normal.
Very easy process. Watch the YouTube video, it goes step by step for the repair. The part was $33, shipping was $6. Take your time and fix it yourself or pay $500 for a new refrigerator.
Parts Used:
-
Eric from SOUTH HAVEN, MN
-
Difficulty Level:Very Easy
-
Total Repair Time:30 - 60 mins
-
Tools:Nutdriver
1 person
found this instruction helpful.
Was this instruction helpful to you?
Thank you for voting!
Fridge was't cool
I just followed the instructions on the videos.
Parts Used:
-
Aaron from ODESSA, TX
-
Difficulty Level:Really Easy
-
Total Repair Time:30 - 60 mins
-
Tools:Nutdriver, Screw drivers
1 person
found this instruction helpful.
Was this instruction helpful to you?
Thank you for voting!
Old gasket was torn and falling out
I removed the old gasket and cleaned the area. Then I started at the bottom and pressed the new gasket into the door. You must use firm pressure and go all around. It does get tricky hear the end as it seems like there is excess, but it will fit. Just keep using firm pressure.
Parts Used:
-
Cristina from MARLBOROUGH, MA
-
Difficulty Level:Really Easy
-
Total Repair Time:15 - 30 mins
1 person
found this instruction helpful.
Was this instruction helpful to you?
Thank you for voting!
Intermittent loud noise coming from fan motor located in freezer compartment
Ordered a new evaporator fan motor and watched the repair video supplied by part select on their web site.It was spot on step by step instructions
Parts Used:
-
Donald from Okeechobee, FL
-
Difficulty Level:Very Easy
-
Total Repair Time:15 - 30 mins
-
Tools:Nutdriver
1 person
found this instruction helpful.
Was this instruction helpful to you?
Thank you for voting!
Evap fan motor comes on and off will not stay running
pulled back panel to get at evap fan motor cut wires to remove reinstalled hooked up wires
Parts Used:
-
john from NEWHALL, CA
-
Difficulty Level:Easy
-
Total Repair Time:30 - 60 mins
-
Tools:Nutdriver, Pliers
1 person
found this instruction helpful.
Was this instruction helpful to you?
Thank you for voting!
Noise from fan
I watch the video on your site and this make iit very easy to do. That repair that tooks me 40 minutes.
Parts Used:
-
Reginald from WEST PALM BCH, FL
-
Difficulty Level:Really Easy
-
Total Repair Time:30 - 60 mins
-
Tools:Socket set
1 person
found this instruction helpful.
Was this instruction helpful to you?
Thank you for voting!
Fridge quit working.
A little research told me the hum plus no cooling was either the compressor or the relay. I ordered the new relay and put it in but it didn't fix the problem. I ended up having to buy a new fridge, but it was worth the $30 gamble to see if I could fix it on the cheap and it saved me the money a service call would've cost. Pretty easy installation, just in a tight space on my model.
Parts Used:
-
Bill from Bay City, MI
-
Difficulty Level:Easy
-
Total Repair Time:15 - 30 mins
-
Tools:Nutdriver, Screw drivers, Wrench set
1 person
found this instruction helpful.
Was this instruction helpful to you?
Thank you for voting!
Freezer worked, refrigerator didn't. Ice build up on coils.
Unplugged refrigerator. Emptied freezer and removed ice maker and cover, need to unplug fan. Defrosted coils with hot water. Cut wires to thermostat as close to it ad possible to leave extra wire in case of an error. Stripped wire in new thermostat and put in shrink plastic then the wire crimp connector joining both light blue wires making sure wires were in before crimping them. Repeated with other dark blue wire. After used the heat gun to shrink the protective white tubing. The only thing i found not satisfying was tge tubing. It was too wide and too small. When i shrunk it did not cover the whole connector and was loose. I had to use a glue gun to cover both ends of each wire connector. Hope this helps other users.
Parts Used:
-
Salvador from SANTA ANA, CA
-
Difficulty Level:Very Easy
-
Total Repair Time:15 - 30 mins
-
Tools:Nutdriver, Pliers
1 person
found this instruction helpful.
Was this instruction helpful to you?
Thank you for voting!
Refrigerator wasn't getting cold
removed the back panel of the freezer and unplugged the connector for the Motor. Removed the air diffuser, then removed the fan blade. Removed the 2 screws holding the motor to the bracket. Disconnected the old wire harness and installed the new one. Put the fan blade onto the new motor and installed the motor onto the bracket. Put the air diffuser back on, plugged the motor back in and fastened the back panel. Plugged the refrigerator into the outlet and tested, OK!
Parts Used:
-
Brad from STOCKTON, CA
-
Difficulty Level:Very Easy
-
Total Repair Time:15 - 30 mins
-
Tools:Nutdriver
1 person
found this instruction helpful.
Was this instruction helpful to you?
Thank you for voting!