




















25331679102 Kenmore Refrigerator - Instructions
Keep searches simple. Use keywords, e.g. "leaking", "pump", "broken" or "fit".
Shelf retainer bar had broken
Put the pieces that came together, and crimped the retainers with padded pliers. Installed in to the door snap clip retainers 3 minutes start to finish.
The REALLY impressive part was that I did the standard FedEx shipping which was supposed to be 5-7 days. I received the parts 28 HOURS after I placed the order. This was way above and beyond the term "good" Customer Service. The service was OUTSTANDING. So much so that I got to place a call I seldom get to make back to PartSelect to thank them for the outstanding service. I give them 5 stars and will use them again as well as referring my neighbors and friends to this business.
The REALLY impressive part was that I did the standard FedEx shipping which was supposed to be 5-7 days. I received the parts 28 HOURS after I placed the order. This was way above and beyond the term "good" Customer Service. The service was OUTSTANDING. So much so that I got to place a call I seldom get to make back to PartSelect to thank them for the outstanding service. I give them 5 stars and will use them again as well as referring my neighbors and friends to this business.
Parts Used:

-
Jeffery from Canoga Park, CA
-
Difficulty Level:Really Easy
-
Total Repair Time:Less than 15 mins
-
Tools:Pliers
3 of 5 people
found this instruction helpful.
Was this instruction helpful to you?
Thank you for voting!
Light Switch too loose so no longer triggered by the door.
Googled it on Youtube - unplugged the fridge, used a paint scraper to loosen the old light switch, unplugged it from the electrical source, connected the new switch, replaced the whole unit into the proper location and pushed it firmly into place.
Parts Used:

-
Linda from BOZEMAN, MT
-
Difficulty Level:Very Easy
-
Total Repair Time:Less than 15 mins
2 of 2 people
found this instruction helpful.
Was this instruction helpful to you?
Thank you for voting!
Light Switch not working properly
After unplugging the fridge, I took a small flat headed screwdriver and carefully pried off the light switch from the inside, right side of the refrigerator. I disconnected the 2 wires from the switch and replaced it with the new switch and pushed it back into the frame of the fridge. Done !! Very very easy !! Thank you
Parts Used:
-
William from ORMOND BEACH, FL
-
Difficulty Level:Very Easy
-
Total Repair Time:Less than 15 mins
-
Tools:Screw drivers
2 of 2 people
found this instruction helpful.
Was this instruction helpful to you?
Thank you for voting!
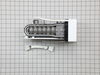
Ice maker stopped working
First I determined the icemaker was the problem when it was no longer calling for water. You can hear that "whistle" for 6-7 seconds when it calls for water. Anyway, replacement was a piece of cake, but did not entirely fix my problem. I also had to flush the lines to the soloniods that allow water to flow through the filter and into the water storage tank because it was cloggged with a little piece of plastic.
Parts Used:
-
Joseph from Seal Beach, CA
-
Difficulty Level:Really Easy
-
Total Repair Time:15 - 30 mins
-
Tools:Screw drivers
2 of 2 people
found this instruction helpful.
Was this instruction helpful to you?
Thank you for voting!
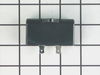
Freeze would not re-start after temp rose above 23 degrees.
Unplugged the freezer. Located the Run Capacitor (next to the compressor). Removed the wire holding bracket, removed the Run Capacitor from the Start Relay. Installed the NEW Capacitor, re-installed the holding bracket. Plugged the unit in, looking at the display for the proper start-up sequence data. All is good - freezer operating for another 10+ yrs. NOTE: When removing the Run Capacitor, beware the COMPRESSOR could be HOT to the touch.
Parts Used:
-
Andy from GOOSE CREEK, SC
-
Difficulty Level:Really Easy
-
Total Repair Time:15 - 30 mins
-
Tools:Screw drivers
2 of 2 people
found this instruction helpful.
Was this instruction helpful to you?
Thank you for voting!
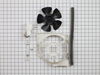
Condenser motor burned out
I followed the instructions on your website, made it a simple as possible. Very tight work area sometimes fingers only, but a little patience works.
Saved at least $300. By not paying a repair person.
Saved at least $300. By not paying a repair person.
Parts Used:
-
Bill from STERLING, VA
-
Difficulty Level:Easy
-
Total Repair Time:30 - 60 mins
-
Tools:Nutdriver, Socket set
2 of 2 people
found this instruction helpful.
Was this instruction helpful to you?
Thank you for voting!
Ice Maker Stopped Making Ice
Removed power , unplugged wires and 2 screws then reversed the process 1 hour later first batch of cubes dropped into bin
Parts Used:
-
PERRY from LOWER BURRELL, PA
-
Difficulty Level:Easy
-
Total Repair Time:Less than 15 mins
-
Tools:Nutdriver
3 of 5 people
found this instruction helpful.
Was this instruction helpful to you?
Thank you for voting!
Lost the temperature control know
The knob came in the plastic package. It was the correct part. I opened the package and placed the knob on the prongs. Now it works fine.
Thanks
John S.
Thanks
John S.
Parts Used:
-
John from Pilesgrove, NJ
-
Difficulty Level:Really Easy
-
Total Repair Time:Less than 15 mins
3 of 5 people
found this instruction helpful.
Was this instruction helpful to you?
Thank you for voting!
Broken supports on door shelves needed replacement
This is super easy. You just pop the old supports off vertically, pull the bar off of the broken one(s), replace them with the new one(s), then pop the whole thing back onto the door of the fridge by pushing down on both sides.
Parts Used:
-
Ari from ITHACA, NY
-
Difficulty Level:Very Easy
-
Total Repair Time:Less than 15 mins
2 of 2 people
found this instruction helpful.
Was this instruction helpful to you?
Thank you for voting!
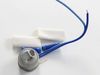
Freezer froze up/ Fridge ran warm
Thawed out freezer, I recommend laying a couple old towels in freezer to soak up melted ice. Replaced old thermostat with new part. Removed 2 screws, removed back plate, unplugged 2 connectors and cut 2 wires. Crimped in new thermostat and repositioned to original part location. Reconnected plugs as I reinstalled back plate. Installed 2 screws and connected power. Works like new! Trouble shooting and part installation video is very helpful, great site!
Parts Used:
-
will from bushnell, IL
-
Difficulty Level:Very Easy
-
Total Repair Time:Less than 15 mins
-
Tools:Nutdriver
2 of 2 people
found this instruction helpful.
Was this instruction helpful to you?
Thank you for voting!
The shelf broke
-
Mary Jane from GREENVILLE, SC
-
Difficulty Level:Very Easy
-
Total Repair Time:Less than 15 mins
2 of 2 people
found this instruction helpful.
Was this instruction helpful to you?
Thank you for voting!
A support for the end of the door rack was broken.
I attempted unsuccessfully to glue this piece several times. Then my wife got the idea for me to search for a replacement on line. It took me less than 5 minutes to reassemble the door rack and reinstall in in our refrigerator. no tools were required. The part fit like the factory original. I wish all repair jobs were this straight forward and simple to do. Having the correct part makes it more than easy. We were both more than pleased with the price and the delivery time.
Thanks Part Select!
Thanks Part Select!
Parts Used:
-
John from Cambridge, MN
-
Difficulty Level:Really Easy
-
Total Repair Time:Less than 15 mins
2 of 2 people
found this instruction helpful.
Was this instruction helpful to you?
Thank you for voting!
the freezer frosted up and the fridge was not getting cold.
-
Sherry from Newberry, SC
-
Difficulty Level:Easy
-
Total Repair Time:30 - 60 mins
-
Tools:Nutdriver
2 of 2 people
found this instruction helpful.
Was this instruction helpful to you?
Thank you for voting!
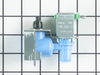
Water inlet valve stuck open
Turned off water to inlet valve. Unbolted valve from back of unit, disconnect water supply line from valve, disconnected water line to ice maker. Put on new compression ring around water supply line. Pressed ice maker line into new valve, installed valve back on unit, then connected main supply line to valve. Works like a charm.
Parts Used:
-
Robert from GUNTERSVILLE, AL
-
Difficulty Level:Really Easy
-
Total Repair Time:15 - 30 mins
-
Tools:Wrench (Adjustable)
2 of 2 people
found this instruction helpful.
Was this instruction helpful to you?
Thank you for voting!
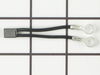
Blown thermal fuse for Ice Maker
After disassembling, the thermal fuse I ordered were not and exact fit, I had to cut off the ring terminals, strip the insulation back and splice it in.
It works.
It works.
Parts Used:
-
Derekandkelsey from WINCHESTER, VA
-
Difficulty Level:A Bit Difficult
-
Total Repair Time:1- 2 hours
-
Tools:Nutdriver, Pliers, Screw drivers, Socket set, Wrench set
3 of 5 people
found this instruction helpful.
Was this instruction helpful to you?
Thank you for voting!