




















25331670107 Kenmore Refrigerator - Instructions
Keep searches simple. Use keywords, e.g. "leaking", "pump", "broken" or "fit".
ice maker quit working/and it was leaking
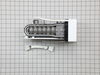
BOUGHT NEW ICEMAKER TOOK TWO SCREWS OUT, UNPLUGGED THE ELECTRICAL CONNECTION. REMOVED OLD ICEMAKER, PUT TWO SCREWS BACK INTO REFRIGERATOR(DON'T SCREW ALL THE WAY IN AS THE NEW ICE MAKER WILL FIT ON. HOOK ELECTRICAL CONNECTION AND ADAPTER (THAT COMES WITH IT). PUT THE DRAIN TUBE IN ITS SPOT, HOOK ICE MAKER ONTO THE TWO SCREWS TIGHTEN EM DOWN. I DID THIS RIGHT BEFORE I WENT TO A BIRTHDAY DINNER WITH MY HUSBAND, WAS ALREADY DRESSED AND READY TO GO AND I TOLD HIM ILL PUT IT IN SO WE CAN HAVE ICE WHEN WE RETURN. ENDED UP BEING A SURPRISE PARTY FOR ME AND WHEN WE RETURNED WE HAD ICE. IT WAS SO EASY EVEN A GIRL CAN DO IT!!
Parts Used:
-
KATHY from MURFREESBORO, TN
-
Difficulty Level:Very Easy
-
Total Repair Time:15 - 30 mins
-
Tools:Nutdriver
2 of 2 people
found this instruction helpful.
Was this instruction helpful to you?
Thank you for voting!
freezer cold and frosting up but refrigerator warm
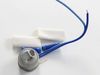
inside the freezer compartment, remove four hex head screws from rear panel,lift panel forward and unplug wire assembly from panel. find old defrost thermostat attached to copper tube by clip on back of thermostat, unclip, snip two wires to thermostat, take new thermostat, strip 1/4"of wire from wires in freezer (thermostat is prestripped),insert light blue wire from thermostat and light blue wire from freezer into opposite ends of crimp connector and crimp securely. repeat with dark blue wires. set panel back in freezer,connect plug to back of panel, refasten screws and you are go to go! save yourself the price of a new refrigerator or $300 repair by repairman!
Parts Used:
-
Gary from SABINSVILLE, PA
-
Difficulty Level:Very Easy
-
Total Repair Time:15 - 30 mins
-
Tools:Nutdriver
2 of 2 people
found this instruction helpful.
Was this instruction helpful to you?
Thank you for voting!
Ice maker stopped working
First I determined the icemaker was the problem when it was no longer calling for water. You can hear that "whistle" for 6-7 seconds when it calls for water. Anyway, replacement was a piece of cake, but did not entirely fix my problem. I also had to flush the lines to the soloniods that allow water to flow through the filter and into the water storage tank because it was cloggged with a little piece of plastic.
Parts Used:
-
Joseph from Seal Beach, CA
-
Difficulty Level:Really Easy
-
Total Repair Time:15 - 30 mins
-
Tools:Screw drivers
2 of 2 people
found this instruction helpful.
Was this instruction helpful to you?
Thank you for voting!
Lost the temperature control know
The knob came in the plastic package. It was the correct part. I opened the package and placed the knob on the prongs. Now it works fine.
Thanks
John S.
Thanks
John S.
Parts Used:

-
John from Pilesgrove, NJ
-
Difficulty Level:Really Easy
-
Total Repair Time:Less than 15 mins
3 of 5 people
found this instruction helpful.
Was this instruction helpful to you?
Thank you for voting!
Ice Maker Stopped Making Ice
Removed power , unplugged wires and 2 screws then reversed the process 1 hour later first batch of cubes dropped into bin
Parts Used:
-
PERRY from LOWER BURRELL, PA
-
Difficulty Level:Easy
-
Total Repair Time:Less than 15 mins
-
Tools:Nutdriver
3 of 5 people
found this instruction helpful.
Was this instruction helpful to you?
Thank you for voting!
Ice maker stopped making ice
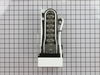
The ice tray would fill up, but never spit the ice out. I pulled one screw out of the bottom of the ice maker and loosened the two on top. I dropped the unit, unpluged the power and reversed the previous steps to install the new ice maker. Completley easy.
Parts Used:
-
Josh from Norman, OK
-
Difficulty Level:Really Easy
-
Total Repair Time:Less than 15 mins
-
Tools:Nutdriver
5 of 11 people
found this instruction helpful.
Was this instruction helpful to you?
Thank you for voting!
The Refrigerator was not cooling properly. At 40-45 degrees milk spoiled
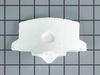
My upper and bottom air diffuser was missing.
Purchased both air diffuser and placed it.
Purchased both air diffuser and placed it.
Parts Used:
-
Marcos from E STROUDSBURG, PA
-
Difficulty Level:Really Easy
-
Total Repair Time:15 - 30 mins
-
Tools:Socket set
2 of 2 people
found this instruction helpful.
Was this instruction helpful to you?
Thank you for voting!
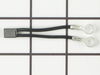
Blown thermal fuse for Ice Maker
After disassembling, the thermal fuse I ordered were not and exact fit, I had to cut off the ring terminals, strip the insulation back and splice it in.
It works.
It works.
Parts Used:
-
Derekandkelsey from WINCHESTER, VA
-
Difficulty Level:A Bit Difficult
-
Total Repair Time:1- 2 hours
-
Tools:Nutdriver, Pliers, Screw drivers, Socket set, Wrench set
3 of 5 people
found this instruction helpful.
Was this instruction helpful to you?
Thank you for voting!
Fan was off kilter and began rubbing the frame which is caused it to slow down and make an disturbing audible noise.
Before buying the part, I watched your video and realized it was extremely simple to remove and replace. Item was to take 7-10 days and I received it in 4. Took longer than 15 minutes because I had to move the fridge forward, get my tools and a vacuum, get a cup of coffee and get to it. Very easy and the video was exactly step by step. It took longer to vacuum all of the dust bunnies than to replace the part.
Honestly, I was in the market to buy a new refrigerator but now I believe I'll wait several more years. Thank you for your support.
Honestly, I was in the market to buy a new refrigerator but now I believe I'll wait several more years. Thank you for your support.
Parts Used:
-
Martin from N HOLLYWOOD, CA
-
Difficulty Level:Really Easy
-
Total Repair Time:30 - 60 mins
-
Tools:Screw drivers, Socket set
2 of 2 people
found this instruction helpful.
Was this instruction helpful to you?
Thank you for voting!
Refigerator not cooling
I followed your video instructions, is very important to have this information.
Parts Used:
-
Carlos from MOSINEE, WI
-
Difficulty Level:Really Easy
-
Total Repair Time:30 - 60 mins
-
Tools:Screw drivers
2 of 2 people
found this instruction helpful.
Was this instruction helpful to you?
Thank you for voting!
Refrigerator not working, freezer working
I initially replaced the defrost timer, and later replaced it and the defrost thermostat. The defrost thermostat was the faulty component
Parts Used:
-
Stephen from VAN WERT, OH
-
Difficulty Level:Easy
-
Total Repair Time:30 - 60 mins
-
Tools:Nutdriver
2 of 2 people
found this instruction helpful.
Was this instruction helpful to you?
Thank you for voting!
Refrigerator too warm
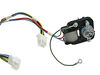
The parts were easily replaceable. No special instructions needed. Just identify and remove and replace. I didn't know which specific part needed to be replaced (both reported to fix my problem) but neither part was very expensive so I replaced both. No special tools needed. 1/4" nutdriver and phillips head screwdriver. Repair took about 30 minutes. I did have to make an adjustment on the defrost timer (a small dial on the unit) I just set it how the old part was set. I immediately knew it was going to work when I plugged the refrigerator back in and the fan motor inside the freezer kicked on. Easy peesy...
Parts Used:
-
James from N RICHLND HLS, TX
-
Difficulty Level:Really Easy
-
Total Repair Time:30 - 60 mins
-
Tools:Nutdriver, Screw drivers
2 of 2 people
found this instruction helpful.
Was this instruction helpful to you?
Thank you for voting!
Freezer froze up/ Fridge ran warm
Thawed out freezer, I recommend laying a couple old towels in freezer to soak up melted ice. Replaced old thermostat with new part. Removed 2 screws, removed back plate, unplugged 2 connectors and cut 2 wires. Crimped in new thermostat and repositioned to original part location. Reconnected plugs as I reinstalled back plate. Installed 2 screws and connected power. Works like new! Trouble shooting and part installation video is very helpful, great site!
Parts Used:
-
will from bushnell, IL
-
Difficulty Level:Very Easy
-
Total Repair Time:Less than 15 mins
-
Tools:Nutdriver
2 of 2 people
found this instruction helpful.
Was this instruction helpful to you?
Thank you for voting!
The shelf broke
-
Mary Jane from GREENVILLE, SC
-
Difficulty Level:Very Easy
-
Total Repair Time:Less than 15 mins
2 of 2 people
found this instruction helpful.
Was this instruction helpful to you?
Thank you for voting!
the freezer frosted up and the fridge was not getting cold.
-
Sherry from Newberry, SC
-
Difficulty Level:Easy
-
Total Repair Time:30 - 60 mins
-
Tools:Nutdriver
2 of 2 people
found this instruction helpful.
Was this instruction helpful to you?
Thank you for voting!