




















25323114100 Kenmore Freezer - Instructions
Keep searches simple. Use keywords, e.g. "leaking", "pump", "broken" or "fit".
Freezer wouln't start
First I removed the clamp, pulled out the part, and diconnected the two wires on the side and a small screw. Reconnected the new part with the small screw, connected the wires and plugged the part back to the side of the motor. Whaa La, Done.
Parts Used:
-
Ivette from Grand Island, NY
-
Difficulty Level:Really Easy
-
Total Repair Time:Less than 15 mins
-
Tools:Screw drivers
7 of 11 people
found this instruction helpful.
Was this instruction helpful to you?
Thank you for voting!
Gasket worn out

-
Teresa from EDMOND, OK
-
Difficulty Level:Really Easy
-
Total Repair Time:30 - 60 mins
-
Tools:Screw drivers
5 of 5 people
found this instruction helpful.
Was this instruction helpful to you?
Thank you for voting!
I Lost The Key
-
VICKIE from DAWSON, GA
-
Difficulty Level:Really Easy
-
Total Repair Time:15 - 30 mins
5 of 7 people
found this instruction helpful.
Was this instruction helpful to you?
Thank you for voting!
freezer not cold
-
Marion from Jamestown, NY
-
Difficulty Level:Easy
-
Total Repair Time:15 - 30 mins
-
Tools:Screw drivers
70 of 202 people
found this instruction helpful.
Was this instruction helpful to you?
Thank you for voting!
While defrosting freezer tossed the drain plug with ice and water into the sewer system.
Opened mailer and bag and place the drain plug into the drain. fit perfectly. In fact it is better than the one lost since the original needed a screwdriver or tool to remove the plug. This one has a flang or finger turner on it so that it can be removed. Also, does not interfere with items in bottom of freezer.
Parts Used:
-
paul from LISLE, IL
-
Difficulty Level:Very Easy
-
Total Repair Time:Less than 15 mins
4 of 5 people
found this instruction helpful.
Was this instruction helpful to you?
Thank you for voting!
Warm out door gasket.
Had to lossen around 60 screws to allow for the old gasket to be removed. Then I began the process of inserting the new gasket by fitting it into the gasket channel opened when I loosened the 60 screws. I inserted the gasket a little at a time making sure it was properly fitted then I tightened that part and then do the next part until I finished replacing the gasket.
Parts Used:
-
Gerald from North Little Rock, AR
-
Difficulty Level:A Bit Difficult
-
Total Repair Time:1- 2 hours
-
Tools:Screw drivers
3 of 3 people
found this instruction helpful.
Was this instruction helpful to you?
Thank you for voting!
End cap for side door shelf broken
Both end caps were missing on the door side bottom metal shelf. succesfully installed no tools needed
Parts Used:
-
wissam farhat from medley, FL
-
Difficulty Level:Easy
-
Total Repair Time:Less than 15 mins
3 of 3 people
found this instruction helpful.
Was this instruction helpful to you?
Thank you for voting!
Followed the instructions that were sent and repair was easy.
-
Glenn from CHAPPELL HILL, TX
-
Difficulty Level:Easy
-
Total Repair Time:30 - 60 mins
-
Tools:Screw drivers
3 of 3 people
found this instruction helpful.
Was this instruction helpful to you?
Thank you for voting!
Missing key
After removing the key from its shipping package I pushed it into the freezer locking slot and turned it to lock and unlock the lid and then removed it. I had no problems with this fix. Of course, I am an older gentleman with a lot of experience in repairs around my house,as well as other houses. I am sure that a less experienced person may have more of problem with this type of "repair".
Parts Used:
-
John from DUNBAR, WV
-
Difficulty Level:Very Easy
-
Total Repair Time:Less than 15 mins
3 of 4 people
found this instruction helpful.
Was this instruction helpful to you?
Thank you for voting!
Freeze would not re-start after temp rose above 23 degrees.
Unplugged the freezer. Located the Run Capacitor (next to the compressor). Removed the wire holding bracket, removed the Run Capacitor from the Start Relay. Installed the NEW Capacitor, re-installed the holding bracket. Plugged the unit in, looking at the display for the proper start-up sequence data. All is good - freezer operating for another 10+ yrs. NOTE: When removing the Run Capacitor, beware the COMPRESSOR could be HOT to the touch.
Parts Used:
-
Andy from GOOSE CREEK, SC
-
Difficulty Level:Really Easy
-
Total Repair Time:15 - 30 mins
-
Tools:Screw drivers
2 of 2 people
found this instruction helpful.
Was this instruction helpful to you?
Thank you for voting!
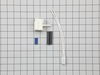
Controller showed signs of the plastic housing had melted.
I paid attention to how the old part came off. You need a small (very small) flat bladed screwdriver to release the two wires that plug into the controller. I checked that it was a bit difficult but it would had been easier if I could have found a screwdriver sooner.
Parts Used:
-
Jim from Cherryvale, KS
-
Difficulty Level:A Bit Difficult
-
Total Repair Time:15 - 30 mins
-
Tools:Screw drivers
3 of 6 people
found this instruction helpful.
Was this instruction helpful to you?
Thank you for voting!
the refrig was in storage for about a year, the freezer door warped
removed freezer door and installed the new one. This was a pretty easy thing to do, although putting the old handle on the new door was a challenge. No knowing that there is a plastic piece holding the top of the handle i broke the that piece and had to order another one. Mean while the freezer was making alot of frost inside, so that had to be cleaned after the new part came.
Parts Used:
-
Jeffery from Phillipsburg, NJ
-
Difficulty Level:Really Easy
-
Total Repair Time:Less than 15 mins
3 of 6 people
found this instruction helpful.
Was this instruction helpful to you?
Thank you for voting!
Door handle had too much space between the door and handles.
-
Michael from MEMPHIS, TN
-
Difficulty Level:Really Easy
-
Total Repair Time:Less than 15 mins
-
Tools:Screw drivers
1 person
found this instruction helpful.
Was this instruction helpful to you?
Thank you for voting!
Door wouldn’t stay shut
Purchased gasket from parts plus installed it and door still won’t stay shut without duct tape plus the frost is building up really bad looking for another parts store to get problem fixed
Parts Used:
-
Angela from ORLANDO, FL
-
Difficulty Level:Really Easy
-
Total Repair Time:30 - 60 mins
-
Tools:Screw drivers
2 of 4 people
found this instruction helpful.
Was this instruction helpful to you?
Thank you for voting!
Compressor Stopped Running. Fan and lights still working.
1. Ensure that the power is completely removed from the freezer. 2. Using needle-nose pliers and a screw driver, remove the wire retainer holding the controller assembly to the compressor and remove the controller assembly by pulling away from the compressor. 3. Cut the two wires from the existing controller assembly and strip the ends about a quarter of an inch. 4. Slide the heat shrink tubing over the wires of the connector provided with the controller kit. 5. Use the Blue Barrel connectors provided with the controller kit to connect the controller wires provided in the kit to the existing wires of the freezer. **Ensure that they are well crimped. 6. Using a heat gun, shrink the tubing to fit over the connector and wires. **Be careful not to overheat. 7. Plug the connector into the new controller provided in the kit. 8. Plug the controller assembly back into the socket on the compressor. 9. Reattach the wire retainer securely to hold the controller assembly to the compressor. 10. Plug in the freezer and adjust the thermostat so that the compressor energizes. If the controller was the issue your freezer should begin to cool.
Parts Used:
-
Jerry from FORT SMITH, AR
-
Difficulty Level:Easy
-
Total Repair Time:15 - 30 mins
-
Tools:Pliers, Screw drivers
1 person
found this instruction helpful.
Was this instruction helpful to you?
Thank you for voting!