




















22308 (1988) Kenmore Range - Instructions
Keep searches simple. Use keywords, e.g. "leaking", "pump", "broken" or "fit".
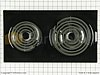
replace element cartridge
I placed my order online and received the replacement parts the very next day - thank you so much!!
The hardest part of this repair job was removing it from the boxes! Pulling out the old cartridge and inserting the new was as easy as could be!
The hardest part of this repair job was removing it from the boxes! Pulling out the old cartridge and inserting the new was as easy as could be!
Parts Used:
-
Kathleen from Ledyard, CT
-
Difficulty Level:Really Easy
-
Total Repair Time:Less than 15 mins
6 of 6 people
found this instruction helpful.
Was this instruction helpful to you?
Thank you for voting!
We are renting a house with a stove that only had two burners on one side and a grill element on the other. We needed four burners.
This was an extremely simple repair. No screws, no nothing. If you can plug in a lamp, you can swap out this part just as easily.
Parts Used:
-
Michael from Palo Alto, CA
-
Difficulty Level:Really Easy
-
Total Repair Time:Less than 15 mins
7 of 9 people
found this instruction helpful.
Was this instruction helpful to you?
Thank you for voting!
The Burners on the stove stopped working
I was told that we needed a new stove at an estimated cost of $3900. I decided to google the parts that were not working after I was able to identify the Part number & model. I was first advised to look at Lowes, which I did and was not successful. I did another web search the Part Select site came up. At first I was able to find the part, but the color. A simple phone call and a helpful (Human) voice at the other end gave me a new model number and in less than 5 minutes I had made my order. Total cost $368.00 including shipping and handling. My stove is working like new. Total savings $3500 and change. Satisfaction 100%. I have placed the web site in the must have category.
Parts Used:
-
Horacio from Laredo, TX
-
Difficulty Level:Really Easy
-
Total Repair Time:Less than 15 mins
6 of 7 people
found this instruction helpful.
Was this instruction helpful to you?
Thank you for voting!
All four of the cooktop switch controls needed replacing since none would control their respective burner.
Turned off the power at the circuit breaker panel. Removed the control knobs from each switch and the four palnuts under each knob. Removed the two screws inside the vent well that hold the escutcheon in place. Pulled each switch up as much as possible to expose the wires attached underneath to each switch blade. Remoced each wire and replaced them on the new switch. Same procedure for all four switches. Reassembled in reverse order. Turned on power and all four burners lit up and were regulated as if new. I saved $244.00 doing the repair myself.
Parts Used:

-
William from Williamsbirg, VA
-
Difficulty Level:Really Easy
-
Total Repair Time:30 - 60 mins
-
Tools:Pliers, Screw drivers, Wrench set
6 of 7 people
found this instruction helpful.
Was this instruction helpful to you?
Thank you for voting!
drain jar lids rusted and broken of their mounts
The lids are fastened to the underside of the unit by rivets....3 to each lid.
I used a cordless drill and small drill bit to drill through the rivets to remove the old lids and remains of the rivets.
The new lids are easily fastened back using a rivet gun ( about $20 in Lowes) using small 1/8th aluminum rivets.
No real problems.
1 thing to note is that the drill bit will pass through the old rivet by about 1/4 inch before it comes up against the upper level of the BBQ floor so do not drill any deeper.The aluminum rivets are easy to drill through and you will easily feel when the rivet is drilled through.
I used a cordless drill and small drill bit to drill through the rivets to remove the old lids and remains of the rivets.
The new lids are easily fastened back using a rivet gun ( about $20 in Lowes) using small 1/8th aluminum rivets.
No real problems.
1 thing to note is that the drill bit will pass through the old rivet by about 1/4 inch before it comes up against the upper level of the BBQ floor so do not drill any deeper.The aluminum rivets are easy to drill through and you will easily feel when the rivet is drilled through.
Parts Used:
-
ronald from ESTERO, FL
-
Difficulty Level:A Bit Difficult
-
Total Repair Time:15 - 30 mins
5 of 5 people
found this instruction helpful.
Was this instruction helpful to you?
Thank you for voting!
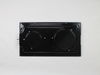
wanted to update our white induction unit (still works)
Simple. We just unplugged the old white induction unit (still works after 18 yrs) and plugged in the new black radiant cartridge. Great customer assistance.
Parts Used:
-
Pam from Oregon City, OR
-
Difficulty Level:Really Easy
-
Total Repair Time:Less than 15 mins
6 of 8 people
found this instruction helpful.
Was this instruction helpful to you?
Thank you for voting!
needed to replace the old burner cartridges
1. Lifted out the old burner cartridges
2. Opened the box from PartSelect
3. Inserted the new burner cartridges
It's plug and play. No tools required !
2. Opened the box from PartSelect
3. Inserted the new burner cartridges
It's plug and play. No tools required !
Parts Used:
-
Michael from Crysta Lake, IL
-
Difficulty Level:Really Easy
-
Total Repair Time:Less than 15 mins
5 of 5 people
found this instruction helpful.
Was this instruction helpful to you?
Thank you for voting!
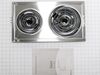
heating coils (burners) were not working
when the new cartridges came in all I did was unplug the old and plug in the new and I had a new stove
Parts Used:
-
Carol from Holbrook, NY
-
Difficulty Level:Really Easy
-
Total Repair Time:Less than 15 mins
6 of 8 people
found this instruction helpful.
Was this instruction helpful to you?
Thank you for voting!
Plastic ends on old cover broke.
-
HElen from Pawleys Island, SC
-
Difficulty Level:Really Easy
-
Total Repair Time:Less than 15 mins
6 of 8 people
found this instruction helpful.
Was this instruction helpful to you?
Thank you for voting!
1 element of a 4 element burner worked
There was no tools required with this job. I had to remove the old elements from the stove top and replace them with the newly purchased ones from this site. The hardest part was to located the parts I needed. I went to Best Buy to purchase these and they said they no longer stock them. They quoted me double the price that I paid and I received them a lot faster this way and did not have to rely on them for help. I will recommend this site to all my friends.
Parts Used:
-
Paula from Wautoma, WI
-
Difficulty Level:Really Easy
-
Total Repair Time:Less than 15 mins
7 of 11 people
found this instruction helpful.
Was this instruction helpful to you?
Thank you for voting!
I had just installed new burner moduels on my stove top but was unable to find a cover for my grill and decided to go on line to look for one. I was thrilled when I located just what I was looking for. I also had a problem with large pots and pans causing a dark grease like stain on the stove top ar
All I had to do was insert the new burner and place the grill cover over the existing grill top. Works like a charm.
Parts Used:
-
Carol from Frisco City, AL
-
Difficulty Level:Really Easy
-
Total Repair Time:Less than 15 mins
6 of 9 people
found this instruction helpful.
Was this instruction helpful to you?
Thank you for voting!
Cartridge was in need of replacement unit
Unplugged unit,cleaned stove and replaced new cartridge.
Parts Used:
-
Marion from Center Point, IA
-
Difficulty Level:Really Easy
-
Total Repair Time:Less than 15 mins
5 of 6 people
found this instruction helpful.
Was this instruction helpful to you?
Thank you for voting!
part was just looking old and worn
Really simple just had to remove the old part by simply pulling it out of the socket and then insert the new cartridge. It looks great it was shipped in a matter of days I was surprised to get it so soon.
Parts Used:
-
Geri from El Dorado, CA
-
Difficulty Level:Really Easy
-
Total Repair Time:Less than 15 mins
5 of 6 people
found this instruction helpful.
Was this instruction helpful to you?
Thank you for voting!
Old stove burners were rusted out and hard to clean
Unplugged old units and plugged in new units. They fit perfectly and it was all so easy. I have been very happy with PartSelect services.
Parts Used:
-
Pamela from Kerrville, TX
-
Difficulty Level:Really Easy
-
Total Repair Time:15 - 30 mins
6 of 9 people
found this instruction helpful.
Was this instruction helpful to you?
Thank you for voting!
high blower vibration
blower wheel was caked with dried grease clumps; replaced blower wheel, urethan foam and 3 motor isolators; blower/fan no longer vibrating cooktop.
Parts Used:

-
Lawrence from Chandler, TX
-
Difficulty Level:Really Easy
-
Total Repair Time:1- 2 hours
-
Tools:Nutdriver, Pliers, Screw drivers, Socket set
10 of 21 people
found this instruction helpful.
Was this instruction helpful to you?
Thank you for voting!