These agitator directional cogs are commonly referred to as dog ears. They come four to a package and are usually used with direct drive washing machines.
$7.31
In Stock
Order within the next 10 hrs and your part ships today!
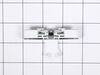
The agitator kit is most commonly used if the top part of the agitator is not moving correctly but the bottom is. This kit now includes all pieces shown in photo plus the thrust spacer, inner cap seal...
$26.58
In Stock
Order within the next 10 hrs and your part ships today!
This 18 ml bottle of white appliance touch-up paint is used to cover scratches or marks on your appliance. The white touch-up paint can be used on refrigerators, microwaves, ranges, clothes dryers, an...
$15.95
In Stock
Order within the next 10 hrs and your part ships today!
If your washer is noisy, spins slowly, or leaves clothes soaking wet, this splutch cam kit might be the fix. It helps your machine switch between washing and spinning by connecting the motor to the ba...
$49.29
In Stock
Order within the next 10 hrs and your part ships today!
This white thrust spacer is made of plastic and is also commonly referred to as a retainer ring. It is used in the agitator assembly of many direct drive washing machine models. This is the retaining ...
$8.82
In Stock
Order within the next 10 hrs and your part ships today!
This lid switch assembly is for a top load washer. The lid switch assembly detects if the washer lid is open or closed and prevents the washer from spinning when the lid is open.
$161.61
In Stock
Order within the next 10 hrs and your part ships today!
This suspension rod kit includes four rods that stabilize the wash tub, reducing vibrations and movement during cycles. It is compatible with a range of washing machines and helps improve performance ...
$113.97
In Stock
Order within the next 10 hrs and your part ships today!
This fabric softener dispenser releases softener at the proper time during the wash cycle to ensure even distribution. It helps prevent residue buildup on clothing and supports consistent fabric care....
$34.08
In Stock
Order within the next 10 hrs and your part ships today!
Order within the next 10 hrs and your part ships today!
Questions And Answers for 1CWTW4845EW3
Ask our experts a question about this model and we'll get back to you as soon as possible!
1 question answered by our experts.
< Prev
1
Next >
Sort by:
Search filter:
Clear Filter
Your search term must have 3 or more characters.
Keep searches simple. Use keywords, e.g. "leaking", "pump", "broken" or "fit".
Sorry, we couldn't find any existing answers that matched.Try using some different or simpler keywords, or submit your new question by using the "Ask a Question" button above!
Vanini
November 15, 2025
How to reset washing machine so that it can work? It won’t start and all the yellow lights including the locked red light stays on and it keeps ticking
For model number 1CWTW4845EW3
Hi Vanini, thank you for reaching out. Try unplugging the machine for at least one minute to clear a temporary glitch. If that doesn't work, check the door lock assembly. Otherwise, you may need to replace the control board, part number PS16744862. We hope this solves your problem!
First pry off the cap of the agitator. Then using a socket remove the bolt that holds the plastic cup in place. Remove this cup by prying it loose from the two tabs that hold it in place. Once this cup is removed you can get to the broken cogs. Slip the new cogs into the underside of the cup, and slide the cup back down in the agitator housing using the slots on the side for a guide. (You may want to remove the entire agitator and assemble everything upside down, then flip it all back over to mount, so the cogs don't fall out). Tighten the bolt, snap the cap back in place on top of the agitator and your'e done. Easy repair.
The instructions came with the repair kit, it was fairly simple and straight foward.
One bolt held the entire agitator unit in the washer, as well as held the upper and lower halves together. Once that nut was removed the two halves seperated and the plastic clutch pieces could easily be replaced wtih the new onces in the repair kit.
Very easy do-it-yourself repair! Took about 20 minutes because I was being cautious. Next time I could do it in 5 minutes.
On top of the agitator is a flat cap that is held in place by the friction of an o-ring, there are no fasteners. I would imagine one could get under the lip with a small screwdriver or butter knife to pop it off but I chose simply using my fingernails so as to not disfigure the cap. Under the cap you will find the head of the only bolt that holds the assembly together it is a 7/16 head and because it is in a 4" deep well your will need a 6" extension for your ratchet. Once the bolt is out the top of the agitator, the assembly with the cogs removes by hand. Set the assembly upside down on the counter, slide the black plastic ring off, pull the cogs out with your fingertips, install the new cogs put a new black ring on and set the assembly back in the agitator. Reinstall bolt. As the bolt is down in a tube, you cannot set it in place with your fingers and it will fall out of the socket. To hold the bolt in the socket during positioning you can either put a gob of Vaseline on the bolt head to hold it in the socket or form a small piece of paper over the bolt head and set it into the socket, the friction of the paper will hold the bolt into the socket. Took me less then 10 minutes, good luck


 Diagram and Parts List for Whirlpool Washer")