




















12001294 Maytag Ice Maker - Instructions
Keep searches simple. Use keywords, e.g. "leaking", "pump", "broken" or "fit".
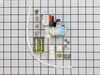
Old Valve was dead
This was very easy and pretty fast to do and its working great...all for $40 bucks ! you can do this...trust me!
Parts Used:
-
Joseph from Bloomfield Hills, MI
-
Difficulty Level:Really Easy
-
Total Repair Time:15 - 30 mins
-
Tools:Pliers
2 of 3 people
found this instruction helpful.
Was this instruction helpful to you?
Thank you for voting!
ice maker quit working
Replaced the water valve. I knew that the ice maker was working by watching the movement. It was not getting water to it, s I figured it was the electric water valve and sure enough, that fixed the problem.
Parts Used:
-
Randy from Yale, OK
-
Difficulty Level:Easy
-
Total Repair Time:15 - 30 mins
-
Tools:Screw drivers, Wrench (Adjustable)
2 of 3 people
found this instruction helpful.
Was this instruction helpful to you?
Thank you for voting!
no shut-off for ice production; shut-off arm broken/missing
Inserted the prongs of the replacement shut-off arm in the holes provided in the bracket.
Parts Used:

-
Victoria from MELBOURNE, FL
-
Difficulty Level:Really Easy
-
Total Repair Time:Less than 15 mins
2 of 3 people
found this instruction helpful.
Was this instruction helpful to you?
Thank you for voting!
Replaced leaking ice maker after minor screwup!
Old ice maker leaking water and produced ice cubes with black inclusions. First, I removed old ice maker per video instructions. Transferred electrical cable, cover, and bail to new ice maker. First installation failed because I failed to make sure water tube correctly enter back of ice maker. No ice. Initially thought electrical cable wasn't firmly in place. Then I noticed frozen water dripping down back of freezer. A clue! Removed ice maker and reinstalled making sure water tube went through the hole in back of ice maker. Now the new ice maker works beautifully!
Parts Used:

-
Jackson from Leesburg, VA
-
Difficulty Level:Easy
-
Total Repair Time:15 - 30 mins
-
Tools:Nutdriver
2 of 3 people
found this instruction helpful.
Was this instruction helpful to you?
Thank you for voting!
Ice from icemaker taste metallic; new ice maker directly from box
I did not do the repair yet, there is no schematic on how to route the hose; also no description of how to do the routing/connections.
Parts Used:

-
Samuel from ALEXANDRIA, VA
-
Difficulty Level:Difficult
-
Total Repair Time:More than 2 hours
2 of 3 people
found this instruction helpful.
Was this instruction helpful to you?
Thank you for voting!
Ice maker was not working.
Ordered new single outlet water valve, received in less than two days. Removed old one, and the repair pretty much feel in place. Instructions were there as a backup. ........ Just curious if the connection from the water source to the valve outlet connection could b a quick connect just the like the water line going directly to the ice maker. Gregg in PA.
Parts Used:
-
GREGG from WEST CHESTER, PA
-
Difficulty Level:Really Easy
-
Total Repair Time:30 - 60 mins
-
Tools:Nutdriver
1 person
found this instruction helpful.
Was this instruction helpful to you?
Thank you for voting!
Ice Maker leaking.
I watched the video regarding the instillation of this ice maker a few times and then followed it exactly. It was incredibly easy. We had ice cubes about two hours later and no longer had a leak making icebergs!
Parts Used:
-
Jeannine from Pontiac, IL
-
Difficulty Level:Really Easy
-
Total Repair Time:30 - 60 mins
-
Tools:Nutdriver
1 person
found this instruction helpful.
Was this instruction helpful to you?
Thank you for voting!
Ice maker broken. Quick fix
The plastic fill cup part is also used to hold one end of the wire “one/off” switch that is manually activated or activated when the ice tray is full. This wire piece fell out because one end, that is part of the plastic fill cup, broke off. The wire switch was fine.
The video demos show you exactly what to do. The repair man showed me a trick to speed up the testing process. The trick is to insert a wire jumper cable to actuate the ice maker and make it rotate. But this isn’t necessary.
Hardest part of this fix is emptying the freezer (bottom with a slide out door) and removing the door.
Why this part is so expensive is beyond me. But I’m happy it was available for a 24yo fridge that still works!!
The video demos show you exactly what to do. The repair man showed me a trick to speed up the testing process. The trick is to insert a wire jumper cable to actuate the ice maker and make it rotate. But this isn’t necessary.
Hardest part of this fix is emptying the freezer (bottom with a slide out door) and removing the door.
Why this part is so expensive is beyond me. But I’m happy it was available for a 24yo fridge that still works!!
Parts Used:

-
Tim from Berkeley, CA
-
Difficulty Level:Easy
-
Total Repair Time:1- 2 hours
-
Tools:Nutdriver, Screw drivers
1 person
found this instruction helpful.
Was this instruction helpful to you?
Thank you for voting!
icicles from pooled water in ice collector bucket
I watched the repair video on the web site a couple of times just to get comfortable with what to expect. (i.e. pressing tabs on wiring harness to remove, placement of lift arm for removal and installation) These instructions were a big help...I had the removal, modifications and installation completed in less than 30 minutes. Ice cubes (without the extra icicles) in 1 hour...
Parts Used:
-
Roberta A from WINTER HAVEN, FL
-
Difficulty Level:Really Easy
-
Total Repair Time:30 - 60 mins
-
Tools:Nutdriver
1 person
found this instruction helpful.
Was this instruction helpful to you?
Thank you for voting!
Ice tray was corroded and leaking
Removed top drawer from freezer. Unplugged the ice maker. Uncrewed the bottom screw. Loosened the two top screws. Removed old ice maker. Removed all the parts that didn't come with the new ice maker and installed on new ice maker. Reinstalled the new ice maker. Started making ice with no leaks in about 3 hours.
Parts Used:
-
Scott from SAN DIEGO, CA
-
Difficulty Level:Easy
-
Total Repair Time:30 - 60 mins
-
Tools:Nutdriver
1 person
found this instruction helpful.
Was this instruction helpful to you?
Thank you for voting!
Leaking water every time ice maker fillls.
Replaced entire ice maker. Turn off water where it comes out of the wall. Loosen two top screws and remove one screw at bottom. Lift unit up and off top screws and swivel out to the right and disconnect power plug from freezer. Warning new unit does not come with: 1. Power Cable 2. Front plastic cover. 3. Wire bail. Install in reverse order Do NOT toss old unit until new one is installed and working. My came with the bottom mounting bracket bent so I just used the old one. When installing old power cable into new unit be sure to put small sensor into clip. It's part of the cable harness assembly.
Parts Used:
-
Bill from Granite Bay, CA
-
Difficulty Level:Very Easy
-
Total Repair Time:15 - 30 mins
-
Tools:Screw drivers
1 person
found this instruction helpful.
Was this instruction helpful to you?
Thank you for voting!
We would come home from wintering in Texas and the ice maker would again work for about a week. Decided to replace the valve because it wasn't expensive.
Replaced the valve and cleaned all the coils at the same time. The ice maker is spewing out ice. Wife is happy again.
Parts Used:
-
Tom from MINNEAPOLIS, MN
-
Difficulty Level:Really Easy
-
Total Repair Time:15 - 30 mins
-
Tools:Nutdriver, Wrench (Adjustable)
1 person
found this instruction helpful.
Was this instruction helpful to you?
Thank you for voting!
Damage to non-stick coating caused water overflow
Repair was as shown in the video except my refrigerator had screws instead of the plastic clips as shown in the video. Just had to loosen the two upper ones and remove the one lower one. All other steps were as shown in the video.
Parts Used:
-
Jim from WAUSAU, WI
-
Difficulty Level:Very Easy
-
Total Repair Time:15 - 30 mins
-
Tools:Screw drivers
1 person
found this instruction helpful.
Was this instruction helpful to you?
Thank you for voting!
No Ice Production
I performed basic troubleshooting to make sure there was power and water. Based on historical research on this particular ice maker, I decided that the best direction was to replace the entire assembly. I found this item on this site, ordered it and received it a few days later. I basically removed the ice pan and a few items in the freezer, removed the three mounting screws with either a flat blade screwdriver or nut driver, pulled the electrical harness out of the back wall of the freezer and transferred it to the new ice maker and then installed the new unit, really that simple. Iwas concerned at first, not seeing any activity in the new ice maker but after 15 minutes or so I heard ice falling into the ice bin. Well worth replacing seeing how simple this job was.
Parts Used:
-
Anson from Algonquin, IL
-
Difficulty Level:Easy
-
Total Repair Time:15 - 30 mins
-
Tools:Nutdriver, Screw drivers
1 person
found this instruction helpful.
Was this instruction helpful to you?
Thank you for voting!
ice maker was asking for water, but no ice
replaced the wiring harness, it contains a heating element that allows the water to pass through the discharge tube and not freeze up. I installed the ice maker originally so this was fairly easy repair once I knew the wiring set up.
Parts Used:

-
Lowell from Tonica, IL
-
Difficulty Level:Easy
-
Total Repair Time:15 - 30 mins
-
Tools:Pliers, Screw drivers
1 person
found this instruction helpful.
Was this instruction helpful to you?
Thank you for voting!