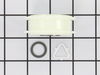
This Idler Pulley includes the tri-ring and gasket and everything included here is manufacturer-certified. This part maintains correct tension on the drive belt in order to spin the drum properly. If ...
This drum support roller is sold individually. Most dryers require two. The tri-rings are included. This is a drum support roller for a dryer. It is a genuine replacement part. The part includes the d...
This thermostat may differ in appearance, but functions the same as the original part. This part controls the temperature of the inside of the dryer drum and prevents the dryer from overheating.
If you notice that your dryer is noisy or will not tumble, you may need to replace the tri ring. This part is triangular, and is less than an inch in size. Tri rings can be found both on the idler pul...
Also known as Thermal Cut-Off kit. The thermostat acts as a safety mechanism that keeps the dryer from overheating and the fuse is like a backup system - it's set to trip at a higher temperature than...
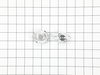
The idler pulley wheel is now sold with this arm. This idler pulley is for dryers.
Idler pulley maintains correct tension on the drive belt to spin the drum.
The blower wheel pulls air over the heat source, through the clothes drum, and past the thermostats, then pushes it out the exhaust duct. The blower wheel, which is usually plastic, may wear out over ...
1) Disconnected power cord from wall. 2) Disconnected vent hose from back of dryer. 3)Removed dryer rear panel. 4)Disengaged tension spring on idle wheel arm. 5) Removed worn idle wheel. 6)Installed new Idler wheel assembly. 7) Vacuumed dust from rear of dryer (optional, recommended). 8) Reinstalled rear cover, vent hose and power cord. Easy repair 15-30
I recommend you order the idler pulley as soon as you start to hear the unusual noise indicating metal against metal. Replace the idler pulley before it fails and possibly causes more damage to the drive system. Simply removed the power cord at the back of the dryer and then the multiple screws holding the back panel in place as well as the clip holding the exhaust vent in place. You may need to remove the top panel to access a few of these screws. A diagram of the belt routing is in the paperwork I found behind the front lower panel of the dryer. This too is easily removed with just a few screws.


 Diagram and Parts List for Kenmore Dryer")