




















11092976102 Kenmore Washer Dryer Combo - Instructions
Keep searches simple. Use keywords, e.g. "leaking", "pump", "broken" or "fit".
Noisy
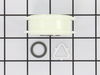
Disconnect power supply, remove power cord from dryer, remove dryer vent tube from dryer, remove 2 Philips screws from power connection on dryer, remove nuts from back of dryer, remove back of dryer. Locate idler pulley at bottom of unit at the rear of the motor, pull pulley back to loosen belt and remove from pulley, remove pulley retainer clip, remove pulley and rear washer from shaft and inspect shaft for wear or rust. replace washer and pulley (no specific direction to replace them, washer first then pulley). Reverse above procedure to reassemble. This is for a front load dryer, a top load dryer is different.
Parts Used:
-
Robert from HAGERSTOWN, MD
-
Difficulty Level:Very Easy
-
Total Repair Time:15 - 30 mins
-
Tools:Nutdriver, Screw drivers
5 of 5 people
found this instruction helpful.
Was this instruction helpful to you?
Thank you for voting!
washing machine stuck on drain cycle
Siphon break kit keeps washing machine from continuing to siphon after rinse/cycle -- like emptying a pool with a hose. Fixed the problem of the tub never filling due to siphon draining out water as it's being put in.
Parts Used:

-
Matthew from Wauwatosa, WI
-
Difficulty Level:Easy
-
Total Repair Time:15 - 30 mins
-
Tools:Screw drivers
17 of 41 people
found this instruction helpful.
Was this instruction helpful to you?
Thank you for voting!
Drum support roller making very loud noise
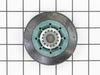
had to take front off of Dryer then was able to replace drum roller
Parts Used:

-
William from TROY, AL
-
Difficulty Level:Really Easy
-
Total Repair Time:1- 2 hours
-
Tools:Screw drivers, Socket set
5 of 5 people
found this instruction helpful.
Was this instruction helpful to you?
Thank you for voting!
Lint filter seal worn out
The part wasn’t for my machine. Unfortunaly I was not able to repair it. I was sent stripe of foam with an adhesive strip on the back. I needed a felt strip.
Parts Used:

-
Dennis from PALM BCH GDNS, FL
-
Difficulty Level:Very Easy
-
Total Repair Time:Less than 15 mins
5 of 5 people
found this instruction helpful.
Was this instruction helpful to you?
Thank you for voting!
Coupling on Whirlpool Washer gave out
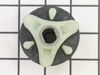
The coupling, made of plastic and rubber, on our Whirlpool washer gave out. Done the same repair nine years ago and knew what to do. Here is a short summery:
1. unscrew the 2 screws that hold the control panel on top of the machine in place
2. unscrew the screws that connect the housing with the back panel
3. pop the 2 clips under the control panel to release the back panel
4. with the back panel loose disconnect everything
that is pushed, screwed or clamped on and take the back panel off (don't worry about remembering where things go, everything can go only one way together again)
5. slightly lift the housing of the washer in the back to remove, that gives you access to the coupling in front of the machine
6. I personally like to put the washer on its back and do the repair that way. However, if you want to
leave it standing that is gets you there too.
7. take the screws out of the brackets that hold the pump (the thing with the two hoses attached to it)
in place and snap off the brackets; lift up the pump and put aside
8. you can now remove the broken coupling
9. check for any fragments and clean off what needs to be cleaned
10. replace the coupling
11. reverse the order of steps 1 to 7; make sure that the all electrical connections and hoses are connected!
12. test
1. unscrew the 2 screws that hold the control panel on top of the machine in place
2. unscrew the screws that connect the housing with the back panel
3. pop the 2 clips under the control panel to release the back panel
4. with the back panel loose disconnect everything
that is pushed, screwed or clamped on and take the back panel off (don't worry about remembering where things go, everything can go only one way together again)
5. slightly lift the housing of the washer in the back to remove, that gives you access to the coupling in front of the machine
6. I personally like to put the washer on its back and do the repair that way. However, if you want to
leave it standing that is gets you there too.
7. take the screws out of the brackets that hold the pump (the thing with the two hoses attached to it)
in place and snap off the brackets; lift up the pump and put aside
8. you can now remove the broken coupling
9. check for any fragments and clean off what needs to be cleaned
10. replace the coupling
11. reverse the order of steps 1 to 7; make sure that the all electrical connections and hoses are connected!
12. test
Parts Used:

-
Ronny from Santa Monica, CA
-
Difficulty Level:Easy
-
Total Repair Time:30 - 60 mins
-
Tools:Screw drivers, Socket set, Wrench set
5 of 5 people
found this instruction helpful.
Was this instruction helpful to you?
Thank you for voting!
slow or no spin
First read up on what others did and tried to find free repair manual with little luck. Called repairman, they thought whole transmission was shot- would have been $70 just to have them look- forget it. Getting it apart: popped off the two console cosmetic panels to get to a screw on each side from the top. Lifted off console, levered and squeezed retaining clips. Unhooked two connectors and overflow tubing? Shell pulled off easily, getting back on after I was all done made me wonder if it was a good choice. In the end yes- allowed me to clean inside surfaces of both tubs to remove grime and rust. There are many stories on the actual clutch replacement, so won't go into too much detail but some lessons learned. Keep track of the way all the plastic aggitator pieces go in, plus the washers and clips along the way. Deep well 1/2" I think socket for the tub, it's litely spring loaded so look before you set it down. Punching off the nut on the tub worried me, but it was no big deal. Loosens and tightens the normal directions, no positive tight stop, just compression so pay attention to how tight and hard you pounded to get it off. Drain the water from the inner tub before getting too far. I took the four springs off and removed both tubs to clean. No more complaining about brown spots on clothes. Get the whole clutch kit, not just the band, even though it's probably just the band worn out. The plastic clutch engaging piece will probably be fatigued. The motor etc is heavy, and buffered it's drop with rags. tip on side when putting it back, because its a bear to try to lift up. I lightly greased some moving parts, just not much as to not cause band grip problems. The wire retaining clip is tricky- I put the hook end in first, used pliers to try and compress, and screwdriver to push down and in. The whole things wants to spin while you do this, but when it finally goes, it stays. I was concerned about the location of the band spring in relation to it's actuator when putting it together, but it turned out if you put it anywhere where the clutch is free to spin, it will engage normally. The top lid has two rubber bumpers, one fell off and landed on the front bottom corner of the cover which didn't help reinstallaion until my 8year old noticed it! Took a number of tries but finally got the four guides from the frame into the cover. I tried bringing it in level, front tipped sligthly up, front tipped slightly down; in the end I won't be much help, it just finally went. It wasn't as easy as most people said it would be, but my back hurt and I had kids "help", and it took just under two hours. Works amazingly well now. Parts arrived Two days after ordering, with no expiditing!
Parts Used:

-
Steven from Wausau, WI
-
Difficulty Level:A Bit Difficult
-
Total Repair Time:1- 2 hours
-
Tools:Pliers, Screw drivers, Socket set
6 of 9 people
found this instruction helpful.
Was this instruction helpful to you?
Thank you for voting!
drum SLAMMING into the back of the washer when sipnning
I just replaced the spring just like the vid show me.it run's like a new one-I bought it used about 5 yr's ago
Parts Used:

-
WILLIAM from DAYTON, KY
-
Difficulty Level:Really Easy
-
Total Repair Time:15 - 30 mins
-
Tools:Screw drivers, Socket set
5 of 6 people
found this instruction helpful.
Was this instruction helpful to you?
Thank you for voting!
The "O"ring on the fabric softner inner cap broke when I was cleaning the built-up fabric softner off of the inside of the dispenser and cap. I suspect that it had just gotten old and brittle. I decided to replace the washer lid because the enamel coating was flaking off of the edges of the lid and
The "O" ring just snaps in place. For the lid it was necessary to remove the screws from the hinge on the left side, then extract the hinge rod. Once the hinge rod was removed the lid lifts out. Removed the hinge rod from the right side and installed it on the new lid. Then put the lid back in place, insert the hinge rod into the left side of the lid and replace the screws. Removed the safty switch actuater from the old lid and snapped it in place on the new lid. Done !
Parts Used:


-
Steven from Brentwood, CA
-
Difficulty Level:Really Easy
-
Total Repair Time:15 - 30 mins
-
Tools:Pliers, Screw drivers
5 of 6 people
found this instruction helpful.
Was this instruction helpful to you?
Thank you for voting!
The washer would drain, but was screaming while doing nothing else.
The tough part was replacing the front cabinet.
I did consult the video for help on replacing the clutch spring.
Thank you for that bit.
I admit to taking too much apart, most of the cabinet back can be left alone.
Some of the plastic wire keepers/routers suffered, as well as the console hinges.
The newly reassembled washer works without a hitch, and truely it took me about 4 hours over several days to dissamble and reassemble.
It is louder in the audible range than before, but very serviceale for another 20 years, saints willing.
I did consult the video for help on replacing the clutch spring.
Thank you for that bit.
I admit to taking too much apart, most of the cabinet back can be left alone.
Some of the plastic wire keepers/routers suffered, as well as the console hinges.
The newly reassembled washer works without a hitch, and truely it took me about 4 hours over several days to dissamble and reassemble.
It is louder in the audible range than before, but very serviceale for another 20 years, saints willing.
Parts Used:
-
Richard from JAMESTOWN, PA
-
Difficulty Level:Really Easy
-
Total Repair Time:More than 2 hours
4 of 4 people
found this instruction helpful.
Was this instruction helpful to you?
Thank you for voting!
washer wouldn't spin with load, then not at all with rapid clicking sound
Clutch was noticibly worn compared to new part. Direct drive flange had broken, this part should be steel. found a you tube video that was simple to follow. no problems
Parts Used:
-
Lou from ATLANTIC HLDS, NJ
-
Difficulty Level:Easy
-
Total Repair Time:1- 2 hours
-
Tools:Pliers, Screw drivers, Socket set
4 of 4 people
found this instruction helpful.
Was this instruction helpful to you?
Thank you for voting!
washer would not spin or agitate
I first took the 2 screws out and disconnected the wires, I got my parts ordered and when they came in I put it back together then plugged th wires back in. I really could not believe that I could do something of this nature but when I started it was easy. My boyfriend wanted to take the washer to a repair shop, but I said first I will take a look and see if it will be worth saving. Otherwise I will junk it. It cost me with shipping costs 41.00 I am very proud of my self.
But I read other peoples experience on fixing the same problem that I had so I gave it a try.
I will not hesitate to do other jobs myself. Doreen Finlaw
But I read other peoples experience on fixing the same problem that I had so I gave it a try.
I will not hesitate to do other jobs myself. Doreen Finlaw
Parts Used:

-
Doreen from Ashtabula, OH
-
Difficulty Level:Easy
-
Total Repair Time:1- 2 hours
-
Tools:Screw drivers, Socket set, Wrench (Adjustable)
6 of 10 people
found this instruction helpful.
Was this instruction helpful to you?
Thank you for voting!
Dryer drum turned hard because rollers were worn
Remove top, front and drum. Top is removed by sliding a putty knife under the front corners and pushing the tabs back. Front is held with screws. Disconnect two electrical connectors. Rollers are easily accessible and changed.
Parts Used:
-
Paul from STONE CREEK, OH
-
Difficulty Level:Easy
-
Total Repair Time:30 - 60 mins
-
Tools:Nutdriver, Pliers
4 of 4 people
found this instruction helpful.
Was this instruction helpful to you?
Thank you for voting!
Dryer was squealing
Disconnected Power cord, removed vent pipe, removed back panel, had to slide top cover off to remove additional screw holding back on. Went down to where the Idler Pulley was, removed old piece by depressing on the spring loaded actuator and slid it off the belt and all. Replaced same as removal.
Parts Used:
-
Kevin from VALDOSTA, GA
-
Difficulty Level:Very Easy
-
Total Repair Time:30 - 60 mins
-
Tools:Nutdriver, Screw drivers
4 of 4 people
found this instruction helpful.
Was this instruction helpful to you?
Thank you for voting!
Annoying loud metal to metal screeching noise.
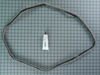
Took the front part of the dryer out, released tension on the idler pulley, took the drum out, and remove the old drum seal. Make sure you remove the old adhesive with sandpaper or wire brush. Put the new adhesive on the seal, not on the drum. Adhesive is very runny. Seal may need to be stretched to fit the drum. Set the seal on the drum, let sit a few minutes. Put everything back together.
Parts Used:
-
Ricardo from ARBUCKLE, CA
-
Difficulty Level:Really Easy
-
Total Repair Time:30 - 60 mins
-
Tools:Screw drivers, Socket set
4 of 4 people
found this instruction helpful.
Was this instruction helpful to you?
Thank you for voting!
slow spin
-
eugene from abbott, TX
-
Difficulty Level:Really Easy
-
Total Repair Time:30 - 60 mins
4 of 4 people
found this instruction helpful.
Was this instruction helpful to you?
Thank you for voting!