



















11092974102 Kenmore Washer Dryer Combo - Instructions
Keep searches simple. Use keywords, e.g. "leaking", "pump", "broken" or "fit".
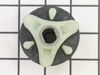
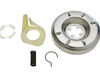
In the spin cycle, drum would'nt spin unless assisted
First off unplug the machine then turned off H/C water supply and removed hoses, laid the machine on its side, removed 3 motor supp. bolts, loosened drum pulled out shaft and clutch assembly was right there. Also replaced coupling while it was apart. And to think, a svce company wanted 179.00 just to walk in my door and diagnose the pblm. Then, parts and labor were extra. Thanks for the help/advice, piece of cake!!!!!!!
Parts Used:
-
ANTHONY from NY, NY
-
Difficulty Level:Really Easy
-
Total Repair Time:30 - 60 mins
-
Tools:Nutdriver, Pliers, Screw drivers, Socket set
22 of 24 people
found this instruction helpful.
Was this instruction helpful to you?
Thank you for voting!
Cog stripped causing agitator to not turn
Removed top cap on agitator w/ flathead screwdriver. Removed protective cap over bolt and cog housing shaft. Used 7/16 deep socket w/ extension to remove bolt. Removed housing where stripped cogs were located. Cogs seated loosely in shaft housing no tools required to remove cogs. Replaced cogs in housing, made sure everything was lined correctly. re-inserted housing into shaft. ,screwed bolt, replaced caps and works like new.
Parts Used:

-
Vicki from Houston, TX
-
Difficulty Level:Easy
-
Total Repair Time:Less than 15 mins
-
Tools:Screw drivers, Wrench set
22 of 25 people
found this instruction helpful.
Was this instruction helpful to you?
Thank you for voting!
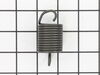
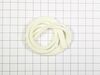
Tub did not center and seal was hanging out of tub
Laid washer on front side and removed top spring, then lifted the tub assembly to replace the right side spring, the one behind the motor was the hardest, I lifted the tub then removed the spring bracket at the tub with pliers and a socket. The top seal all I had to do was take the 4 screws that hold the top on (it takes a long extension) then sit it bak up and I lifted the top up to give me enough room to unsnap the top piece of the tub, cleaned it up put seal in. The parts fit perfitlt and real fast shipping, I bookmarked the site and will buy from again. JIM
Parts Used:
-
James from Nelsonville, OH
-
Difficulty Level:Easy
-
Total Repair Time:1- 2 hours
-
Tools:Pliers, Socket set
22 of 25 people
found this instruction helpful.
Was this instruction helpful to you?
Thank you for voting!
tub off center, rubbing on outer tub in spin
turned the washer on it's back and shoved the tub to the side to release pressure on a spring ,pulled it loose and installed new one. this worked for the back two then turned washer on it;s face and repeted the process on the front spring.
Washer works great now.
Washer works great now.
Parts Used:
-
Charles from Rose Bud, AR
-
Difficulty Level:A Bit Difficult
-
Total Repair Time:1- 2 hours
-
Tools:Pliers
21 of 24 people
found this instruction helpful.
Was this instruction helpful to you?
Thank you for voting!
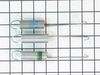
The support sprint had broke which left the basin unleveled so water would leak behind the basin and onto the floor
I replaced the broken support spring and the problem was fixed
Parts Used:
-
Michael from Newark, DE
-
Difficulty Level:Really Easy
-
Total Repair Time:Less than 15 mins
36 of 69 people
found this instruction helpful.
Was this instruction helpful to you?
Thank you for voting!
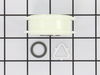
Idler Pulley broke
I disconnect the power, then the vent pipe. I removed the back panel of the dryer to access the pulley and removed the belt. Replaced the back and put everything back together.
Parts Used:
-
Keith from Richmond, VA
-
Difficulty Level:Really Easy
-
Total Repair Time:15 - 30 mins
-
Tools:Socket set
21 of 26 people
found this instruction helpful.
Was this instruction helpful to you?
Thank you for voting!
Although the motor was running, washer wouldn't agitate or spin.
After disconnecting the electrical supply, first remove the two screws at either end of the control panel and fold it back away from the washer top. Then, unplug the electrical lid switch connection. Now, remove the two clips at either end on top to disconnect the housing from the washer back and chassis. The motor is sandwiched between the water pump in the front and transmission at the rear. The Direct Drive Coupling connects the rear motor shaft to the transmisson. After you have taken the outter portion of the washer off, remove the two snap clips that hold the water pump in place and slide the pump off the front shaft. Best to also disconnect the upper hose connection so the pump can be moved out of the way. Caution though, remaining water in tub will drain out. Now remove the two screws that hold the clips in place which secure the motor to the transmission. Careful, as the old Direct Drive Coupling is probably destroyed, the clips are the only thing holding the motor in place and the motor needs to be supported so it won't drop to floor when the clips are removed. Be careful not to lose the four rubber grommets which sit between the motor and transmission bracket. After motor is on floor remove the old plastic slip-on direct drive coupling discs from both the motor and transmission shafts. The new replacement discs have steel centers which do not slide onto the shafts as easily as the old plastic ones did. I had to tap the center steel portion onto the shafts using a hammer and a deep wall socket the same width as the steel portion of the disc. Be careful! I'm sure that tapping the plastic portion of the disc to properly seat it on the shaft will break it away from the steel portion. In my case, It took me several attempts to completely seat the new discs. I had to do quite a bit of tapping to get the discs seated far enough onto the shafts so that the motor slipped easily against the transmission bracket grommets and the retainer clips snapped back into place easily. Reassembly is simply reversing the steps you took when taking the unit apart. Before putting the outter housing back in place, I checked to make sure everything was running smoothly by jumping out the electrical snap-in connection for the lid switch and running the machine in the spin cycle. Remember, if you don't jump out the lid switch and just try to test the unit in the aggitate cycle, the machine has to first fill with water.
Parts Used:
-
Thomas from Commack, NY
-
Difficulty Level:A Bit Difficult
-
Total Repair Time:30 - 60 mins
-
Tools:Pliers, Screw drivers, Socket set, Wrench set
20 of 24 people
found this instruction helpful.
Was this instruction helpful to you?
Thank you for voting!
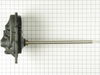
The spin gear was striped.
I had to take the motor and transmission out. They are one piece. Removed the clutch, take off trans. cover, remove a snap ring, take the striped gear off, and put the new one on. Then put put everything back on the way it came off.
Parts Used:
-
Aaron from Lake Mills, WI
-
Difficulty Level:A Bit Difficult
-
Total Repair Time:1- 2 hours
-
Tools:Pliers, Socket set
21 of 27 people
found this instruction helpful.
Was this instruction helpful to you?
Thank you for voting!
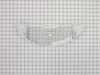
The sensor would not slide into grill
Initially, i watched the how to do it instruction in the fix website to determine the complexity of repairs. The instruction built up my confidence. I ordered and recieved the grill amd the two new sensors. I placed the two new sensors into the new grill sensor slots. Then removed the old grill by unscrewing three screws. Connected the two sensors positioned the grill and screwed in the three screws put the lent stray in the grill and closed the dyer door. I have been a happy camper ever since. I saved the $75 home insurance fee plus maintenence installment. Thanks
Parts Used:

-
sandra*broadnax from BRISTOW, VA
-
Difficulty Level:Easy
-
Total Repair Time:Less than 15 mins
-
Tools:Screw drivers
18 of 18 people
found this instruction helpful.
Was this instruction helpful to you?
Thank you for voting!
Top Half of Agitator would not function without appying sideways pressure
Heard about the website... 1 minute to find it, 10 minutes to order new cogs... 3 day wait for new parts... Rec'd Fedex, 15 minutes total to pull the agitator cover (bleach dispenser) then the bung cover with o-ring (just lift out) expose bolt, unskrew and remove top portion of agitator or entire agitator if it's easier. Seperate, remove black cog holder (slides up the spindle) and replace cogs one at a time just like the old ones. Reassemble in reverse and you are back in business. Saved the $75 deductible on my home appliance warrenty. You guys are the best... cheers...
Parts Used:
-
Donald from Fredericksburg, VA
-
Difficulty Level:Really Easy
-
Total Repair Time:15 - 30 mins
-
Tools:Socket set
18 of 21 people
found this instruction helpful.
Was this instruction helpful to you?
Thank you for voting!
idler pully sqwieling
once the back is off remove belt from tentioner and remove v clip. smooth shaft with wd-40 and scotch brite , then install new idler replace v clip
and your done !!!
and your done !!!
Parts Used:
-
Jerry Duty from Fort Walton Beach, FL
-
Difficulty Level:Really Easy
-
Total Repair Time:Less than 15 mins
-
Tools:Screw drivers
19 of 24 people
found this instruction helpful.
Was this instruction helpful to you?
Thank you for voting!
Agitator was barely agitating. Making a clicking noise.
Removed agitator cap. Removed bolt inside with socket wrench. Located plastic cogs Pulled out old cogs and slid in new cogs and put back together and works great. Easy to take apart and put back together. Very cheap repair. Cogs less that $4.00 plus shipping. Shipped next working day.
Parts Used:
-
Charmaine from Slidell, LA
-
Difficulty Level:Easy
-
Total Repair Time:15 - 30 mins
-
Tools:Socket set
17 of 18 people
found this instruction helpful.
Was this instruction helpful to you?
Thank you for voting!
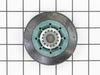
noisy drum
the job would have gone faster if the right parts had been sent in the first place. I would have never paid for two day shipping. In the repair, I removed the rear panel, clipped the plastic triangle holding the bearing, installed the new bearing and new clip.
Parts Used:
-
Jeff from Mesa, AZ
-
Difficulty Level:A Bit Difficult
-
Total Repair Time:30 - 60 mins
-
Tools:Nutdriver, Screw drivers, Wrench (Adjustable), Wrench set
20 of 27 people
found this instruction helpful.
Was this instruction helpful to you?
Thank you for voting!
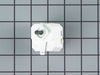
Dryer would not start
It was as easy as 123 took off old part reconnected the wires put the srews on put the cover back and my dryer is working like new again thank you PartSelect for making my life a little easyer Anna Lavergne
Parts Used:
-
Anna from Spring Hill, FL
-
Difficulty Level:Really Easy
-
Total Repair Time:15 - 30 mins
-
Tools:Pliers, Screw drivers, Socket set
18 of 22 people
found this instruction helpful.
Was this instruction helpful to you?
Thank you for voting!
Would not spin
Remove the nut from the top of the motor shift inside of wsher. then remove the wire harness plug. Take out three bolts side the shaft and motor out. Replace clutch and install in reverse order.
Parts Used:
-
floyd from Slidell, LA
-
Difficulty Level:Easy
-
Total Repair Time:1- 2 hours
-
Tools:Pliers, Screw drivers, Socket set
23 of 39 people
found this instruction helpful.
Was this instruction helpful to you?
Thank you for voting!