This dryer drum roller kit is designed to restore smooth and quiet operation in a wide range of dryer models. It includes two drum rollers, four tri-rings, and one to two retaining washers, providing ...
$28.95
In Stock
Order within the next 6 hrs and your part ships today!
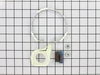
If you notice that your dryer is noisy or will not tumble, you may need to replace the tri ring. This part is triangular, and is less than an inch in size. Tri rings can be found both on the idler pul...
$17.01
In Stock
Order within the next 6 hrs and your part ships today!
This dryer lint filter and screen assembly is a genuine replacement part designed to trap lint and fibers during the drying cycle, helping to maintain airflow and prevent blockages in the vent system....
$76.79
In Stock
Order within the next 6 hrs and your part ships today!
Replace the shaft of your left side drum support roller with this part from Whirlpool/Kenmore. This replacement shaft is 2-7/8 inches long. It is meant for use with many of Whirlpool/Kenmore's gas and...
$64.85
In Stock
Order within the next 6 hrs and your part ships today!
Very easy once I figured out how to open it up to see what was the matter. 1 Remove power. 2 Open the lint filter cover and remove the 2 Phillip screws. 3 Pry the front of the top cover up to separate the cover from the plastic clips that secure to the top front panel. 4 Remove the 2 nut screws securing the top of the front panel to each side cover. 5 Pull front panel out slightly to detach wiring from the cover switch. 6 Pull front panel straight up and set aside. 7 Remove drum belt from tensioner and motor pulley under the drum. 8 Remove drum by pulling it toward the front between the 2 sides. 9 Locate the 2 support rollers and their mounting shafts. Change the shafts at this point if they are worn. (Mine were OK) 10 Remove the support bracket from the shaft if present. 11 Remove the plastic triangular retainer from the shaft and slide the old wheel off of the shaft. 12 Clean the shaft from any bearing debris. 13 Replace the rollers and retainers. 14 Insert drum through the front side panels making sure the seal on the rear of the drum is centered around the opening and not folded inside the opening. 15 Place the belt on the drum and thread the belt through the tensioner and around the motor pulley. 16 Position the front cover on the lower clips on each of the sides. 17 Re-attach the 2 wires for the cover switch. 18 Pull the drum up so the opening on the drum and front cover align. 19 Screw together the side panels to the front panel using the 2 hex headed screws. 20 Check for binds by rotating the drum several times by hand. 21 Press the front of the top panel down toward the front panel to engage the plastic clips attaching the top to the front. Watch for the lint filter housing alignment as you push the top panel down. 22 Replace the 2 screws to attach the lint filter to the top cover. 23 Plug in machine and test.
Frist I disconnected the water lines and power cord. Then I leaned the washer back against the wall. Removed the 2 pump retainers and then the pump. Next removed the 2 screws from the motor retainers and pulled off the retainers and motor. Then removed the 3 bolts from the Gear case. Then removed the cap from the top of the agitator with a flat screw driver. Then removed the bolt from the top of the gear shaft. and removed the auger and agitator assembly. Then removed the gear case from the washer. Next removed the slip ring and then the clutch from the top of the gear case. Next removed the 1/4" screws from cover of gear case and removed the cover. Found the top gear bad. Ordered the new gear and pinion kit. Couldn't find any part #'s to match what PartSelect had. Ordered the gear that they should that fit most washers. The pics they had up looked the same as the one that was bad. Had the new gear in 3 days put it back together and it still wouldn't work right. Took it apart again and looked at it and found a small clip on the bottom side of the gear was upside down. Fliped it over put the gear back in and ran the washer with the gear case out and it worked. Put it back together again. And learned a good lesson always watch how you take things apart for when it's time to put it back together!


 Diagram and Parts List for Kenmore Washer Dryer Combo")