




















11067052600 Kenmore Dryer - Instructions
Keep searches simple. Use keywords, e.g. "leaking", "pump", "broken" or "fit".
Making a racket.
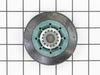
Took the top off and then front off and drum out . Replaced Drum roller and shaft support bolts.
Parts Used:
-
Carl from MARION, KY
-
Difficulty Level:Really Easy
-
Total Repair Time:More than 2 hours
-
Tools:Nutdriver, Pliers, Screw drivers, Socket set
3 of 3 people
found this instruction helpful.
Was this instruction helpful to you?
Thank you for voting!
Loud squeaking noise
Replaced the most worn drum wheel any lubed the belt tension arm pulley. The noise didn't go completely away. There are 4 drum wheels. I need to order 3 more wheels and the tension arm now.
Parts Used:
-
Steven from WICHITA, KS
-
Difficulty Level:Really Easy
-
Total Repair Time:30 - 60 mins
-
Tools:Pliers
3 of 4 people
found this instruction helpful.
Was this instruction helpful to you?
Thank you for voting!
Dryer stopped heating
We have a very early model of the He3. We had to follow directions for the He2 model to replace the heater element and thermostat. Access is easy through the front panel, but removing and replacing the element required some force and maneuvering in a small area.
We replaced both the element and the thermostat since we had the entire part disconnected and removed. So far working great!
We replaced both the element and the thermostat since we had the entire part disconnected and removed. So far working great!
Parts Used:
-
Linda from DANVILLE, CA
-
Difficulty Level:A Bit Difficult
-
Total Repair Time:1- 2 hours
-
Tools:Screw drivers, Socket set
3 of 4 people
found this instruction helpful.
Was this instruction helpful to you?
Thank you for voting!
Dryer won’t start
Drum belt broke. Found drive shaft belt guide broke. Replaced pulley wheel since I had it apart.
Parts Used:


-
Kyle from HANOVER, IL
-
Difficulty Level:Really Easy
-
Total Repair Time:30 - 60 mins
-
Tools:Nutdriver, Socket set
3 of 4 people
found this instruction helpful.
Was this instruction helpful to you?
Thank you for voting!
Dryer won't start.Only make a click noise.
Remove top,front and panels.change thermal fuse and outlet thermistor.
Parts Used:
-
Candido from GREENVILLE, TX
-
Difficulty Level:Easy
-
Total Repair Time:Less than 15 mins
-
Tools:Screw drivers, Socket set
3 of 4 people
found this instruction helpful.
Was this instruction helpful to you?
Thank you for voting!
Dryer drum wouldn't turn and motor would shut off
First I was told by the maytag repair man that the motor was shot and it would be 467 dollars to repair. Since I didn't have that kind of money I decided to take it apart to see if I could replace the motor myself. Once I had it apart I saw the part that held the motor in place was broken off and the motor was out of place causing it too shut itself off. Once I figured it all out it took about 2 minutes to replace the less than 6 dollar part! Thanks partSelect!!!
Parts Used:

-
Cynthia M from Westfield, MA
-
Difficulty Level:Easy
-
Total Repair Time:More than 2 hours
-
Tools:Screw drivers
3 of 4 people
found this instruction helpful.
Was this instruction helpful to you?
Thank you for voting!
Bulb worked for a couple days and has now burned out, filaments dangling
To replace the light bulb, I removed the screw and the cover, unscrewed the old bulb, replaced with the new bulb and replaced the cover, securing it with the small screw. It worked appropriately with normal use for a few days and then I noticed the light was not coming on when I opened the door.
I removed the cover and pulled out the bulb to find that the filaments inside are dangling and burned through. I need them replaced, please.
I removed the cover and pulled out the bulb to find that the filaments inside are dangling and burned through. I need them replaced, please.
Parts Used:
-
Amy from JUNCTION, TX
-
Difficulty Level:Easy
-
Total Repair Time:Less than 15 mins
-
Tools:Screw drivers
3 of 4 people
found this instruction helpful.
Was this instruction helpful to you?
Thank you for voting!
Electric Heating Element went out.
I checked continuity of all electrical points. I took the top off, then the back, and front of the dryer off so it was easy to inspect the whole dryer. I was also able to clean unwanted dust, and lent with a shop vacuum by doing this.
Keep track of different screws, and mark each screw location with a permanent magic marker. Taking pictures with camera phone is very helpful. Pay attention to electrical connections as well, some of those will need to be dismantled.
Try not to take apart anything more than needed. Watching some online video's can be very helpful as well.
If uncomfortable doing this, call a service repair technician.
I'm a farm boy, and repairs usually come easy to me, but not always.
Keep track of different screws, and mark each screw location with a permanent magic marker. Taking pictures with camera phone is very helpful. Pay attention to electrical connections as well, some of those will need to be dismantled.
Try not to take apart anything more than needed. Watching some online video's can be very helpful as well.
If uncomfortable doing this, call a service repair technician.
I'm a farm boy, and repairs usually come easy to me, but not always.
Parts Used:
-
John from WELLS, MN
-
Difficulty Level:A Bit Difficult
-
Total Repair Time:1- 2 hours
-
Tools:Screw drivers, Socket set
2 of 2 people
found this instruction helpful.
Was this instruction helpful to you?
Thank you for voting!
Shutting off and had to wait before could turn back on
Followed online video very easy and dryer works like new one....
Parts Used:
-
Allen from KENNETT, MO
-
Difficulty Level:Really Easy
-
Total Repair Time:30 - 60 mins
-
Tools:Screw drivers, Socket set
2 of 2 people
found this instruction helpful.
Was this instruction helpful to you?
Thank you for voting!
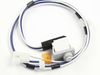
Door switch had failed. Dryer would not start.
Opened front of dryer and replaced switch.
Best part was ordering and receiving switch in two days. You guys really do ship the same day as ordered.
Best part was ordering and receiving switch in two days. You guys really do ship the same day as ordered.
Parts Used:
-
dan from Melbourne, FL
-
Difficulty Level:Really Easy
-
Total Repair Time:15 - 30 mins
-
Tools:Screw drivers
3 of 5 people
found this instruction helpful.
Was this instruction helpful to you?
Thank you for voting!
Lights turn on, all the beeps but dryer won't start.
I ordered the wrong part. It was pick and choose from the info provided.I checked again and found one that's 58% of the time the part.
Parts Used:
-
James from HONESDALE, PA
-
Difficulty Level:Really Easy
-
Total Repair Time:30 - 60 mins
-
Tools:Nutdriver, Pliers
2 of 2 people
found this instruction helpful.
Was this instruction helpful to you?
Thank you for voting!
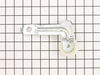
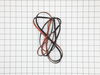
Broken dryer belt and broken idler pulley wheel
Looked it up on YouTube and followed the video instructions. Repair went fine after I got the correct parts ordered from two different places before I got the correct parts. Parts Select was the only one that sent the correct parts.
Parts Used:
-
ROGER from MADISON, TN
-
Difficulty Level:Really Easy
-
Total Repair Time:30 - 60 mins
-
Tools:Screw drivers, Socket set
3 of 5 people
found this instruction helpful.
Was this instruction helpful to you?
Thank you for voting!
Quick Boil burner would not stay heated and did not reach the required temperature.
The repair was easy. Shut off all power to the range, or unplug it. Remove the sheet metal back from the control panel using a nut driver or socket set. Pull the knob from the front of the control panel. Remove the two Phillips head screws that were hidden behind the knob. Pull the control switch out the back side of the control panel. Compare the old switch with the new one, to make absolutely sure you have the correct switch. Remove one wire at a time from the old switch and immediately install it in the exact same position on the new switch. When you have successfully transferred all of the wires from the old switch to the new switch, reinstall the new switch using the two Phillips screws. Reinstall the knob and the sheet metal cover. Plug the range back in, and/or turn the power back on. Trying boiling a pan of water to confirm that the repair resolved the issue.
Parts Used:
-
Ronald from NOVI, MI
-
Difficulty Level:Very Easy
-
Total Repair Time:Less than 15 mins
-
Tools:Nutdriver, Pliers
2 of 2 people
found this instruction helpful.
Was this instruction helpful to you?
Thank you for voting!
Dryer not heating
Confirmed I had incoming 240V, checked continuity on element switch confirmed bad. Ordered replacement part. U have to remove drum to replace element
Parts Used:
-
James from GREENVILLE, NC
-
Difficulty Level:Really Easy
-
Total Repair Time:30 - 60 mins
-
Tools:Nutdriver
2 of 2 people
found this instruction helpful.
Was this instruction helpful to you?
Thank you for voting!
Heater element had burnt open and would not heat.
I found a simple video on YouTube. I removed the front panel and door. I removed drum and belt drive. Heater element was then easily accessible. I removed all wires after taking pictures of wiring. Element was secured by one screw and one clip and was easily removed. Removed element from element cover. Checked thermostat and thermal overload. Put new element inside of element cover. Then replaced everything in reverse order. Removing lint from inside of dryer was probably the most difficult part of repair. Had to have assistance from my son to put drum belt back on but rest of replacement was simple.
Parts Used:
-
Joe from COWARD, SC
-
Difficulty Level:Really Easy
-
Total Repair Time:1- 2 hours
-
Tools:Nutdriver, Screw drivers, Socket set
2 of 2 people
found this instruction helpful.
Was this instruction helpful to you?
Thank you for voting!