




















11066134610 Kenmore Dryer - Instructions
Keep searches simple. Use keywords, e.g. "leaking", "pump", "broken" or "fit".
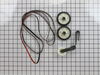
Loud rumble and finally the drum stopped because the belt broke
I opened the top and front of the dryer. 1st I pulled out the drum and cleaned up the lint and mess from the busted support roller. Next it was a matter of looking at the enclosed drawing and instructions. I could not believe it was that easy.
Parts Used:
-
William from Rocky Mount, VA
-
Difficulty Level:Easy
-
Total Repair Time:30 - 60 mins
-
Tools:Screw drivers, Socket set
3 of 5 people
found this instruction helpful.
Was this instruction helpful to you?
Thank you for voting!
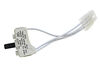
broken door switch light would not turn on and dryer kept running when door was opened.
First removed lint screen, then removed screws holding lint screen housing.Pushed on back of machine a little so that top could be pried up. Then replaced switch and put everything back together. Helps to have two people so one can push on back of top piece while top of machine is being pried up.
Parts Used:
-
Pam from PLANT CITY, FL
-
Difficulty Level:Easy
-
Total Repair Time:15 - 30 mins
-
Tools:Screw drivers
2 of 2 people
found this instruction helpful.
Was this instruction helpful to you?
Thank you for voting!
Bad door gasket
Removed old seal and replaced with new one. Save yourself time and get some acetone to remove old glue works great!
Parts Used:

-
Joseph from NEOSHO, MO
-
Difficulty Level:Very Easy
-
Total Repair Time:30 - 60 mins
-
Tools:Pliers, Screw drivers
2 of 2 people
found this instruction helpful.
Was this instruction helpful to you?
Thank you for voting!
Dryer would not operate
I removed the two screws underneath the lent trap the removed the two screws that held the dryer switch assembly. I then lifted up the top and disconnected the door switch assembly. Removing the door switch assembly was the toughest part, and it was not difficult. Simply grab a pair of pliers and pull. I the attatched the new door switch assembly and the four screws and my dryerwas as good as new. I paid around $20.00 including shipping and saved myself a couple of hundred dollars
Parts Used:
-
Joseph from Winterville, NC
-
Difficulty Level:Really Easy
-
Total Repair Time:15 - 30 mins
-
Tools:Screw drivers
2 of 2 people
found this instruction helpful.
Was this instruction helpful to you?
Thank you for voting!
dryer won't start
1. Didn't understand how to do continuity test for 3-wire door switch. After looking that up, I discovered that wasn't the problem ! I have tested, the thermal fuse, oscillating fuse,start switch, I've tested the timer and the black , blue connections go to zero ( continuity good) the tan , white connections just barely off of infinity. I've ordered a new timer. I'll let you know if that's the problem. If you can more diagnostic videos. AKH
Parts Used:
-
ALEX from ELMSFORD, NY
-
Difficulty Level:Really Easy
-
Total Repair Time:30 - 60 mins
2 of 2 people
found this instruction helpful.
Was this instruction helpful to you?
Thank you for voting!
Dryer did NOTHING.
Removed old door switch and tested with ohms meter. It registered as charged, but when black button was pushed it did not cut off (go to zero). Replaced the part just like the video showed. Only problem i had was dropping my screwdriver down into the dryer well. It was doing no harm so i left it there since i tried retrieving from the back but was not able to get entire back off!
Parts Used:
-
Shari from Mabank, TX
-
Difficulty Level:Easy
-
Total Repair Time:15 - 30 mins
-
Tools:Screw drivers
4 of 8 people
found this instruction helpful.
Was this instruction helpful to you?
Thank you for voting!
Making all types of squealing noises
I changed the belt, tension pully and rollers. Runs like new now. I also took the opportunity to clean it out real good while I had it apart.
Parts Used:
-
Kevin from White Haven, PA
-
Difficulty Level:Easy
-
Total Repair Time:30 - 60 mins
-
Tools:Pliers, Screw drivers, Socket set
3 of 5 people
found this instruction helpful.
Was this instruction helpful to you?
Thank you for voting!
Loud screeching when dryer tumbles
We had to pop open the top. Unscrew front of dryer from sides. Disconnecting the wires was a bit more difficult than expected. We had to use a tiny screwdriver to slide into the sides of the white wire connector on each side before pulling apart. Front drum falls when front of dryer is removed. It took two of us to reassemble - one to hold the drum while the other put the front on. Our problem turned out to be one wheel. We replaced both wheels and saved the rest of the parts. Hums along just fine.
Parts Used:
-
Joan from MANLIUS, NY
-
Difficulty Level:A Bit Difficult
-
Total Repair Time:30 - 60 mins
-
Tools:Screw drivers, Socket set
2 of 2 people
found this instruction helpful.
Was this instruction helpful to you?
Thank you for voting!
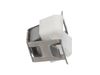
Broken door catch on dryer door
Gently remove the door bezel by prying it off with a small screwdriver. Then remove the door catch from the door with the same screwdriver. Be careful not to drop it in the door. I did and had to fish it out with a small hooked pick. Install the new door catch by sliding the top in first then the bottom. Again, careful not to drop it in the door. Then snap the door bezel back in place.
Parts Used:

-
Anthony from NORTH ADAMS, MA
-
Difficulty Level:Very Easy
-
Total Repair Time:Less than 15 mins
-
Tools:Screw drivers
2 of 2 people
found this instruction helpful.
Was this instruction helpful to you?
Thank you for voting!
The Dryer door would not latch. The door latch was broken and needed to be replaced.
Once I received the new latch I removed the latch cover with the flat head screw driver and worked out the old latch. I then positioned the new latch and snapped in place. I then replaced the cover and shut the Dryer door. The door latched and the repair was complete.
Parts Used:
-
Douglas from WINCHESTER, VA
-
Difficulty Level:Very Easy
-
Total Repair Time:Less than 15 mins
-
Tools:Screw drivers
2 of 2 people
found this instruction helpful.
Was this instruction helpful to you?
Thank you for voting!
Light wouldn’t work and dryer wouldn’t stop when you open the door.
Remove the lint screen, then remove the two (2) Phillips screws that are at the entrance of the lint screen compartment. Take a putty knife and insert it under the top pannel of the dryer about 1” in from the outside and push the putty knife in as you lift that corner of the pannel. Repeat on the other side. Then raise the lid and prop it up. The door switch is on the right side just behind the door on the inside. Open the door and remove the two screws that hold the switch and remove the switch. Install the new switch like the old one came out and close it up you’re ready to go! It is very easy you can’t hurt anything.
Parts Used:
-
Karen from HUNTSVILLE, TX
-
Difficulty Level:Really Easy
-
Total Repair Time:Less than 15 mins
-
Tools:Screw drivers
2 of 2 people
found this instruction helpful.
Was this instruction helpful to you?
Thank you for voting!
the metal plate connecting the door catch was broken, so I ordered the part
I pushed one end of the catch on upper side the hole and when locked, I pushed the other end of the catch to the lower side to get locked. To complete, the white cover was inserted on top of the catch and done.
Parts Used:
-
Cris from GLENDALE, CA
-
Difficulty Level:Really Easy
-
Total Repair Time:Less than 15 mins
2 of 2 people
found this instruction helpful.
Was this instruction helpful to you?
Thank you for voting!
Dryer would not turn on.
I just followed the instructions from this site for the door switch part and had it running in 10 minuets. This site made it very easy.
Parts Used:
-
RICHARD from LEVERING, MI
-
Difficulty Level:Very Easy
-
Total Repair Time:Less than 15 mins
-
Tools:Screw drivers
2 of 2 people
found this instruction helpful.
Was this instruction helpful to you?
Thank you for voting!
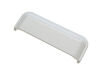
Broke handle on dryer and replaced it with a new one
Followed the directions and just snapped the new handle in place
Parts Used:
-
Robert from MIDDLEBORO, MA
-
Difficulty Level:Really Easy
-
Total Repair Time:Less than 15 mins
3 of 5 people
found this instruction helpful.
Was this instruction helpful to you?
Thank you for voting!
door catch had crackedt
took out old ,twisted in the new one it was nice to have the right part the first time!! thank-you
Parts Used:
-
stephen from tewksbury, MA
-
Difficulty Level:Really Easy
-
Total Repair Time:Less than 15 mins
-
Tools:Screw drivers
2 of 2 people
found this instruction helpful.
Was this instruction helpful to you?
Thank you for voting!