




















11064102301 Kenmore Dryer - Instructions
Keep searches simple. Use keywords, e.g. "leaking", "pump", "broken" or "fit".
broken rib belt
Followed instructions from video, just removed lint collector, dryer top and front panel, removed broken belt and old idler pulley. Vacuumed and cleaned up inside dryer.installed new pulley and rib belt according to printed instructions,installed new dryer duct and new clamps. Saved myself huge service call or having to buy new dryer.Will be checking with this site on any future repairs instead of calling a repair service. Your video made it real easy to repair.and I am 77 years old.. Bob
Parts Used:


-
Robert from PEABODY, MA
-
Difficulty Level:Really Easy
-
Total Repair Time:15 - 30 mins
-
Tools:Nutdriver, Screw drivers
6 of 6 people
found this instruction helpful.
Was this instruction helpful to you?
Thank you for voting!
couldn't get the wire connection anywhere after we bought the heating element.
we received the two heating element wires in 3 days and connected the heating element with no problem works great.
Parts Used:
-
Betty from Erie, PA
-
Difficulty Level:Really Easy
-
Total Repair Time:15 - 30 mins
-
Tools:Socket set
6 of 6 people
found this instruction helpful.
Was this instruction helpful to you?
Thank you for voting!
Needed to repair and replace dryer motor pulley and pully
this was very was very easy. But I deviated from the You Tube instructions. One to release the motor pulley. I needed to use 2 adjustable wrenches for a longer lever. I needed to use a hammer to help release pulley. Second to remove the dryer cable I needed to use a small screw driver to aid in the release. ---- the part from the company was a perfect fit.
Parts Used:
-
Rob from GAITHERSBURG, MD
-
Difficulty Level:Really Easy
-
Total Repair Time:30 - 60 mins
-
Tools:Wrench (Adjustable)
6 of 6 people
found this instruction helpful.
Was this instruction helpful to you?
Thank you for voting!
damp clothes after drying....
repair was fairly cut and dry...if you have any handyman experience....the hard part was partselect web page...starts out easy to locate part if you have the correct model number....however after that it can be confusing as to what you are looking for part wise and if you have located the correct part....diagrams are helpful if you could see them and/or understand them or what you are looking for....as a novice can be fustrateing....even after calling partselect for help/explaination....other wise it went well for a repair and hopeful will get another 10yrs out of this dryer.....
Parts Used:
-
John from San Antonio, TX
-
Difficulty Level:Easy
-
Total Repair Time:30 - 60 mins
-
Tools:Socket set
6 of 6 people
found this instruction helpful.
Was this instruction helpful to you?
Thank you for voting!
Dryer stopped heating
(Always unplug dryer before making any repairs) I opened the dryer and checked the heating element. Making sure that the connection was good and nothing was damaged, I determined the problem was overheated wires. They melted and lots connection. I replaced them with the heating element wire connection kit. Easy to install and simple to get right. I cleaned the dryer again with a vaccum cleaner, removing all the lint, and checked the vents, making sure they were clear...I turned the breaker on (it was tripped when the dryer overheated)and everything worked great.
Parts Used:
-
Joseph from Austin, TX
-
Difficulty Level:Really Easy
-
Total Repair Time:15 - 30 mins
-
Tools:Screw drivers, Socket set
6 of 7 people
found this instruction helpful.
Was this instruction helpful to you?
Thank you for voting!
Dryer was not heating
We pulled the back off the dryer and we weren't sure where the problem was exactly. So we pulled off the heating element and the thermostat. The heating element seemed to be burnt out, so we ordered that and the thermostat. We got the parts very quickly, so we put them in and found that the dryer still didn't heat. There was another thermostat (trip thermostat) that we decided to order and try...bingo...that was it. Now it works like a charm.
Parts Used:
-
Teresa from Gilroy, CA
-
Difficulty Level:Easy
-
Total Repair Time:15 - 30 mins
-
Tools:Pliers, Screw drivers, Socket set
7 of 10 people
found this instruction helpful.
Was this instruction helpful to you?
Thank you for voting!
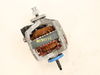
Start windings burnt out on original motor (dryer would not start)
The repair was fairly straight-forward. I removed the front of the dryer, lifted the top off, and then released the tension off the belt dy depressing the pulley arm. Once the belt was off, the drum came right out and then it was on to unhooking the wiring from the old motor. Very simple up till this point. The snag came when I went to unthread the impeller fan off of the old motor shaft. It was permanently sealed onto the shaft so I had to cut the old shaft into using a reciprocating saw was a metal-cutting blade. Once this was done the new motor installed easily exactly like the old one was mounted. I had to also purchase a new fan due to the fact that I was unable to remove the cut shaft from the old fan. All parts worked great and the dryer assembled back together easily. Works like a new dryer now.
Parts Used:
-
Frank from Smyrna, TN
-
Difficulty Level:Easy
-
Total Repair Time:1- 2 hours
-
Tools:Pliers, Screw drivers, Socket set, Wrench (Adjustable)
7 of 10 people
found this instruction helpful.
Was this instruction helpful to you?
Thank you for voting!
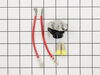
Stopped drying
Steve video
Parts Used:
-
Vincent from Kenly, NC
-
Difficulty Level:Very Easy
-
Total Repair Time:30 - 60 mins
-
Tools:Socket set
6 of 7 people
found this instruction helpful.
Was this instruction helpful to you?
Thank you for voting!
Dryer would not start.
Unplug dryer from mains. Remove the back of the dryer. Thermal fuse is located on the left hand side near the bottom as you face the back of the dryer. Remove fuse and connect new fuse. Never repaired an appliance before and this was so easy!
Parts Used:
-
Rebecca from Scarsdale, NY
-
Difficulty Level:Really Easy
-
Total Repair Time:15 - 30 mins
-
Tools:Screw drivers
7 of 10 people
found this instruction helpful.
Was this instruction helpful to you?
Thank you for voting!
Dryer was blowing cold air
It's amazing... I fixed my dryer!! I am a 47 year old woman with no technical training, and I did it!
I live in a apartment and I bought the Whirlpool Dryer (Model #LER7646JQ0) USED for $150 about 6 months ago. The dryer started blowing cold air, so I called the place that I bought it from and they quoted me a price of at least $300 to fix the dryer.
After searching through google, I found the partselect.com website, and read the repair stories. I decided to take a chance. I ordered just 2 of the suggest 4 parts that could fix the issue, and the dryer did not work. The next day I order the other 2 parts, and that did it - my dryer was fixed.
The diagrams on the site were a little confusing to me (the dryers looks a little simpler inside) but it was easy to repair. I used a screw driver and plier to do the repair, however it would have been much easier if I had a socket set. I would suggest buying all parts suggested, and return the items you don't need. Here are the parts I used:
1. THRMST-FIX (Thermostat, High Limit 221 F
2. USE WPL 279838 (Heating Element (10" long x 6" wide)
3. Thermal Cut-Off Kit
4. Cycling Thermostat (Limit: 155-25) (Thermostat, Internal-Bias)
Good Luck!
I live in a apartment and I bought the Whirlpool Dryer (Model #LER7646JQ0) USED for $150 about 6 months ago. The dryer started blowing cold air, so I called the place that I bought it from and they quoted me a price of at least $300 to fix the dryer.
After searching through google, I found the partselect.com website, and read the repair stories. I decided to take a chance. I ordered just 2 of the suggest 4 parts that could fix the issue, and the dryer did not work. The next day I order the other 2 parts, and that did it - my dryer was fixed.
The diagrams on the site were a little confusing to me (the dryers looks a little simpler inside) but it was easy to repair. I used a screw driver and plier to do the repair, however it would have been much easier if I had a socket set. I would suggest buying all parts suggested, and return the items you don't need. Here are the parts I used:
1. THRMST-FIX (Thermostat, High Limit 221 F
2. USE WPL 279838 (Heating Element (10" long x 6" wide)
3. Thermal Cut-Off Kit
4. Cycling Thermostat (Limit: 155-25) (Thermostat, Internal-Bias)
Good Luck!
Parts Used:
-
All About Eve from Hollywood, FL
-
Difficulty Level:Easy
-
Total Repair Time:15 - 30 mins
-
Tools:Pliers, Screw drivers
6 of 8 people
found this instruction helpful.
Was this instruction helpful to you?
Thank you for voting!
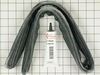
It was having a hard time starting and would quit.
First I had to take the top of the dryer off by taking the two screws off of the lint trap on top then I pushed the top forward a little and lifted up. Then I had to take the front of the dryer off (I think there was two screws). After that I had to take the belt off to be able to get the drum out. I pulled off the old seal and had to use some glue remover to get the old glue off. I then put the new seal on did a little bit at a time to make sure it was on correctly. The glue is really sticky once it starts to dry. It takes two people to put the seal on especially when it gets down to the end. Although my dryer defenitly needed a new seal it was not the problem. It was not very difficult at all, just more time consuming with trying to get the old glue off. Will be buying a new motor, found one cheap and alot less expensive than buying a new dryer considering when I am done I will pretty much have a new dryer for about $120.00.
Parts Used:
-
Christine from Minot, ND
-
Difficulty Level:Really Easy
-
Total Repair Time:1- 2 hours
-
Tools:Socket set, Wrench set
5 of 5 people
found this instruction helpful.
Was this instruction helpful to you?
Thank you for voting!
dryer would not heat
thought the heating element was bad, once inside the element
looked good, tested continuity , tested good.
further test revealed I only had 110 volts at the wall outlet,traced problem to fuse blown in disconnect box under
the house.
Did not need the heating element.luckily parts select is taking the new element back since I did not use it.
Hope this review helps.
looked good, tested continuity , tested good.
further test revealed I only had 110 volts at the wall outlet,traced problem to fuse blown in disconnect box under
the house.
Did not need the heating element.luckily parts select is taking the new element back since I did not use it.
Hope this review helps.
Parts Used:
-
Jessica from Campton, KY
-
Difficulty Level:Easy
-
Total Repair Time:30 - 60 mins
-
Tools:Nutdriver, Pliers
6 of 8 people
found this instruction helpful.
Was this instruction helpful to you?
Thank you for voting!
bad heating element
Pulled the dryer away from the wall took back cover off the dryer. Used volt/ohm meter to identify the bad element. Ordered the element it came in two days. 2 screws and 2 wires to plug in and we were back to drying cloths
Parts Used:
-
Kevin from pendleton, IN
-
Difficulty Level:Really Easy
-
Total Repair Time:15 - 30 mins
-
Tools:Nutdriver
5 of 5 people
found this instruction helpful.
Was this instruction helpful to you?
Thank you for voting!
Dryer would not heat up
Un plug or remove power before you start. First you would have to remove the rear panel of the dryer. All you need is a quarter inch nut driver. Then look at the bottom right side of the dryer. There you will see the heating duct. At the very bottom is where the element is. There are two screws on both sides( they will all be removed with a quarter inch nutdriver ). After you have removed the four screws holding the element on you will have to remove two wires from the elemet be sure that you mark them and dont mix them up. You will also have to remove the round temperature sensor because you will have to reinstall it on the new element. Then you get new element and reverse the order of my directions. Good luck and be safe ALL WAYS REMOVE POWER BEFORE WORKING ON ELECTRICAL APPLIANCES.
Parts Used:
-
Clinton from Warren, AR
-
Difficulty Level:Easy
-
Total Repair Time:15 - 30 mins
-
Tools:Nutdriver, Pliers
6 of 8 people
found this instruction helpful.
Was this instruction helpful to you?
Thank you for voting!
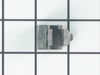
Dryer Top Panel is Loose
1) Unplug power cable from dryer.
2) Remove the 2 screws that secure the chute for lint filter screen with
Phillips head screwdriver.
3) Remove the lint filter screen.
4) Depress plastic locking clip on each side with putty knife to release
tension and lift up top panel to clear the locking clips. Each locking
clip is located 2-1/2 inches from the front edge of side panel.
5) Lift the top panel and lean against the wall for support. If dryer top
panel cannot be raised all the way due to cabinet(s) above, tape
the dryer top panel to cabinet above or have somebody hold the
top panel for temporary support.
6) Install the new metal locking clips. Ensure that the elongated tab
of the metal locking clip is towards the front of dryer. Compress
locking clip lightly with pliers and push down into the hole.
7) Lower the dryer top panel and press it down in place over the metal
locking clips for a tight fit.
8) Reinstall the 2 screws to secure the lint filter chute.
9) Reinstall lint filter screen.
10) Reconnect power cable for dryer.
11) Turn on dryer and inspect that all dryer panels (top, sides and
front) are tight and secured.
Repair Duration: 5 minutes
2) Remove the 2 screws that secure the chute for lint filter screen with
Phillips head screwdriver.
3) Remove the lint filter screen.
4) Depress plastic locking clip on each side with putty knife to release
tension and lift up top panel to clear the locking clips. Each locking
clip is located 2-1/2 inches from the front edge of side panel.
5) Lift the top panel and lean against the wall for support. If dryer top
panel cannot be raised all the way due to cabinet(s) above, tape
the dryer top panel to cabinet above or have somebody hold the
top panel for temporary support.
6) Install the new metal locking clips. Ensure that the elongated tab
of the metal locking clip is towards the front of dryer. Compress
locking clip lightly with pliers and push down into the hole.
7) Lower the dryer top panel and press it down in place over the metal
locking clips for a tight fit.
8) Reinstall the 2 screws to secure the lint filter chute.
9) Reinstall lint filter screen.
10) Reconnect power cable for dryer.
11) Turn on dryer and inspect that all dryer panels (top, sides and
front) are tight and secured.
Repair Duration: 5 minutes
Parts Used:
-
MONTE from CHESAPEAKE, VA
-
Difficulty Level:Very Easy
-
Total Repair Time:Less than 15 mins
-
Tools:Pliers, Screw drivers
5 of 5 people
found this instruction helpful.
Was this instruction helpful to you?
Thank you for voting!