




















1067600302 Kenmore Refrigerator - Instructions
Keep searches simple. Use keywords, e.g. "leaking", "pump", "broken" or "fit".
Condenser fan making noise
I removed 7 screws hold the heavy cardboard cover on the rear of the fridge. The dificult part was taking the screws that hold the 3 fan motor braces on the fan out. After that it was a matter of making the wire conections and putting it back in. I did not have enough room to laydown to do the work, If i had it would have been a lot easier to see the screws that had to be removed. All in all an easy job, and the part was a perfect fit.
Parts Used:

-
Richard from North Easton, MA
-
Difficulty Level:Easy
-
Total Repair Time:15 - 30 mins
-
Tools:Nutdriver, Pliers, Wrench set
2 of 4 people
found this instruction helpful.
Was this instruction helpful to you?
Thank you for voting!
Broken Water Nozzle at Door
(1) Ordered PS371704 from PartSelect! Best advice EVER! (2) Unplugged refrigerator (since the water solenoid on the back of the refrigerator is powered to switch ON the water, you NEVER have to turn off the water!) (3) Pull off the refrigerator's bottom grill. (4) With a small saucer under the fittings, unscrew the black and white tube fitting. There is only one nut to remove on the white tubing side. You'll need to undo the compression fitting on the black tubing and slide off the compression nut. You'll need to MAKE SURE you keep these nuts and replace onto the black and white tubing the SAME WAY you took them off. You'll NOT need to use nut drivers as finger tight is the key. Too hard and you'll ruin these plastic nuts. You should get only about 1/8 cup or less of water during this whole exercise. (5) Cut off the old, broken water nozzle. (4) Find a screw of the appropriate size to fit tightly 1/2 way inside the new tubing (this is to ensure your old and new tubing are connected to feed through the door). If screw is not tight within the tubing, wrap part of a plastic (thin) sack around this screw a couple of times and force into the tubing. You'll, of course, then need to use the hacksaw to cut the head off the screw as you'll be forcing the other half of the screw into the old cut tubing (6) Chase the dog out of the kitchen and cajole your wife (significant other) to push the newly joined tubes through the top of the dispenser, through the door and out the bottom as you will be gently PULLING on this old tubing from the bottom until the new tubing pops through the doors bottom. (7) Once this new tubing is out, you will separate the old tubing and, using the nuts in the proper sequence, connect this new tubing to the white tubing. (8) Plug the refrigerator back in and test flow the water. Check to ensure the plastic nuts have no leakage ... button up the bottom grill ... and enjoy the fresh water! PS> Don't forget to praise the wife (significant other) and give the dog a treat for staying out of your face!!
Parts Used:

-
Chris from Brentwood, TN
-
Difficulty Level:Easy
-
Total Repair Time:15 - 30 mins
-
Tools:Pliers, Screw drivers
1 person
found this instruction helpful.
Was this instruction helpful to you?
Thank you for voting!
original motor stopped
removed old and instaslled new. biggest problem was getting to one of the screws.
Parts Used:
-
Paul from Lowell, MI
-
Difficulty Level:A Bit Difficult
-
Total Repair Time:1- 2 hours
-
Tools:Nutdriver, Socket set
2 of 4 people
found this instruction helpful.
Was this instruction helpful to you?
Thank you for voting!
Ice maker was not working.
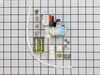
Ordered new single outlet water valve, received in less than two days. Removed old one, and the repair pretty much feel in place. Instructions were there as a backup. ........ Just curious if the connection from the water source to the valve outlet connection could b a quick connect just the like the water line going directly to the ice maker. Gregg in PA.
Parts Used:
-
GREGG from WEST CHESTER, PA
-
Difficulty Level:Really Easy
-
Total Repair Time:30 - 60 mins
-
Tools:Nutdriver
1 person
found this instruction helpful.
Was this instruction helpful to you?
Thank you for voting!
Refrigerator compartment warm
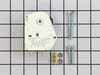
first confirm that freezer is cold. if is frozen solid it needs to be defrosted. take the freezer items out,take shelf out, bottom cover, 2 screws. then ice maker, 3 screws and unplug wires. then back panel 2 screws. In refrigerator compartment were the controllers are located, look under it you will see 1 hole, insert a flat end screw driver and turn clockwise till it stops. this action will turn on your defroster, also the compressor will stop. is the heater melting the ice? if so soak up water and clean tray, use hair dryer in drain hole to aid in the defrost, check tray under fridge and if its dry keep defrosting. it should take half an hour. now take the flat head screw driver and turn the defrost timer clock wise out of defrost mode a quarter turn or so. the compressor should come back on, soon after the fan in the freezer compartment should also come on. this steps lets you no that the defrost heater works, fan works and drain hole is clear. if its defrosted place parts back in the reverse order. if not defrosted replace heater or mother board. in refrigerator compartment were the dials are located their are 2 screws, one on the left and the other on the right side take them out, the cover will drop down, you will find wiring schematics you will need them to install defrost timer. is timer making ticking sound? if no replace timer. new timer will be different from original so follow instructions that come with it. timer is above were the hole is located. the plastic hold downs will break when you try to take them off, unplug fridge, lift timer out and remove from wire harness. the new timer has a black wire that slips over either 1 or 2 depending on color of wire on the wire harness. check schematics. some silicone adhesive will keep unit in place, ad some into the plastic shaft prior to installation, plug wire harness return wiring instruction along with new one inside of cover, plug in fridge, turn defrost timer clock wise with flat head screw driver making sure that you hold timer from above so it wont move. did compressor come on?. put all paper work inside of cover before installing cover
Parts Used:
-
alfonso from Fairfield, CA
-
Difficulty Level:Easy
-
Total Repair Time:30 - 60 mins
-
Tools:Nutdriver, Screw drivers
1 of 2 people
found this instruction helpful.
Was this instruction helpful to you?
Thank you for voting!
Solenoid stem had seperated from valve seat.
Turn off water, removed two mounting screws, unplugged solenoid, removed incoming water connection and plastic pipe to ice maker. Installed new valve, connected water lines, reconnected plug, remounted with screws. Turned water back on, over rode power to ice maker and checked for leaks. Total time about 5 minutes. Very easy repair.
Parts Used:
-
Gary from Lewisburg, WV
-
Difficulty Level:Really Easy
-
Total Repair Time:Less than 15 mins
-
Tools:Nutdriver, Wrench (Adjustable)
1 of 2 people
found this instruction helpful.
Was this instruction helpful to you?
Thank you for voting!
fan motor had gone bad
I removed the nuts that held the motor mount, then removed fan blade, cut the wires, and slid the motor pass the mounts and the coil shroud, Installed motor in reverse order. worked out ok.
Parts Used:
-
william from whitwell, TN
-
Difficulty Level:Easy
-
Total Repair Time:30 - 60 mins
-
Tools:Screw drivers, Socket set, Wrench set
1 of 2 people
found this instruction helpful.
Was this instruction helpful to you?
Thank you for voting!
cooling fan quit
Ordered new fan motor on line took out old motor and replaced with new one
Parts Used:
-
George from Belhaven, NC
-
Difficulty Level:Easy
-
Total Repair Time:30 - 60 mins
-
Tools:Nutdriver
1 of 2 people
found this instruction helpful.
Was this instruction helpful to you?
Thank you for voting!
refrigerator stopped cooling due to condenser over-heating
Pull refrigerator out to access back, unplug unit and remove the 3 .25" screws cut the power leads to motor and install new with easy to understand instructions provided with new motor. Plug refrigerator back in and enjoy your cold beverages once more. EASIEST REPAIR EVER.
Parts Used:
-
Kevin from COVINGTON, LA
-
Difficulty Level:Really Easy
-
Total Repair Time:Less than 15 mins
-
Tools:Nutdriver, Pliers
1 of 2 people
found this instruction helpful.
Was this instruction helpful to you?
Thank you for voting!
Motor noise while running and clicking when shutting off
The instruction sheet supplied with the new motor described the steps to take very good. Replaced the rubber grommets for the three motor mounts also. A flashlight or light source was needed or was very helpful.
Parts Used:
-
Curtis from Sedona, AZ
-
Difficulty Level:Easy
-
Total Repair Time:15 - 30 mins
-
Tools:Nutdriver, Pliers
1 of 2 people
found this instruction helpful.
Was this instruction helpful to you?
Thank you for voting!
freezer and food section too warm
removed lower back cover. diconnected fan ass'y electrical connection, removed fan housing (3 screws). removed fan motor from housing. cut old connector from fan and installed on new fan with wire nuts included. re-installed new fan to housing and re-installed housing to frame.
Parts Used:
-
William from Milford, MA
-
Difficulty Level:Easy
-
Total Repair Time:30 - 60 mins
-
Tools:Socket set
1 of 2 people
found this instruction helpful.
Was this instruction helpful to you?
Thank you for voting!
The freezer worked but the refrigerator wouldn't cool.
When we got the part, we read the instructions, which were easy and very clear step by step. Taking the old part off took most of the time, it was attached a little differently than was described in the video and the instructions for the part. Once we detached that, the replacement part went in very easily and quickly. It took a short while for the cycle to start, we were actually a little worried that it wasn't going to work. Then it started cycling. After the first day the freezer had started icing up, we took a blow dryer and melted it and waited. It hasn't started freezing up again. The refrigerator is keeping the proper temperature and the freezer is also working properly, it's been a week. We seem to be obsessed with going out and checking to see if it's working but I think it's a success. Doing this ourselves only cost $26.00. A huge savings if we had hired someone else to repair it for us. We will definitely choose this option with any other appliance that needs repair. It was easy and simple to find the correct part thanks to the website. And the video tutorial was very informative and helpful.
Parts Used:
-
ROBERT from KIRKWOOD, MO
-
Difficulty Level:Easy
-
Total Repair Time:15 - 30 mins
-
Tools:Screw drivers, Socket set
1 of 2 people
found this instruction helpful.
Was this instruction helpful to you?
Thank you for voting!
Condenser Fan Failure
Partition between Freezer and Fridge was running very hot. (Warm is normal). Oiling fan did not work. The only problems encountered in the replacement were getting fan out and in through coolant lines, cut plug off to accomodate generic fan wiring, getting the screws back in without cooking your hand on a hot compressor. Unit works great!
Parts Used:
-
Al from Tonka Bay, MN
-
Difficulty Level:Easy
-
Total Repair Time:30 - 60 mins
-
Tools:Socket set
2 of 5 people
found this instruction helpful.
Was this instruction helpful to you?
Thank you for voting!
Refrigerator would not stay cold
Removed rear cover to see non-operating fan - removed three mounting screws on the motor that were a challenge to access. Swapped fan from old motor onto new motor - one threaded nut on the motor shaft. Spliced new fan wires into fan wires of the wiring harness and mounted with three self-tapping screws supplied with new fan motor. Replaced rear cover and plugged it in! Now the refrigerator cools like new (1981 model side-by-side Admiral)
Parts Used:
-
Jeremy from State College, PA
-
Difficulty Level:A Bit Difficult
-
Total Repair Time:30 - 60 mins
-
Tools:Nutdriver, Screw drivers, Wrench set
2 of 6 people
found this instruction helpful.
Was this instruction helpful to you?
Thank you for voting!
The Ice was hollow and then it just t stopped.
The first issue was to determine if the problem was with the ice maker or the water dispenser / pump. I chose to try to repair the dispenser first since there air bubbles in the plastic line. Also, the ice maker seems to have been working. There just wasn't enough water so the ice cubes were hollow.
I unplugged the power cord, , removed the cardboard backing and two bolts that secured the pump to the refrigerator. I vacumned the area so I could see around. I pulled the valve out and disconnected it from the internal power source. I disconnected the copper water intake and the plastic tubbing to the ice maker. I used a pipe cutter to take the old flanged area off. A new flange was included in the package. I used that and reconnected the copper intake and the plastic tubbing. I replaced the power source and secured the valve to the refrigerator makeing sure the plastic tubbing wasn't twisted. When I plugged the refrigator back up, the ice maker started working within five minutes.
I unplugged the power cord, , removed the cardboard backing and two bolts that secured the pump to the refrigerator. I vacumned the area so I could see around. I pulled the valve out and disconnected it from the internal power source. I disconnected the copper water intake and the plastic tubbing to the ice maker. I used a pipe cutter to take the old flanged area off. A new flange was included in the package. I used that and reconnected the copper intake and the plastic tubbing. I replaced the power source and secured the valve to the refrigerator makeing sure the plastic tubbing wasn't twisted. When I plugged the refrigator back up, the ice maker started working within five minutes.
Parts Used:
-
Steven from Atlanta, GA
-
Difficulty Level:Really Easy
-
Total Repair Time:15 - 30 mins
-
Tools:Nutdriver, Wrench set
1 of 3 people
found this instruction helpful.
Was this instruction helpful to you?
Thank you for voting!