




















10670234902 Kenmore Refrigerator - Instructions
Keep searches simple. Use keywords, e.g. "leaking", "pump", "broken" or "fit".
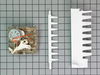
The icemaker would not produce ice because the motor that pushed the cubes out had failed. The original icemaker failed in this way and we had the icemaker replaced by Sears Service for about $200. The second icemaker failed for the same reason after 18 months. I decided to do the repair myself t
Open the refirigerator door and push and hold the On/Off button at the top to turn off internal power. Open the freezer door and move the icemaker switch on the right side freezer wall to "off".
To get access to the icemaker, first remove a hinged plastic door that mounts to the ceiling of the freezer compartment by two hex screws. Remove the screws and the door so you can work with the icemaker without interference.
The icemaker assembly will slide out once the wireharness has been disconnected. To disconnet the wire harness, a while plastic shield has to be removed from the right side of the icemaker, just behind the water inlet.
Locate a hex screw on the bottom right rear of the icemaker and remove it with a socket wrench. Then the plastic cover can be pulled off.
Slide the icemaker out enough so you can get your fingers on the plug connector. It takes some effort to pull the plug connectors apart. Once unplugged the whole icemaker assembly can be removed.
The motor module is located on the left side and is protected by a white cover. This cover is not attached so it can be pulled off to reveal the motor module.
Remove 3 screws from the outside of the motor module and the module can be pulled out of the housing. Insert the new motor module. The module turns the shaft of the ice srapper arm. the shaft has a D shape which mates with the hole in the motor module so you may have to roatate the scrapper arm until the shaft shape matches up with the hole shape in the motor module.
Once the motor module is seated, replace the 3 screws and push the white cover back on.
Position the icemaker so you can reconnect the wireharness plug connectors. Once connected you can push the icemaker asembly back into the grooves of shelf rail. Reattach the while protector shield which covers up the wire harness plugs.
Open the refirigerator door and push and hold the power button to turn internal power back on. Move the icemaker switch on the right wall of the freezer to the "on" position and close the door.
The icemaker should start making ice within 2 hours.
To get access to the icemaker, first remove a hinged plastic door that mounts to the ceiling of the freezer compartment by two hex screws. Remove the screws and the door so you can work with the icemaker without interference.
The icemaker assembly will slide out once the wireharness has been disconnected. To disconnet the wire harness, a while plastic shield has to be removed from the right side of the icemaker, just behind the water inlet.
Locate a hex screw on the bottom right rear of the icemaker and remove it with a socket wrench. Then the plastic cover can be pulled off.
Slide the icemaker out enough so you can get your fingers on the plug connector. It takes some effort to pull the plug connectors apart. Once unplugged the whole icemaker assembly can be removed.
The motor module is located on the left side and is protected by a white cover. This cover is not attached so it can be pulled off to reveal the motor module.
Remove 3 screws from the outside of the motor module and the module can be pulled out of the housing. Insert the new motor module. The module turns the shaft of the ice srapper arm. the shaft has a D shape which mates with the hole in the motor module so you may have to roatate the scrapper arm until the shaft shape matches up with the hole shape in the motor module.
Once the motor module is seated, replace the 3 screws and push the white cover back on.
Position the icemaker so you can reconnect the wireharness plug connectors. Once connected you can push the icemaker asembly back into the grooves of shelf rail. Reattach the while protector shield which covers up the wire harness plugs.
Open the refirigerator door and push and hold the power button to turn internal power back on. Move the icemaker switch on the right wall of the freezer to the "on" position and close the door.
The icemaker should start making ice within 2 hours.
Parts Used:
-
Jeffrey from Lexington, KY
-
Difficulty Level:Easy
-
Total Repair Time:15 - 30 mins
-
Tools:Screw drivers, Socket set
3 of 5 people
found this instruction helpful.
Was this instruction helpful to you?
Thank you for voting!
The handle broke and my wife was afraid to close the door because she might not be able to open it back.
The part-select video showed me to do the following:
Unplug dish washer
Open the door and unscrew the screws around the inside of the door all around.
Place the screws in the detergent holder with a cap until finished.
The door mechanism is at the top and attached to two electrical wires.
Unfasten the wires from the attachment.
Take the new attachment and fasten the wires to it.
Place the attachment back in the spot and make sure handle is sticking thru the hole to the outside.
Reattach the screws.
Plug back chord.
Finished - 15 minutes
Unplug dish washer
Open the door and unscrew the screws around the inside of the door all around.
Place the screws in the detergent holder with a cap until finished.
The door mechanism is at the top and attached to two electrical wires.
Unfasten the wires from the attachment.
Take the new attachment and fasten the wires to it.
Place the attachment back in the spot and make sure handle is sticking thru the hole to the outside.
Reattach the screws.
Plug back chord.
Finished - 15 minutes
Parts Used:

-
Jeff from WINSTON SALEM, NC
-
Difficulty Level:Really Easy
-
Total Repair Time:15 - 30 mins
-
Tools:Screw drivers
2 of 2 people
found this instruction helpful.
Was this instruction helpful to you?
Thank you for voting!
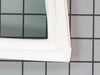
Door would pop open. I cleaned gasket made sure nothing in the way of door. Gasket was cracked top and bottom it worked better but the seal was not good.
Did just like the video showed took doors off daughter helped take off doors so easy put door on blanket. My daughter 38 went to town putting it on just watch the corners so easy two days after installation the door seals great. You can do this.
Parts Used:
-
Roy from KAUFMAN, TX
-
Difficulty Level:Really Easy
-
Total Repair Time:30 - 60 mins
-
Tools:Nutdriver
2 of 2 people
found this instruction helpful.
Was this instruction helpful to you?
Thank you for voting!
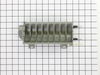
The coating on the mold /heater unit as cracked and some broken off and cause the water to drip down in the Ice trace and form large icicles
I just removed the unit and replaced the mold/'heater with the new one and re-installed. It was very easy and didn't have to turn off the refer. or empty the frozen food.
However , there were not instruction that came with the mold/heater unit. I had no problem but other do-in-uselfers may need some basic instructons
Jim
However , there were not instruction that came with the mold/heater unit. I had no problem but other do-in-uselfers may need some basic instructons
Jim
Parts Used:
-
James from Tomball, TX
-
Difficulty Level:Really Easy
-
Total Repair Time:15 - 30 mins
-
Tools:Nutdriver, Screw drivers
3 of 5 people
found this instruction helpful.
Was this instruction helpful to you?
Thank you for voting!
The freezer worked fine but the refrigerator wasn’t getting cold.
I removed the flat panel inside freezer & fan blades not turning. I removed 2 1/4” screws, unplugged wires took fan motor out & put that fan blade on new fan motor. Plugged wires into new motor replaced 2 bolts, reinstalled flat panel plugged refrigerator in & reset temperature controls. The next day checked temperature and was all done.
Parts Used:

-
Ray from Wiggins, MS
-
Difficulty Level:Really Easy
-
Total Repair Time:30 - 60 mins
-
Tools:Nutdriver, Screw drivers
2 of 2 people
found this instruction helpful.
Was this instruction helpful to you?
Thank you for voting!
TOO COLD FREEZER, TOO WARM REFRIGERATOR, EVAP FAN FROZEN SOLID
I just followed the directions on the video of my specific model. Make a note of where to locate that video of your model, as there are many other videos of other models that can have different parts located in different areas and it can be time consuming finding the exact video you want again.
Also note that you must make mental or written notes on exactly what direction any parts you remove are facing, this can save huge amounts of time when reassembling.
I was worried that I might need other parts, but decided to do one part replacement at a time since this unit is a spare and no urgency to get it back working again. I found that the evaporator fan was the only thing needed! The fridge works like new again!
Also note that you must make mental or written notes on exactly what direction any parts you remove are facing, this can save huge amounts of time when reassembling.
I was worried that I might need other parts, but decided to do one part replacement at a time since this unit is a spare and no urgency to get it back working again. I found that the evaporator fan was the only thing needed! The fridge works like new again!
Parts Used:
-
William from GRANTS PASS, OR
-
Difficulty Level:Easy
-
Total Repair Time:1- 2 hours
-
Tools:Nutdriver, Pliers
2 of 2 people
found this instruction helpful.
Was this instruction helpful to you?
Thank you for voting!
Defrost drain clogged with ice
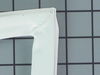
Replaced gaskets on both doors. Followed the online video link that came with emailed receipt. Worked exactly like demonstrated in the video.
Parts Used:
-
Michael from CHICAGO, IL
-
Difficulty Level:Easy
-
Total Repair Time:30 - 60 mins
-
Tools:Nutdriver
2 of 2 people
found this instruction helpful.
Was this instruction helpful to you?
Thank you for voting!
After 17 years, the old door gasket was split and showing signs of mold
The gasket has an inner lip that fits over the edge of the door plastic liner. The old gasket was removed by pulling it straight out, in the plane of the door. Try not to pull sideways as it could crack the door liner, which gets brittle with age. The new liner had a brown magnetic strip, which holds the door closed, and this fits behind the edge of the door liner. Start on the bottom of the door. A helper is useful to hold the gasket loosely vertical. A flat blade screwdriver can be used to pry away the liner to insert the new seal. Once you have worked in the lower edge, install both sides, and then the top. Some juggling side-to-side may be needed for an exact fit
Parts Used:
-
duncan from HOWELL, NJ
-
Difficulty Level:A Bit Difficult
-
Total Repair Time:15 - 30 mins
-
Tools:Screw drivers
2 of 2 people
found this instruction helpful.
Was this instruction helpful to you?
Thank you for voting!
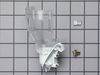
Faulty light socket
-
Larry from HOUSTON, TX
-
Difficulty Level:Very Easy
-
Total Repair Time:15 - 30 mins
-
Tools:Screw drivers
3 of 5 people
found this instruction helpful.
Was this instruction helpful to you?
Thank you for voting!
Light didnt go on
The light rocker switch wasnt working. I found the part on the web site. It was so easy. I used a screw driver to pop out the old one and pop the new one in. It took 5 min. Thanks!!!
Parts Used:

-
dorotea from staten island, NY
-
Difficulty Level:Really Easy
-
Total Repair Time:Less than 15 mins
-
Tools:Screw drivers
3 of 5 people
found this instruction helpful.
Was this instruction helpful to you?
Thank you for voting!
fridge door switch did not work
I removed the switch housing (4 screws), replacing the switch in the housing was a snap. It took 5 minutes, cost $8 and light works like new!
Why didn't I order this part and do the repair earlier? Very simple.
Why didn't I order this part and do the repair earlier? Very simple.
Parts Used:
-
stu from richmond, VA
-
Difficulty Level:Easy
-
Total Repair Time:Less than 15 mins
-
Tools:Socket set
2 of 2 people
found this instruction helpful.
Was this instruction helpful to you?
Thank you for voting!
cut old off the door and put new on the door
took door of the refergarator. Then cut old gusket of and clipped the new one on and then put the back. Done!!!!!
Parts Used:
-
George from Albakurky, NM
-
Difficulty Level:Easy
-
Total Repair Time:30 - 60 mins
-
Tools:Socket set
7 of 17 people
found this instruction helpful.
Was this instruction helpful to you?
Thank you for voting!
Replacing the bulb in the freezer side
Removed the ice brucket,
Removed the light shield by releasing one screw using a nutdriver.
Replacing the bulb and reinstalled the light shield.
Your web site is one of the best and most helpfull service sites I ever used. Just wish that in the future you will ship parts overseas.
Removed the light shield by releasing one screw using a nutdriver.
Replacing the bulb and reinstalled the light shield.
Your web site is one of the best and most helpfull service sites I ever used. Just wish that in the future you will ship parts overseas.
Parts Used:

-
Yafa (and David) from Bothell, WA
-
Difficulty Level:Easy
-
Total Repair Time:Less than 15 mins
-
Tools:Nutdriver
5 of 11 people
found this instruction helpful.
Was this instruction helpful to you?
Thank you for voting!
Ice maker wouldn't cycle
Originally I took the module off and found that a small plastic part had broken. Both pieces were still there, so I super glued them together and reassembled the unit. It worked great for a couple months. I realized it needed a more permanent fix, so I found the model # and looked up the part. That was very easy on your website. I ordered the part expecting it to take 4-7 days. It was at my house in two days! 15 minutes later I was makin' ice, and makin' my wife happy. Thank you for an all around great experience. I'll definitely buy from you again.
Parts Used:
-
Mark from Fairview Heights, IL
-
Difficulty Level:Really Easy
-
Total Repair Time:Less than 15 mins
-
Tools:Screw drivers
2 of 2 people
found this instruction helpful.
Was this instruction helpful to you?
Thank you for voting!
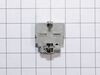
Fridge and freezer were too warm
Chose these parts based on suggestion on this website, as well as other sites. They did not correct the problem. Shipping was also quite slow.
Parts Used:

-
Illyssa from GREELEY, CO
-
Difficulty Level:Really Easy
-
Total Repair Time:Less than 15 mins
-
Tools:Pliers, Screw drivers
2 of 2 people
found this instruction helpful.
Was this instruction helpful to you?
Thank you for voting!