




















10644569600 Kenmore Refrigerator - Instructions
Keep searches simple. Use keywords, e.g. "leaking", "pump", "broken" or "fit".
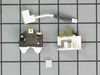
The Freezer and refridgerator would not cool
Removed the starter switch clip and replaced the switch. The appliance begain to cool immeadiatly.
Parts Used:
-
Ronald from Rockford, IL
-
Difficulty Level:Easy
-
Total Repair Time:Less than 15 mins
-
Tools:Nutdriver
4 of 6 people
found this instruction helpful.
Was this instruction helpful to you?
Thank you for voting!
Freezer was icing up and leaking. Refrigerator side would not keep cold.
We emptied out both sides, refrigerator and freezer, and followed the instructions in your video. We turned it off and disconnected the power. We took off the freezer door first. It made it much easier to get the shelves out and reach way back into the freezer. We removed the light and cover, then the ice auger motor. The back panel was easy to lift and remove. The wire assembly was a little hard to understand at first, but when we figured it out it was easy to remove and replace the bimetal defrost thermostat. We did check the video when we had the wire harness out, to make sure we got it right. We reassembled the freezer's inside parts and reattached the door. Before we turned the power back on, we scrubbed down the entire refrigerator. When we turned the power back on, the refrigerator and freezer were operating quietly - no sparks or explosions or shorting out - hooray! And the problems were solved.
The most important resource is your video. It looked like something we could do, and then ordered the parts. Our repair took a long time because we checked the video so many times. Thank you so much for the great information and the excellent parts. We could not have done it without you.
The most important resource is your video. It looked like something we could do, and then ordered the parts. Our repair took a long time because we checked the video so many times. Thank you so much for the great information and the excellent parts. We could not have done it without you.
Parts Used:

-
Camille from Glen Ellyn, IL
-
Difficulty Level:Easy
-
Total Repair Time:More than 2 hours
-
Tools:Nutdriver, Pliers, Screw drivers
3 of 3 people
found this instruction helpful.
Was this instruction helpful to you?
Thank you for voting!
Freezer work perfectly, Refrigerator Stopped getting cold, water line froze, there was ice Forming around the condenser in the bottom of the refrigerator behind the drawers
Freezer worked great, refrigerator stopped getting cold and lots of ice formed around the condenser on the bottom of the refrigerator.
First I had a serious ice issue, ice build up around the bottom of the refrigerator and all through the cold air vents, condenser and cooling fan. I unplugged of the fridg and let defrost over night. I also took all the cold air vents out and cleaned them.
Then I followed the switch install video very simple switch install. Now the Refrigerator works Great nice and cold.
First I had a serious ice issue, ice build up around the bottom of the refrigerator and all through the cold air vents, condenser and cooling fan. I unplugged of the fridg and let defrost over night. I also took all the cold air vents out and cleaned them.
Then I followed the switch install video very simple switch install. Now the Refrigerator works Great nice and cold.
Parts Used:
-
Richard from STATEN ISLAND, NY
-
Difficulty Level:Easy
-
Total Repair Time:1- 2 hours
-
Tools:Nutdriver, Screw drivers
3 of 3 people
found this instruction helpful.
Was this instruction helpful to you?
Thank you for voting!
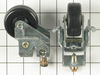
Compressor making excessive noise
One front roller was flat on one side. Decided to replace all rollers at same time. Placed shims under unit and removed mounting screws for one front and one rear roller. With new rollers in place, I was able to level the refrigerator side to side, but unable to do so, front to back. Left the new front roller in place and reinstalled the old rear roller. Have decided to replace refrigeratorin the near future. This is one of my few repair failures!
Parts Used:

-
chester from Tampa, FL
-
Difficulty Level:Easy
-
Total Repair Time:30 - 60 mins
-
Tools:Nutdriver, Socket set
5 of 9 people
found this instruction helpful.
Was this instruction helpful to you?
Thank you for voting!
Broken Freezer Door Cams
1. Put pieces of wood under door to support it.
2. Unscrew three screws holding door hinge.
3. Disconnect water line.
4. Unscrew screw holding each cam. One to door and one to hinge.
5 Replace cams.
6. Retrieve plate with threaded holes behind frame that the hinge attaches to.
7. Use thin philips screwdriver through the hinge bracket, shim, frame and screw plate to align it for the other two screws.
8. Replace all three hinge screws.
9. Connect water line fitting.
10. Remove wood for door support.
11. Check door for smooth movement and strong pressure when closed.
2. Unscrew three screws holding door hinge.
3. Disconnect water line.
4. Unscrew screw holding each cam. One to door and one to hinge.
5 Replace cams.
6. Retrieve plate with threaded holes behind frame that the hinge attaches to.
7. Use thin philips screwdriver through the hinge bracket, shim, frame and screw plate to align it for the other two screws.
8. Replace all three hinge screws.
9. Connect water line fitting.
10. Remove wood for door support.
11. Check door for smooth movement and strong pressure when closed.
Parts Used:

-
Dennis from Corona, CA
-
Difficulty Level:Easy
-
Total Repair Time:30 - 60 mins
-
Tools:Socket set
3 of 3 people
found this instruction helpful.
Was this instruction helpful to you?
Thank you for voting!
lights wouldn't come on/work in refrigerator
Referencing the info/schematics you have on your website, I unscrewed/unattached top-front panel (carefully), from behind the panel you have to detach the wires (2) from the switch, pushed "in" the switch to remove, put in new switch and attach wires to test BEFORE remounting panel. Tada!! Thank you PartSelect! You saved me at least $80...would have been at least $100 to have a repair person come to the house!
Parts Used:

-
Jane from Albuquerque, NM
-
Difficulty Level:Easy
-
Total Repair Time:15 - 30 mins
-
Tools:Pliers, Screw drivers, Socket set
4 of 6 people
found this instruction helpful.
Was this instruction helpful to you?
Thank you for voting!
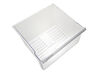
Grandkids try to close the refridge door ...while the drawer was open...the are kids
-
Joe from GARLAND, TX
-
Difficulty Level:Really Easy
-
Total Repair Time:Less than 15 mins
4 of 6 people
found this instruction helpful.
Was this instruction helpful to you?
Thank you for voting!
Raplaced switch
Repair went well,took about five to ten minutes to disconnect the power from the fridge removed the defective switch installed the new one ,reconnected the power,,,and Let there be light and there was light!
Parts Used:
-
Winston A from Brooklyn, NY
-
Difficulty Level:Really Easy
-
Total Repair Time:Less than 15 mins
-
Tools:Pliers
5 of 9 people
found this instruction helpful.
Was this instruction helpful to you?
Thank you for voting!
Top half of freezer & fridge were not cooling. Freezer fan had been making unusually loud noises.
Piece of cake. It took me longer to remove the food from the freezer, remove shelves and back panel than to do the repair. I heard the fan making some noises so I replaced both the fan and defrost thermostat. I used the instructions submitted by a another customer. My 20+ year old fridge is like new now.
Parts Used:
-
rich from PEMBROKE PNES, FL
-
Difficulty Level:Really Easy
-
Total Repair Time:30 - 60 mins
-
Tools:Nutdriver
3 of 3 people
found this instruction helpful.
Was this instruction helpful to you?
Thank you for voting!
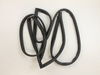
door would not close automatically and replaced torn gasket.
removed door took out single bolt pried out cam put new one in returned bolt rehung door. 15 minutes
pulled old gasket out cleaned area where gasket was and lube edge of new gasket with vaseline starting at top slide gasket in then sides last was bottom which was hardest. 20 minutes
pulled old gasket out cleaned area where gasket was and lube edge of new gasket with vaseline starting at top slide gasket in then sides last was bottom which was hardest. 20 minutes
Parts Used:

-
JOHN from DALLAS, TX
-
Difficulty Level:Really Easy
-
Total Repair Time:15 - 30 mins
-
Tools:Screw drivers, Wrench set
3 of 3 people
found this instruction helpful.
Was this instruction helpful to you?
Thank you for voting!
no problem
-
james from EASTON, PA
-
Difficulty Level:Really Easy
-
Total Repair Time:Less than 15 mins
3 of 4 people
found this instruction helpful.
Was this instruction helpful to you?
Thank you for voting!
Light switch wasn't working.. As I would close the door I would notice our frig light wasn't going off...
I simply removed the old switch by gently pulling down on the old switch with a screwdriver. When it was about half way out I just gently pulled down on the old switch and it popped out... I removed the two connectors attached to the old switch by pulling on the connectors with a pliers...I tried using my fingers but wasn't able to pull the connectors off so I used pliers. It worked perfectly.. When pulling off the old connectors, make sure you attach the new switch to the same tabs on the new switch... It was very easy to do and took under 5 mins.....The light switch works perfect....P.S. You should unplug the frig while making the connection just in case....Safety first....!!!
Parts Used:
-
David from Hemet, CA
-
Difficulty Level:Really Easy
-
Total Repair Time:Less than 15 mins
-
Tools:Pliers, Screw drivers
3 of 4 people
found this instruction helpful.
Was this instruction helpful to you?
Thank you for voting!
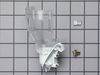
the light socket broke apart
I took out the old socket by moving a clip. Reattached the electrical wires, clicked in the socket and that was it.
Parts Used:
-
Elyse from Skokie, IL
-
Difficulty Level:Really Easy
-
Total Repair Time:15 - 30 mins
-
Tools:Screw drivers
4 of 7 people
found this instruction helpful.
Was this instruction helpful to you?
Thank you for voting!
Refrigerator and freezer stopped cooling.
The repair was incredibly easy. The only reason it took me so long to do it was that the instruction sheet did not make it clear that the parts supplied covered 4 possibilities. It took me a long time to realize that in my case (the discrete) I only needed to use the separate relay, one of the funny shaped parts, the jumper wire, and the cover, but not either of the combo versions. Maybe I'm dense or just too cautious. However, once installed, the fridge started up and is working fine.
Parts Used:
-
Norman from Albuquerque, NM
-
Difficulty Level:Easy
-
Total Repair Time:1- 2 hours
-
Tools:Pliers
4 of 7 people
found this instruction helpful.
Was this instruction helpful to you?
Thank you for voting!
broken drawer
It was a drawer I removed the old one and slid the new one in. Took longer to fill out this form than to replace the drawer
Parts Used:
-
Earl from FAIRVIEW, NC
-
Difficulty Level:Very Easy
-
Total Repair Time:30 - 60 mins
4 of 7 people
found this instruction helpful.
Was this instruction helpful to you?
Thank you for voting!