




















10644433600 Kenmore Refrigerator - Instructions
Keep searches simple. Use keywords, e.g. "leaking", "pump", "broken" or "fit".
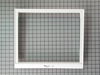
The shelf runner broke
Took out the old one and put in the new one. No tolls required. It did give me the opportunity to clean the back wall of the refrigerator.
Parts Used:
-
Andrew F from Media, PA
-
Difficulty Level:Really Easy
-
Total Repair Time:Less than 15 mins
10 of 15 people
found this instruction helpful.
Was this instruction helpful to you?
Thank you for voting!
Ice maker leaked into ice reservoir
The ice mold has a coating on it. Over time the coating deteriorates. If your ice maker leaks water into the ice reservoir inspect the mold to see if the coating is compromised. If so, replace with new.
Remove the ice maker assembly. 3 small hex screws. Unplug power cord. Disassemble ice maker assembly. Remove ice mold/heater. Replace with new. Reassemble.
Remove the ice maker assembly. 3 small hex screws. Unplug power cord. Disassemble ice maker assembly. Remove ice mold/heater. Replace with new. Reassemble.
Parts Used:
-
joe from hilliard, OH
-
Difficulty Level:Really Easy
-
Total Repair Time:15 - 30 mins
-
Tools:Nutdriver
7 of 7 people
found this instruction helpful.
Was this instruction helpful to you?
Thank you for voting!
Would Not Make Ice.
After lots of internet exploring and diagnosis, the icemaker comes right out, and with three screws out and in, the job is all but done. Don't pay anyone for this repair!!!!!
Parts Used:
-
Zach from Danville, IN
-
Difficulty Level:Really Easy
-
Total Repair Time:Less than 15 mins
-
Tools:Nutdriver
8 of 10 people
found this instruction helpful.
Was this instruction helpful to you?
Thank you for voting!
Ice crusher not dispensing crushing ice or dispensing ice cubes
1. Remove the ice box
2. Unscrew the two Phillips screws on the base of the ice box compartment
3. Lift up the coupling and shaft (be careful because there is a spring between shaft and coupling and washer)
4. Remove old coupling
5. Replace with new coupling and remember to put back the spring
6. Insert back shaft with coupling and washer
7. Screw back on the Phillips screws
8. Replace back the icebox
2. Unscrew the two Phillips screws on the base of the ice box compartment
3. Lift up the coupling and shaft (be careful because there is a spring between shaft and coupling and washer)
4. Remove old coupling
5. Replace with new coupling and remember to put back the spring
6. Insert back shaft with coupling and washer
7. Screw back on the Phillips screws
8. Replace back the icebox
Parts Used:

-
Robert from WESTFORD, MA
-
Difficulty Level:Very Easy
-
Total Repair Time:Less than 15 mins
-
Tools:Screw drivers
7 of 7 people
found this instruction helpful.
Was this instruction helpful to you?
Thank you for voting!
Ice Maker not making ice
Being too lazy to pull out the refrigerator out and unplug it, I turned it off at the fuse box. Opened the freezer door and unscrewed the three screws holding the sensor. Pulled the sensor out and unscrewed the board then unpluged it and removed it. Plugged in new board, screwed it in then replaced the three screws. Repeat on the other side. The most difficult part was getting to one of three screws on each side; it almost required a third hand to hold the flap door between the ice maker and the bin, while removing said screw. I must at say that this product is definitely over engineered.
Parts Used:

-
Alyson from Houston, TX
-
Difficulty Level:Really Easy
-
Total Repair Time:15 - 30 mins
-
Tools:Screw drivers
7 of 7 people
found this instruction helpful.
Was this instruction helpful to you?
Thank you for voting!
Icemaker quit making ice
I found a repair guide online to check the resistance of the motor, thermostat, and heater mold. The resistance of the motor and heater mold were both a little off from their recommendations. I had an assumption that it was the motor but I decided to just buy the whole assembly basically for spare parts and I didn't feel like messing around with it any more. The new icemaker was not just a drop in replacement as part select told me because the Icemaker Bearing and Cup Assembly was larger than the original one. Thus, I had to switch it with the old one really quick so instead of a 3 min job it was 20 or so.....
Parts Used:
-
Bobby from Mokena, IL
-
Difficulty Level:Easy
-
Total Repair Time:15 - 30 mins
-
Tools:Nutdriver, Screw drivers
10 of 16 people
found this instruction helpful.
Was this instruction helpful to you?
Thank you for voting!
Ice maker gear broke into pieces
It was the right part at the right time. I had ordered parts through the retailer from Whirlpool but they were not right. I found the part number on the Whirlpool website and ordered it from you. Once it came it was a thirty second fix. Thanks.
J. Keith Miller
J. Keith Miller
Parts Used:

-
Joseph Keith from High Point, NC
-
Difficulty Level:Really Easy
-
Total Repair Time:Less than 15 mins
-
Tools:Screw drivers
7 of 7 people
found this instruction helpful.
Was this instruction helpful to you?
Thank you for voting!
Chrisper pan support cracked due to overfilling
removed old shelf support after taking out the glass and support. New part was a perfect fit that was a "shap: to put in.
Parts Used:
-
David from Lenexa, KS
-
Difficulty Level:Easy
-
Total Repair Time:Less than 15 mins
9 of 13 people
found this instruction helpful.
Was this instruction helpful to you?
Thank you for voting!
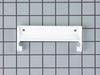
broke tab on cover bracket
removed old bracket and replaced with new one - two screws and it was done - simple
Parts Used:
-
brian from fresno, CA
-
Difficulty Level:Really Easy
-
Total Repair Time:Less than 15 mins
-
Tools:Nutdriver
8 of 10 people
found this instruction helpful.
Was this instruction helpful to you?
Thank you for voting!
Mold Ice Heating Element Broken
Looking at the ice maker it is pretty cut & dried as to how to remove the unit. I took out the ice tray and just started removing all the mounting screws. The same for the mold ice tray & heating element. I was just sad that you did not have just the heating element separate from the mold ice tray.
Parts Used:
-
timothy from indio, CA
-
Difficulty Level:Easy
-
Total Repair Time:1- 2 hours
-
Tools:Nutdriver, Screw drivers, Socket set
7 of 7 people
found this instruction helpful.
Was this instruction helpful to you?
Thank you for voting!
light not working in fridge
It was so easy!
Thanks for the rush to my home on the part.
I just unscrewed the plate that locks in the light switch (screwdriver) and unplugged the old faulty part and plugged in the new switch, screwed the cover back on and I was done!
Easy!
And I am not Mr. Fix-it!
Thanks for the rush to my home on the part.
I just unscrewed the plate that locks in the light switch (screwdriver) and unplugged the old faulty part and plugged in the new switch, screwed the cover back on and I was done!
Easy!
And I am not Mr. Fix-it!
Parts Used:

-
Michael from East Meadow, NY
-
Difficulty Level:Really Easy
-
Total Repair Time:Less than 15 mins
-
Tools:Screw drivers
7 of 8 people
found this instruction helpful.
Was this instruction helpful to you?
Thank you for voting!
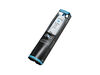
The wrong filter was sent the first time.
I removed the cap from the filter pushed a lever and removed fliter. I replaced the old filter, removed the caps on the new one and slid it into channel after replacing the outer cap. I removed water from the spigot for 4 mins. and it was ready to go. I pushed the reset button to get the green light to come on.
Parts Used:
-
Sandra S from Topeka, KS
-
Difficulty Level:Difficult
-
Total Repair Time:15 - 30 mins
8 of 11 people
found this instruction helpful.
Was this instruction helpful to you?
Thank you for voting!
Ice maker quit after 3 years
I removed the two screws holding the cover door, then the three on the uder side of the icemaker assembly. I carefully worked the old unit out; it was a tight fit. The most difficult step involved disconnecting the power assembly. Due to the space, it was hard to get hold of each side of the clip to pull it out. After the old unit was out, just reversed the steps and had the first batch of ice in less than an hour. (I washed the new unit with warm water and soup as it had grease/lubricant on it when taken out of the package).
Parts Used:
-
Jeffrey from Topeka, KS
-
Difficulty Level:Really Easy
-
Total Repair Time:15 - 30 mins
-
Tools:Nutdriver
8 of 11 people
found this instruction helpful.
Was this instruction helpful to you?
Thank you for voting!
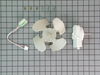
fan making bad bearing noise
r&r fan blade and motor. with the parts you supplied it was easy. the parts were perrrrfect. thank you very much. job well done. bruce
Parts Used:
-
Bruce from Malvern, OH
-
Difficulty Level:Easy
-
Total Repair Time:30 - 60 mins
-
Tools:Nutdriver, Screw drivers, Socket set
8 of 11 people
found this instruction helpful.
Was this instruction helpful to you?
Thank you for voting!
Broken Piece

-
anthony from georgetown, IL
-
Difficulty Level:A Bit Difficult
-
Total Repair Time:30 - 60 mins
-
Tools:Screw drivers
7 of 8 people
found this instruction helpful.
Was this instruction helpful to you?
Thank you for voting!