




















1039877914 Kenmore Range - Instructions
Keep searches simple. Use keywords, e.g. "leaking", "pump", "broken" or "fit".
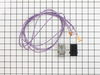
Burner was unreliable...would stop working...I had already replaced the burner
I did as the video suggested.....I cut the old wires and spliced new ones already attached to the new terminal block. It would have been nice to have some instructions with the parts as I expected one piece but had to connect the wires to the new block and the new metal cover. I was guessing a bit. Also, I needed to use the holder strip off my old part so that it displaced the new part back far enough to insert the burner connections. That meant finding a screw and nut small enough to allow the metal cover to fit on the block. But the burner works great. I've learned that any repair requires some ingenuity.
Parts Used:
-
Lelia from Vienna, VA
-
Difficulty Level:A Bit Difficult
-
Total Repair Time:15 - 30 mins
-
Tools:Pliers, Screw drivers
Was this instruction helpful to you?
Thank you for voting!
Plastic Insert for knob to long, had to use my bench grinder to cut it down
(Turn off the Power) Pull stove out, remove the 2 screws that holds switch in place, remove one wire at a time and install on new switch. Slip switch in replace 2 screws. Snap off about 3/4 of the shaft cut down plastic insert for knob, install knob turn on power and it works.
Parts Used:

-
Floyd from Warren, OR
-
Difficulty Level:Really Easy
-
Total Repair Time:15 - 30 mins
-
Tools:Pliers, Screw drivers
Was this instruction helpful to you?
Thank you for voting!
the wires were not long enough to use the original path.
the original path was from the right front control knob around the back of the range and left side of range,which i dismantaled to install the new wires to the right front burner. When I found them to be to short I had to also dismantal the right side so the wires could be routed there. The new wires worked fine but did take some extra time.
Parts Used:
-
Ronald L. from Cedaredge, CO
-
Difficulty Level:A Bit Difficult
-
Total Repair Time:30 - 60 mins
-
Tools:Nutdriver, Screw drivers
Was this instruction helpful to you?
Thank you for voting!
drawer coming out of the track and falling to the floor.
-
Steven from Waukesha, WI
-
Difficulty Level:Really Easy
-
Total Repair Time:15 - 30 mins
-
Tools:Screw drivers
Was this instruction helpful to you?
Thank you for voting!
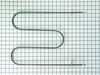
Burned Out Broil Element
The repair went ok. I did have to take the back off the stove in order to get to the wire connectors. Needed an extra person to move the stove out of it's location. Just had to be careful.
Parts Used:
-
William from Eufaula, AL
-
Difficulty Level:A Bit Difficult
-
Total Repair Time:30 - 60 mins
-
Tools:Nutdriver, Pliers, Screw drivers
Was this instruction helpful to you?
Thank you for voting!
R had ight front control made loud noise when contacts opened.
This is twin oven range with controls at side of upper oven. Control panel was fastened with screws at top and bottom. Range has built-in hood at top which had to be disassembled to reach top screw. Once had access to top screw, eaisly removed control panel and replaced control. New control had identical connections as old control so only had to install it, break shaft to correct length, and use proper shaft adapter for knob. Remounted control panel and range worked perfectly. This would have been a very quick job except for having to deal with the built-in range hood.
Parts Used:
-
James from Nashville, AR
-
Difficulty Level:A Bit Difficult
-
Total Repair Time:1- 2 hours
-
Tools:Nutdriver, Pliers, Screw drivers, Socket set, Wrench set
Was this instruction helpful to you?
Thank you for voting!