




















1039858011 Kenmore Range - Instructions
Keep searches simple. Use keywords, e.g. "leaking", "pump", "broken" or "fit".
Electric Burner Control Broken
New one a little different ,but it was marked for wiring!
Had to install upside down because wires would not reach right side up!
Had to pull back side of knob out and turn 180 degrees and glue in knob, so knob would be right side up!
Works fine! Now all burners work again!
Had to install upside down because wires would not reach right side up!
Had to pull back side of knob out and turn 180 degrees and glue in knob, so knob would be right side up!
Works fine! Now all burners work again!
Parts Used:

-
Robert from VINELAND, NJ
-
Difficulty Level:A Bit Difficult
-
Total Repair Time:30 - 60 mins
4 of 5 people
found this instruction helpful.
Was this instruction helpful to you?
Thank you for voting!
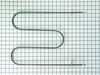
Element burnt out
First I removed the two screws that hold the element in place. I then pulled the element out about 3 inches and disconnected the two wires. Ordered new part on-line for less than 1/2 of local price...including shipping. Local shop would have taken 10 days for part at twice the price. Mine arrived in 72 hours...and Sunday dinner was saved!
Parts Used:
-
Jean from Rayville, LA
-
Difficulty Level:Really Easy
-
Total Repair Time:Less than 15 mins
-
Tools:Nutdriver
3 of 4 people
found this instruction helpful.
Was this instruction helpful to you?
Thank you for voting!
A tenant left the Drip Bowls in an uncleanable state. I could not find a suitable replacement..
Most trainable people can pull out the heating elements and replace the Drip Bowls. The great thing about the ordered drip bowls was that they FIT! Most drip bowls sold as easy replacements for GE or Hotpoint appliances do not fit and wobble the heating element or drip bowls. If not fitting correctly, the tenant usually destroys the heating element and the drip bowl.
Parts Used:
-
Larry from SACRAMENTO, CA
-
Difficulty Level:Very Easy
-
Total Repair Time:Less than 15 mins
3 of 4 people
found this instruction helpful.
Was this instruction helpful to you?
Thank you for voting!
Have tried 3 different store-bought drip pan sets over the past year. None of them laid flat.
Simple installation of new pans and all are level! Thank heaven! Thank you, PartSelect!
Parts Used:
-
Jennifer from Saginaw, MI
-
Difficulty Level:Really Easy
-
Total Repair Time:Less than 15 mins
10 of 25 people
found this instruction helpful.
Was this instruction helpful to you?
Thank you for voting!
The light inside the oven had burned out
0. As a safety precaution, unplug the range or hit the relevant fuse breaker before you start. You might also want to grab a flashlight. Definitely do not try to do this while the oven is hot.
1. Pinch the wire over the light bulb cap to remove it. This is inside the oven at the back.
2. Pop off the hemispherical glass cap.
3. Unscrew the old light bulb, and screw the new light bulb in its place.
4. Put the cap back.
5. Secure the cap by putting the wire back in its slots on the cap.
No tools needed, the cap is just held in place with pressure from the wire.
1. Pinch the wire over the light bulb cap to remove it. This is inside the oven at the back.
2. Pop off the hemispherical glass cap.
3. Unscrew the old light bulb, and screw the new light bulb in its place.
4. Put the cap back.
5. Secure the cap by putting the wire back in its slots on the cap.
No tools needed, the cap is just held in place with pressure from the wire.
Parts Used:

-
Catherine from SEATTLE, WA
-
Difficulty Level:Very Easy
-
Total Repair Time:Less than 15 mins
3 of 5 people
found this instruction helpful.
Was this instruction helpful to you?
Thank you for voting!
Burner wouldn't operate
Took Switch panel off range. Disconnected Infinite switch. Reinstalled infinite switch.. Replaced panel. Repair was very simple and self explainatory.
Knott County Housing Authority Maintenance Personnel
Knott County Housing Authority Maintenance Personnel
Parts Used:
-
Linda from Hindman, KY
-
Difficulty Level:Really Easy
-
Total Repair Time:15 - 30 mins
-
Tools:Nutdriver, Screw drivers
3 of 5 people
found this instruction helpful.
Was this instruction helpful to you?
Thank you for voting!
lights blown out
-
Gerald from WINTERVILLE, GA
-
Difficulty Level:Very Easy
-
Total Repair Time:Less than 15 mins
6 of 14 people
found this instruction helpful.
Was this instruction helpful to you?
Thank you for voting!
support clips fell out
Parts Select is the only parts place I found on the internet that had what I needed on my first purchase, so when I needed these clips I naturally went back to them. Product was easy to find, price was fine, receipt for payment quick and more importantly receipt of item was super quick. Thanks to the efficiency of this place and my old appliances, I will continue to go to them as needed.
Parts Used:
-
tomi from dallas, TX
-
Difficulty Level:Really Easy
-
Total Repair Time:Less than 15 mins
3 of 7 people
found this instruction helpful.
Was this instruction helpful to you?
Thank you for voting!
Broil element died
Followed instructions on Kenmore site. One point of note. Hold onto the element wires firmly. They will retract behind the oven!!! After contacting an electrician friend who removed unit from the wall and rethreaded the wires, it went just fine.
Parts Used:
-
Phoebe from JACKSON, MS
-
Difficulty Level:Really Easy
-
Total Repair Time:30 - 60 mins
-
Tools:Screw drivers
1 person
found this instruction helpful.
Was this instruction helpful to you?
Thank you for voting!
Broiler did not work.
We had to take the back off the stove and disconnect the old element. One side had bad wiring. we had to repair the wires and inserted the new element. The job would not have taken so long if there were any kind of instructions.
Parts Used:
-
Mary from Arab, AL
-
Difficulty Level:A Bit Difficult
-
Total Repair Time:30 - 60 mins
-
Tools:Pliers, Wrench (Adjustable)
1 person
found this instruction helpful.
Was this instruction helpful to you?
Thank you for voting!
Halogen element staying on
removed the end caps from the stove panel, unscrewed the back, unscrewed the old switch, CAREFULLY noting which wire went to which terminal, removed the wires.
Reversed the process. took a little longer because I felt compelled to do a thorough cleaning while I was there.
Reversed the process. took a little longer because I felt compelled to do a thorough cleaning while I was there.
Parts Used:
-
Arthur from Indian Harbour Beach, FL
-
Difficulty Level:Easy
-
Total Repair Time:30 - 60 mins
-
Tools:Pliers, Screw drivers
2 of 4 people
found this instruction helpful.
Was this instruction helpful to you?
Thank you for voting!
Knob/switch would not turn right front burner on at all!
Pulled range out from the wall. Unplugged cord from outlet. Removed old knob, removed two phillips screws a very top of chrome trim, removed six nut-head screws from back to reveal the switches...removed two set screws from the front at knob base. Visually checked to make sure wiring post of new switch matched the old one. There was enough slack in the wiring to remove one wire at a time and connect it to the new switch in its appropriate place. Put new switch in the panel and secured with the two set screws. Select the bushing that would take up the slack for the old knob to fit on the new switch stem. Held new stem at its base with pliers and used another pair of pliers to snap the stem at appropriate length. (The new stem could not be broken off short enough to have the knob as flush to the panel as the other knobs...this was the only negative factor in the repair) Replaced nut-head screws and phillips screws. I was especially pleased with the quick delivery of the part...even without special shipping rates I received the part in less than 18 hours from the time I ordered it online!
Parts Used:
-
William from West Liberty, KY
-
Difficulty Level:Easy
-
Total Repair Time:15 - 30 mins
-
Tools:Nutdriver, Pliers, Screw drivers
3 of 7 people
found this instruction helpful.
Was this instruction helpful to you?
Thank you for voting!
Needed new drip bowl, was very hard to find one that fit my stove
Installed easily, was most impressed with the speed of delivery and it was the perfect size!!
Parts Used:
-
Rosemary from BROOKFIELD, CT
-
Difficulty Level:Very Easy
-
Total Repair Time:Less than 15 mins
1 person
found this instruction helpful.
Was this instruction helpful to you?
Thank you for voting!
Light burnt out.
Turned the wire protector to the side. Turned out the old bulb and replaced it with the new. Turned the wire protector back in place and I'm like new.
Parts Used:
-
Roscoe G from ROCHESTER, NY
-
Difficulty Level:Very Easy
-
Total Repair Time:Less than 15 mins
2 of 4 people
found this instruction helpful.
Was this instruction helpful to you?
Thank you for voting!
Drip pan was ruined by renter
-
Karilyn from KEWADIN, MI
-
Difficulty Level:Very Easy
-
Total Repair Time:Less than 15 mins
1 person
found this instruction helpful.
Was this instruction helpful to you?
Thank you for voting!