This dryer repair kit consists of five commonly replaced dryer parts: one multi-rib belt (part #661570V and measures 93 1/2 inches long), four drum support rollers, one idler assembly, nine tri-rings, and one washer. This universal maintenance kit is an all-encompassing kit for fixing a noisy dryer, among other symptoms, but noisy being the most common. It is compatible with 27-inch wide dryers built from 1965 onwards. Be sure to disconnect the dryer or shut off the house circuit breaker for the appliance before you begin your repair. To access these parts, you will need to remove the dryer drum. For this installation you will need a 1/4-inch nut driver, a long flat-blade screwdriver, a short flat-blade screw diver, and a Phillips screwdriver.
How Buying OEM Parts Can Save You Time and Money
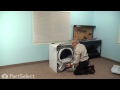
Part Videos
Replacing your Whirlpool Dryer Dryer Repair Kit
Troubleshooting
This part fixes the following symptoms:
Noisy | Drum Not Spinning | Won’t Start | Marks left on clothes
Keep searches simple. Use keywords, e.g. "leaking", "pump", "broken" or "fit".
Sorry, we couldn't find any existing reviews that matched. Try using some different or simpler keywords.
★★★★★
★★★★★
Roy C - January 25, 2020
Verified Purchase
dryer repair
I received the repair kit in excellent shape and very quickly as well and before doing the repairs I watched the video,although my dryer was gas I had no problem doing the job.I didn't know if I needed all the parts as the dryer took to having a rumbling noise about three weeks before I I ordered the parts and the unit was only two years old I didn't figure the problem was that serious but having it all apart I figured I might as well install all the pieces.it took about two hours to get the job done but it got rid of the noise.
★★★★★
★★★★★
BRENT T - August 30, 2019
Verified Purchase
Noisy dryer now quiet.
The Dryer repair kit arrived on time, and was a genuine Whirlpool product.
★★★★★
★★★★★
Nathan S - December 28, 2022
Verified Purchase
Great parts and easy repair
The kit fit my dryer exactly and everything went smoothly when I swapped the parts. Been running great for a month since the swap.
★★★★★
★★★★★
Dave Z - June 5, 2020
Verified Purchase
Easy repair
Great condition and received fast
★★★★★
★★★★★
Jerome M - December 10, 2022
Verified Purchase
Dryer repair kit
Excellent service! Correct item no issues would purchase again!
★★★★★
★★★★★
Keven C - July 28, 2018
Verified Purchase
Worked as expected
Pretty low price i came back alive my dryer with this kit. Shipping was really fast only took 1 business day. I will buy again for sure !
★★★★★
★★★★★
Tim S B - November 14, 2025
Verified Purchase
Easy repair using very helpful instruction video
All the parts fitted perfectly, followed the instructional video which made the repair fairly simple.
Found the source of the noise was one of the rollers bearings had failed, once replaced dryer is quiet again
★★★★★
★★★★★
Patricia S - October 21, 2024
Verified Purchase
Easy repair
The parts repair kit was exactly what I needed for a very easy repair
★★★★★
★★★★★
Peter W - April 15, 2020
Verified Purchase
Great parts. Works as expected.
The parts were of high quality and fit just as well as the originals. Dryer has been through about 10 cycles and is now as quiet as the day we got it. The shipping was really fast! Thanks!
★★★★★
★★★★★
Cal T - April 15, 2020
Verified Purchase
Easy repair with great video
One day project. We ordered on a Tuesday and received the next day, couldn’t believe this, Thank you for this service will use you again in a heart beat.
< Prev
1
2
3
Next >
Customer Repair Stories
Average Repair Rating: 2.8 / 5.0, 29 reviews.
What's this?
< Prev
1
2
3
Next >
Sort by:
Search filter:
Clear Filter
Your search term must have 3 or more characters.
Keep searches simple. Use keywords, e.g. "leaking", "pump", "broken" or "fit".
Sorry, we couldn't find any existing installation instruction that matched.
very loud squeeling sound
The issue was the idler pulley. First I began opening up the front panel based on a youtube video but soon realized the model was slightly different and required a lot more items to remove. I saw the pulley in the back with nothing in the way so I put the front panel crap back on and removed the rear panel. There it was, very simple to remove and replace. I'm not looking forward to drum rollers though. Hopefully they're aren't as difficult as they appear.
Other Parts Used:
jason from HOLDEN, MA
Difficulty Level:
Really Easy
Total Repair Time:
30 - 60 mins
Tools:
Socket set
108 of 116 peoplefound this instruction helpful.
Was this instruction helpful to you?
Thank you for voting!
Motor out
I found that the dryer would not start turning by itself. Could manually help it start and it would run fine. Anyway, after a new set of rollers, belt, etc. found that the motor still would not start by itself. Ordered new motor and it was taken care of. You have to take the back off, remove the belt and remove the tumbler. After that, it is fairly easy. Two screws hold the motor down and then you can take the whole motor assembly out. Be careful removing the fan as it takes a 3/8 socket drive and it is plastic. Two clips hold the motor to the assembly. Needle nose pliers takes care of it. Replace and all should be good.
Other Parts Used:
Jeff from Hutchinson, KS
Difficulty Level:
Easy
Total Repair Time:
30 - 60 mins
Tools:
Nutdriver, Pliers, Screw drivers, Socket set
95 of 191 peoplefound this instruction helpful.
Was this instruction helpful to you?
Thank you for voting!
Squeaky Dryer Noise
I purchased the dryer repair kit with the drum belt, wheels and idler pulley. I watched the instructional videos online and it seemed fairly straight forward. Breaking down the dryer and replacing the pulleys was easy enough. My problem began when I tried to feed the drum belt around the idler pulley. After finishing the job, the dryer would not turn and the sensor light stayed on. I thought something else was broken with the dryer and spent hours trouble shooting other problems that I was having. Finally I figured out that the drum belt was not installed correctly around the idler pulley. However, I could not get it properly installed from the front of the machine so I tried from the rear still with no avail. I finally had to fish the old belt out of the garbage can that I had thrown away earlier. I lined up the old belt with the new one in the kit and discovered that the new belt was much smaller, so I put the old one back on the drum. Here's the lesson I learned...make sure the belts are the same size before attempting to install. The old idler was responsible for the squeaking and that stopped but I am still using the same old drum belt. Hope it lasts.
Other Parts Used:
Eddie from PELZER, SC
Difficulty Level:
A Bit Difficult
Total Repair Time:
More than 2 hours
Tools:
Nutdriver, Screw drivers
85 of 95 peoplefound this instruction helpful.
Was this instruction helpful to you?
Thank you for voting!
high pitched squeaking noise when dryer is first started.
1. Disconnect dryer from electrical outlet. 2. Pull dryer out and disconnect the exhaust tube from the back. 3. Remove the screws at the top of the dryer back ( 3 ) and remove the top of the dryer. 4. The service instructions will be in a bracket on the top right. I didn't use them because I have done this job before. 5. Continue to remove the screws holding the back to the sides. There will be a lint collector attached to the back panel by three screws. This must be removed first, then the screws along the edge of the back panel. 6. Pull the back panel up and away from the sides and set aside. You will see two lower rollers attached to this panel. 7. Look under the drum and you will see a idler arm and roller in front of the electric motor and a little to the left. Notice that the drive belt is looped around the roller. Unloop the drive belt from idler and roller. 8. Lift the drum of the dryer up and out of the dryer. 9. Replace all the rollers (4) by removing the plastic "star" on the roller shaft. This can be done using a small screw driver. 10. Once the rollers are replaced, place the new drive belt, ribbed side facing the drum around the drum. Lift the drum up and into the dryer enclosure, making sure the rollers in the front of the drum are in the ridge groove. 11. Lift the back of the dryer in to the dryer enclosure, again making sure the rollers are in the rear groove. Turn the drum by hand to make sure the front seal is flush to the front of the dryer and that the front rollers are in the front groove. I2. Install drive belt around electric motor shaft ( ribbed side facing the shaft), lift idler arm up while running the non-ribbed side of the belt around the roller on the idler arm. 13. Install the back panel using the remaining screws. 14. Install the top of dryer by sliding it into the front panel and securing with the last three remaining screws, these 3 screws go on the top of the back panel. 15. Replace exhaust hose and replace dryer into space it formally occupied.
Other Parts Used:
Kenneth from TAVARES, FL
Difficulty Level:
Easy
Total Repair Time:
30 - 60 mins
Tools:
Screw drivers, Socket set
39 of 40 peoplefound this instruction helpful.
Was this instruction helpful to you?
Thank you for voting!
loud, screeching noise
Thankfully, I read this customer review before starting my repair:
"Repaired the 4 drum support rollers, 1 idler assembly, 9 tri rings, and 1 washer that came with the kit, however, the multi rib dryer belt that came with the kit did not fit my dryer. After several attempts to troubleshoot the problem, I realized that the belt was too small. I contacted PartSelect customer service and advised that the multi rib dryer belt that came with the kit was too small and I need to purchase a belt (P/N WP8547157) that fits my dryer. Recommend: Advise customers that the belt in the kit may not fit the recommended dryer."
I called PartSelect and discovered that they HAVE NOT put a warning statement with their "PartsKit" despite the above customer's complaint! No explanation nor apology given. I bought the "PartsKit" and I PAID EXTRA TO BUY THE CORRECT DRUM BELT.
I too, recommend that PartSelect Advise customers that the belt in the kit may not fit the recommended dryer.
Repaired the 4 drum support rollers, 1 idler assembly, 9 tri rings, and 1 washer that came with the kit, however, the multi rib dryer belt that came with the kit did not fit my dryer. After several attempts to troubleshoot the problem, I realized that the belt was too small. I contacted PartSelect customer service and advised that the multi rib dryer belt that came with the kit was too small and I need to purchase a belt (P/N WP8547157) that fits my dryer. Adam was very courteous and helpful and very apologetic for the belt not being the right one. PartSelect refunded my purchase for the Parts Kit and I purchased the correct multi rib dryer belt. I received the new belt expeditiously and was able to finalize the repairs. Thank you PartSelect for your support and cooperation. Recommend: Advise customers that the belt in the kit may not fit the recommended dryer.
Other Parts Used:
jose from FALLBROOK, CA
Difficulty Level:
Really Easy
Total Repair Time:
30 - 60 mins
Tools:
Screw drivers, Socket set
22 of 22 peoplefound this instruction helpful.
Was this instruction helpful to you?
Thank you for voting!
Noisy Dryer
I ordered the dryer repair kit and to my surprise it arrived 4 days early. I followed the video instructions on the parts select website to replace 4 rollers, belt and belt pulley. A 1/4 in nut driver attached to my Dewalt drill made life ALOT easier!! My recommendation, when you remove the rollers, take a rag and really clean up the shaft they ride on. Then apply a lightweight spray oil to the shafts. When you install the new rollers they will spin free and easy. Having the dryer apart is also a great time to break out the dust buster of vacuum. Spin the fan motor up front by hand and use vacuum to remove lint or belt shaving from inside the cabinet. Add this step as good fire prevention measure.
Other Parts Used:
Patrick from SCHENECTADY, NY
Difficulty Level:
Easy
Total Repair Time:
1- 2 hours
Tools:
Nutdriver, Screw drivers
21 of 21 peoplefound this instruction helpful.
Was this instruction helpful to you?
Thank you for voting!
Noisy sound from dryer
Just like video except there were two screws in back to take control head off. Be prepared to have shop vacation ready. Clean dryer duct too. Have bandaids ready. Plastic triangles are not easy to take off, video makes it look easy.
Other Parts Used:
john from OLYMPIA, WA
Difficulty Level:
Easy
Total Repair Time:
1- 2 hours
Tools:
Nutdriver, Screw drivers
20 of 23 peoplefound this instruction helpful.
Was this instruction helpful to you?
Thank you for voting!
Dryer would not heat, also had thumping sound as drum turned.
Viewed a video provided on this site for disassembly etc. It was not my exact same model, but the instructions were pretty much spot on. The main issues we had were just that it was bulky etc. and somewhat heavy. We could not really work on it in place, so we had to drag it to the kitchen area. I found the existing heater element to be open upon inspection. Changed it out with the one I purchased which was an exact replacement. The drum rollers, motor pulley, and belt did not really look bad, but since I ordered the repair kit, I went ahead and replaced all of them. I was glad I did because it is much quieter now. The only thing I did differently was I cut off the existing plastic triangle keepers for the rollers with my diagonal cutters instead of work them off with a small screwdriver like in the video, which saved some time and frustration. New ones were provided in the kit I purchased anyway. I also would recommend marking the front of the drum somehow so there is no confusion which way it goes when you put it back together. Works as good as new now, good for another 10 years (I hope).
the dryer was making squealing noises when it first started.
We watched the video at whirlpool.com! Made it so simple anyone could have done it!
Other Parts Used:
Christine from BIRCH RUN, MI
Difficulty Level:
Really Easy
Total Repair Time:
1- 2 hours
Tools:
Nutdriver, Screw drivers
13 of 14 peoplefound this instruction helpful.
Was this instruction helpful to you?
Thank you for voting!
< Prev
1
2
3
Next >
Questions and Answers
Ask our experts a question about this part and we'll get back to you as soon as possible!
77 questions answered by our experts.
< Prev
1
2
3
Next >
Sort by:
Search filter:
Clear Filter
Your search term must have 3 or more characters.
Keep searches simple. Use keywords, e.g. "leaking", "pump", "broken" or "fit".
Sorry, we couldn't find any existing answers that matched.Try using some different or simpler keywords, or submit your new question by using the "Ask a Question" button above!
Laurel
July 20, 2017
Do I need to grease these wheels before reinstalling?
Hi Laurel, it is not recommended to grease the rollers/wheels before installing them. Please let us know if you have any further questions.
69 peoplefound this helpful.
Was this helpful?
Thank you for voting!
June
July 20, 2017
If my dryer is making loud squeaking noises and it’s in direct relation to the drum. Should I purchase this assembly or do you think it’s something else?
Hi June, this dryer repair kit 4392067 will more than likely take care of the noise issues you are experiencing. We also recommend checking the blower wheel for anything that may be caught in it. Also, keep in mind that you may not need to use all the parts in this assembly. It is made for various dryer models, and not all parts in the kit will fit your dryer. I hope this helps.
64 peoplefound this helpful.
Was this helpful?
Thank you for voting!
Deb
July 20, 2017
My dryer is making a thumping noise and I think I might need this repair kit to fix it. Is this assembly what I need?
Hi Deb, this kit is compatible with your model. Make sure while doing this repair you compare the belts that they are the same size. Too long or too short of a belt will affect the drying times. Best of luck with this repair!
20 peoplefound this helpful.
Was this helpful?
Thank you for voting!
Natalie
May 2, 2019
My hubby installed the dryer repair kit part #ps373088. I see here it says not to use lube on the dryer but he said he did. Is this a problem? What will happen?
Hello Natalie, Thank you for the question. The lube should be removed before use. It can cause issues with the belt and other parts. Hope this helps!
12 peoplefound this helpful.
Was this helpful?
Thank you for voting!
Oscar
September 23, 2017
What is the problem when a lot of lint gets inside the dryer?
For model number WED8600YW0
Hello Oscar, thank you for contacting us. You will want to check for holes in the lint filter and the exhaust vent. It's still possible for some to get past the lint filter, you may want to clean it out once or twice a year to keep it clear of lint build up. Hope this helps!
9 peoplefound this helpful.
Was this helpful?
Thank you for voting!
Joshua
August 5, 2018
I need to replace the dryer belt, rollers and roller shafts...will this kit work for my dryer model?
For model number WED8500BC0
Hi Joshua, Thank you for your question. Yes, this kit is listed as compatible underneath your model number. I hope that helps. Good luck with your repair.
6 peoplefound this helpful.
Was this helpful?
Thank you for voting!
Ron
October 28, 2017
Dryer vent doesn't blow out air
For model number WED7600XW0
Hi Ron,
Thank you for your question. It sounds like you either have a motor issue or there is a build up of lint inside of your blower parts. I could suggest first taking a look to see if your blower wheel is clogged up with lint. You should also check to see if your dryer duct is kinked or blocked as well. If all of venting and duct work is cleared out and fine, you may have to look at your motor being the issue. Good luck with your repair.
3 peoplefound this helpful.
Was this helpful?
Thank you for voting!
Brad Koning
December 6, 2019
Started squealing then grinding now it just stopped. I can spin the drum but when i power it up and push dry, it does nothing? Do i need a drum support kit? What part number is the kit i may need? Thanks.
For model number YMEDE400XRO
Hello Brad, thank you for inquiring. This sounds as though the Drive Motor has failed. The replacement for your model is part number PS334287. Good luck with your repair!
3 peoplefound this helpful.
Was this helpful?
Thank you for voting!
Robert
May 17, 2019
Running shoe blocked drum from turning then burnt smell and dryer off
For model number YWED7300XW0
Hello Robert, thank you for your question. We would recommend checking the blower belt and drum belt to see if they have broken. If the dryer will not turn on and tumble, we would recommend testing the thermostats and the belt switch beside the motor which is PartSelect Number PS11754411. I hope this helps!
2 peoplefound this helpful.
Was this helpful?
Thank you for voting!
Michael
August 5, 2019
Just confirming that the dryer kit is the correct one for the model listed above
For model number MDE9700AYW
Hello Michael and thank you for writing
No. Part # PS373088 is not in the list of compatible items for your model. There is individual parts available to do the repair .Hope this helps
1 personfound this helpful.
Was this helpful?
Thank you for voting!
< Prev
1
2
3
Next >
✖
Ask a Question
Ask our experts a question on this part and we'll respond as soon as we can.
This idler pulley assembly includes the pulley and bracket, ensuring proper tension on the dryer drive belt for smooth drum rotation. Compatible with several Whirlpool, KitchenAid, Maytag, Jenn-Air, Amana, Inglis, and Ma...
Fresh Flow Produce Preserver is made for your refrigerator to help keep produce fresh for longer by absorbing the chemical, ethylene, that causes your fruits and vegetables to ripen quicker. Your produce could be fresh f...
Having a problem with a funky-smelling washing machine, or one that just doesnt seem to clean your clothes as well as it used to? Say hello to the Affresh Washing Machine Cleaner by Whirlpool. This powerful washing helpe...
Affresh dishwasher Cleaner is specially formulated to help remove limescale and mineral build-up that can be unsightly and could affect your dishwasher's performance. Each tablet is designed to clean inside your machine ...
Make your cooktop shine with Frigidaire ReadyClean Glass and Ceramic Cleaner. Our scratch-free, streak-free formula removes smudges, grease, burnt-on food, dirt and oil, while protecting and polishing to repel dust and d...