This valve is located behind the refrigerator. It has a 1/4" compression inlet fitting. This part is a solenoid-operated switch that, when activated, releases water from the supply line to the water valve and into the compact icemaker mold.
How Buying OEM Parts Can Save You Time and Money
Part Videos
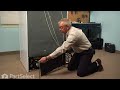
Replacing your Maytag Refrigerator Double Inlet Water Valve
Troubleshooting
This part fixes the following symptoms:
Leaking | Ice maker not making ice | Not dispensing water | Ice maker won’t dispense ice
Keep searches simple. Use keywords, e.g. "leaking", "pump", "broken" or "fit".
Sorry, we couldn't find any existing reviews that matched. Try using some different or simpler keywords.
★★★★★
★★★★★
Nathan M - May 17, 2019
Verified Purchase
Worked great
Easy to install. Video helped. Fixed in 5 minutes
★★★★★
★★★★★
Yvan Dias D - October 28, 2020
Verified Purchase
Perfect
Gah. You
< Prev
1
Next >
Customer Repair Stories
Average Repair Rating: 4.0 / 5.0, 25 reviews.
What's this?
< Prev
1
2
3
Next >
Sort by:
Search filter:
Clear Filter
Your search term must have 3 or more characters.
Keep searches simple. Use keywords, e.g. "leaking", "pump", "broken" or "fit".
Sorry, we couldn't find any existing installation instruction that matched.
Ice Maker had quit due to faulty valve
Repair work was very easy. Water supply was to the icemaker/water dispenser. After removing the outer fiber cover with a screwdriver, the valve was removed by unscrewing one nut. Post removal water lines were removed with a ordinary pair of scissors approximately 1/2" from where it entered the faulty valve. the two electrical connections were then removed from the faulty valve. The water lines were then connected to the replacement water valve very easily by just inserting and applying a small amount of pressure. The electrical connections were then connected, replacement valve reattatched to the frame work (fit perfectly). After this I turned on the water and BINGO ice :) Post knowing the replacement valve worked I re-attached the fiber cover and pushed the refrigerator back in it respective location. Again this repair was very easy and the part arrived sooner than expected.
Other Parts Used:
Brian from Imperial, CA
Difficulty Level:
Really Easy
Total Repair Time:
15 - 30 mins
Tools:
Nutdriver, Screw drivers
65 of 76 peoplefound this instruction helpful.
Was this instruction helpful to you?
Thank you for voting!
Ice maker over flowing
My ice maker was overflowing and i realized that it was the water valve that needed replaced. unscrewed 1 nut, unhooked 3 water lines, unhooked electrical components and re-installed in reverse order. took about 10-15 mins.
Other Parts Used:
ben from manhattan, KS
Difficulty Level:
Really Easy
Total Repair Time:
15 - 30 mins
Tools:
Nutdriver, Pliers
13 of 16 peoplefound this instruction helpful.
Was this instruction helpful to you?
Thank you for voting!
No water to icemaker
Easy to diagnose problem because there was water to the water dispenser but none to the newly installed icemaker. Originally did attempt to clean the solenoid but found the plunger assembly damaged.
New part arrived sooner than I thought it would. Takes about as much time to remove the lower vent cover as to replace the valve. Remove the electrical plug from the wall, valve off the main water supply, remove lower vent cover, disconnect the supply hose from refrigerator valve assembly, remove one hex head mounting screw and you have both water valves in your hands. Identify the valve the supplies water to the filter and the one that supplies water to the icemaker/water dispenser. Then confirm which plastic water supply line goes to the water dispenser and which goes to the icemaker. Hose diameters are different but it is good to know. Disconnect the plastic water supply lines from both the ice dispenser and the icemaker portions of the valve. Replacement solenoid valve does not have thread on type compression fittings. Snip about an inch off of each hose and then press into the appropriate valve orifice.
Making sure the plastic supply lines do not get crimped, remount the valve assembly, reattach the supply hose, valve on the water and check for leaks. No leaks, reinstall dust cover and plug the refrigerator back in.
Move the unit back in place and then take a long deserved beer out and have a celebratory toast for a job well done.
Other Parts Used:
Philip from Mission Viejo, CA
Difficulty Level:
Really Easy
Total Repair Time:
15 - 30 mins
Tools:
Nutdriver, Wrench (Adjustable)
11 of 12 peoplefound this instruction helpful.
Was this instruction helpful to you?
Thank you for voting!
water leak
unplug refridgertor shut water off. took off water line at valve un plug wires unsrew mounting valve. srew water line back plug wires back and mount vavle. turn on water. plug refridgertor in
1. Turn off fridge and Pull plug from wall. 1a. Turn OFF water supply! 2. Remove rear dust cover to gain access to water valve. 3. Mark power connectors(red/green) attached to water valve before removing them. Remove connectors. 4. Remove supply line from old valve. 5. loosen mounting screw holding old valve in place. 6. remove valve. 7. disconnect two plastic water lines from valve. 8. Cut 1/2 inch off the end of each plastic line to get to un-streached line. Make sure you have enough line to still reach valve! 9. Insert plastic lines FIRMLY into outlets of NEW VALVE to lock in place. outlets are different sizes so you can't reverse them! 10. Install new valve and tighten mounting screw. 11. replace/tighten supply line to new valve. 13. Replace dust cover! 14. Plug in, Turn on fridge. 15. Turn on water supply, bleed air out by drawing a glass of water at door, and check for leaks! All Done!
Other Parts Used:
richard from Little Suamico, WI
Difficulty Level:
Easy
Total Repair Time:
15 - 30 mins
Tools:
Nutdriver, Wrench (Adjustable)
9 of 12 peoplefound this instruction helpful.
Was this instruction helpful to you?
Thank you for voting!
Water valve had cracked in a move and was leaking badly
Replaced the water valve with the new part by removing 2 screws to allow folding back of the cover, removing 1 screw and pulling valve assembly out. 1 more screw took the two valves apart, unscrewed the water lines, replaced them on new valve (with newer push-in connections it was even easier), reassembled unit, turned the water on, checked for leaks, none found. Works great, was very easy.
filteer was stoped up took 3 minutes to put bypass cap on & icemaker leaking water
(returned valve) not the problem &. ordered ice maker.pulled the 2 screws at the top of icemaker and one screw at bottom.unhooked wireing harnes from wall replaced .in reverse order.was making long ice cyclies .problem over
the main water valve was leaking causing the water under the frig. But the double out let valve was not holding causing a ice build up in the ice bin. The repair was not complicate you take back cover off turn off water. use the nut driver to unbolt the valves from the frig with frig unplugged use screw driver to remove the power plugs from valve. use flare nut wrenches to remove main water line.push on plastic retainer rings to remove plastic tubing. remove valves from bracket and then reinstall in reverse order.
Water line inside freezer would freeze and block flow
The old valves water lines had threded connectors, I cut those off and pused the line into new valve put everything back together. Only additionalwasto clean ice from around icemaker where hose fills it with water. It'sben working fine for a week so far.
First I unpluged the frigerator, then I turned off the water. Then I removed the the black cover from the bottom back of the frig. The valves are located on the bottom right. Unscrew the bracket that is holding the two valves. I then removed the bottom valve from the bracket, unplug the electrical connections, and connect to the new valve. To remove the water lines from the valves just move the white ring around on top of the valve and pull the line out and insert into the new one when ready. (the valves are the same colors) Do the same to the top valve, mount back to the bracket, then mount the bracket to the frig, hook up your water line to the valve, turn on the water and check for leaks, plug it in. Then put a glass under the water dispenser and try it out, it'll take a few seconds to get the water running through. PartSelect was very quick on getting me my parts, TWO days, couldn't believe it. Very good examples of parts on web page. Very satisfied and will use again.
We're sorry, but our Q&A experts are temporarily unavailable.
Please check back later if you still haven't found the answer you need.
3 questions answered by our experts.
< Prev
1
Next >
Sort by:
Search filter:
Clear Filter
Your search term must have 3 or more characters.
Keep searches simple. Use keywords, e.g. "leaking", "pump", "broken" or "fit".
Sorry, we couldn't find any existing answers that matched.Try using some different or simpler keywords, or submit your new question by using the "Ask a Question" button above!
Doug
April 30, 2018
Does this water inlet valve work for this Whirlpool refrigerator
For model number Gd5dhaxvbo7
Hello Doug, thank you for your question. Unfortunately, that is not the right valve. The correct water inlet valve for your appliance is Water Inlet Valve Part Number W10408179. Please note: This valve has been updated by the manufacturer and no longer includes the removable pre-filter bracket connector. It must be ordered separately; part number WPW10445062. Please enter the part numbers into the site for current price and availability. Good luck with your repair!
3 people found this helpful.
Was this helpful?
Thank you for voting!
Richard
May 27, 2019
My ice cube maker overflows sometimes. It makes ice cubes but leaks water into the freezer onto the floor. When it overflows it just keeps delivering water dies not shut off. I am not sure but the shut off arm in the ice cube tray may not be shutting the water off either.
For model number JCD2388GES
Hello Richard, thank you for your question. Chances are, the water valve is staying on too long. You can test the water valve by following the information at this link. https://www.partselect.com/Refrigerator+test-water-valve+repair.htm. If the valve is fine, the issue would be with the icemaker itself. I hope this helps!
3 people found this helpful.
Was this helpful?
Thank you for voting!
Wayne
June 14, 2023
Ice dispenser works but when I push the water to fill the glass can't get any water. Prior it would work 1 to 2 days then not work for a day or so then work again for a day. Now for the past week cannot get it to dispense water. What would we need for parts and how can we repair it without having to call a repairman?
For model number JCD2289AEB
Hi Wayne, thank you for your inquiry. The issue seems to be with the water tank assembly. A refrigerator's water tank assembly channels the water coming in from the water inlet valve through the water filter and onto the dispenser. If the tank assembly is frozen, or a water line is crimped, water may not be able to get through. Inspect the water tank assembly for any obstruction or damage and replace the water tank, part number PS11743176. Use the following instructions to replace the water tank:
1. Turn off the refrigerator.
2. Remove the rear access panel.
3. Remove the tube from the water inlet valve.
4. Remove the lower base grill and locate the water tube.
5. Remove the drawers from the refrigerator and remove the water tank assembly.
6. Replace the old water tank with a new one.
We hope this information helps!
Fresh Flow Produce Preserver is made for your refrigerator to help keep produce fresh for longer by absorbing the chemical, ethylene, that causes your fruits and vegetables to ripen quicker. Your produce could be fresh f...
Having a problem with a funky-smelling washing machine, or one that just doesnt seem to clean your clothes as well as it used to? Say hello to the Affresh Washing Machine Cleaner by Whirlpool. This powerful washing helpe...
Affresh dishwasher Cleaner is specially formulated to help remove limescale and mineral build-up that can be unsightly and could affect your dishwasher's performance. Each tablet is designed to clean inside your machine ...
Make your cooktop shine with Frigidaire ReadyClean Glass and Ceramic Cleaner. Our scratch-free, streak-free formula removes smudges, grease, burnt-on food, dirt and oil, while protecting and polishing to repel dust and d...