This temperature sensor detects the temperature within the oven cavity.
How Buying OEM Parts Can Save You Time and Money
Part Videos
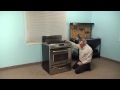
Replacing your KitchenAid Wall Oven Range Temperature Sensor
Troubleshooting
This part fixes the following symptoms:
Oven is too hot | Little to no heat when baking | Oven not heating evenly | Will Not Start
This part works with the following products:
Wall Oven, Range, Microwave Oven Combo, Cooktop.
This part works with the following products:
KitchenAid, Whirlpool, Jenn-Air, Maytag.
Part# WPW10131825 replaces these:
AP6015486, 4455636, W10131825, WPW10131825VP
Customer Reviews
Average Rating:
★★★★★
★★★★★
27 Reviews
4.9
Filter By Rating:
5 Stars
25
4 Stars
1
3 Stars
0
2 Stars
1
1 Star
0
< Prev
1
2
3
Next >
Sort by:
Search filter:
Clear Filter
Your search term must have 3 or more characters.
Keep searches simple. Use keywords, e.g. "leaking", "pump", "broken" or "fit".
Sorry, we couldn't find any existing reviews that matched. Try using some different or simpler keywords.
★★★★★
★★★★★
Cyrille M - December 31, 2022
Verified Purchase
Easy repair, great and helpful service. Easy fix.
Everything was as it should have been. Part arrived quickly.
★★★★★
★★★★★
Susan T - August 11, 2018
Verified Purchase
Easy to repair
The part was in great condition my Appliance is working fine now thank you
★★★★★
★★★★★
Paul M - January 1, 2021
Verified Purchase
job done
very helpfull people to deal with in knowing what part # i needed quick delivery thank you very much
★★★★★
★★★★★
Amanda R - June 17, 2022
Verified Purchase
Easy repair
The part works perfectly.
★★★★★
★★★★★
Rosalind F - January 5, 2022
Verified Purchase
Great Service!
Quick, easy and fixed!
★★★★★
★★★★★
Dick H - August 9, 2020
Verified Purchase
Stove parts
Easy to install and good delivery time
★★★★★
★★★★★
Charles M - December 7, 2019
Verified Purchase
Oven sensor and Hi temperature cutoff
Both parts were were received and were installed without any problems. The speed of your delivery and ease of installation were excellent. Thanks again, I will reorder other parts from you in the future
★★★★★
★★★★★
Steve B - November 2, 2022
Verified Purchase
Easy replacement and park exactly like the one replaced.
Problem of oven not being the correct temperature was fixed by replacing this sensor. Fast shipping. Hassle free experience.
★★★★★
★★★★★
Lori D - March 30, 2023
Verified Purchase
Great part
This part I had replaced before, so I did know how long it would take me.I followed the repair on YouTube and was easy to follow.
★★★★★
★★★★★
Steve P - October 3, 2021
Verified Purchase
Easy repair and part worked great
The part was delivered promptly and the utube video made the repair easy to follow. We’ll done!
< Prev
1
2
3
Next >
Customer Repair Stories
Average Repair Rating: 4.1 / 5.0, 7 reviews.
What's this?
< Prev
1
Next >
Sort by:
Search filter:
Clear Filter
Your search term must have 3 or more characters.
Keep searches simple. Use keywords, e.g. "leaking", "pump", "broken" or "fit".
Sorry, we couldn't find any existing installation instruction that matched.
Over heating oven and uneven baking. Oven thought it was in self cleaning mode.
Sensor replacement was removing 2 screws and gently pulling on old sensor until the clip comes out. Secured the other end of the wires so that it did not fall back inside. Then connected the new sensor clip to the oven wire, then gently returning wire into oven, and then screwing the sensor into place. The baking element was easier than the sensor. Removed the 2 screws holding the element into the back bottom of the oven, and pulled the element forward to disconnect from clamps. Inserted new element into clamps and screwed it in. ***NOTE that there will be a smell from the new element. This smell is normal. If the smell continues after a couple minutes stop the oven and wait an hour before reattempting.
I followed instructions from the videos provided on the Part Select site. As with many such appliances, parts are interchangeable between brands. this unit is a KitchenAid but Whirpool,Kenmore parts interchange...Access from the front is all that's needed however and the only tool required was a phllips head screw driver...the only negative surprise (which the video warned about but I ignored) was the risk of the element leads drawing back through the holes, which 2 did. Save yourself that trouble by securing the wires to the back oven wall with a small strip of duct tape until you're ready to re-attach them to the new element. This necessitated removing the oven entirely for access to the back; the most time consuming aspect being removing/replacing what seemed like 20 odd screws holding the back cover in place! If not for that mistake, entire job would have been under 30 minutes. Well worth the effort and would do it again!
Replaced oven temp sensor, removed oven door and interior racks for easy access to oven upper rear sensor access. Used philips head screw driver to remove both screws, gently pulled old senor out of reat oven wall until electrical connector clear of rear wall, disconnected connector, connected new sensor and gently pushed wiring and connector back into opening, reinstalled door and racks. Ran open thru cycle and used oven thermometer to check temp. fast easy install
Other Parts Used:
Kenneth from BUFFALO, NY
Difficulty Level:
Very Easy
Total Repair Time:
15 - 30 mins
Tools:
Screw drivers
5 of 5 peoplefound this instruction helpful.
Was this instruction helpful to you?
Thank you for voting!
Oven will not maintain set temp
Remove rear panel - remove sensor from inside - unplug from rear - reverse to install - did not fix problem
Other Parts Used:
Sam from TINLEY PARK, IL
Difficulty Level:
Easy
Total Repair Time:
30 - 60 mins
Tools:
Screw drivers
3 of 3 peoplefound this instruction helpful.
Was this instruction helpful to you?
Thank you for voting!
Oven temperature did match target temp entered on control panel.
I found that what was keeping the old temp sensor electrical connection attached to the stove-side connection was a little tab. It wasn't obvious that that was the thing that was keeping the connection secure but there weren't any other alternatives. So pushing the tab up with the metal probe (just a narrow rigid metal wire) allowed me to pull the connection apart.
All this takes place way at the back of the oven so its difficult to fiddle with a screwdriver and the retaining screws at arms length. Putting a bit of scotch tape around the screw to keep it attached to the screwdriver kept it from falling off. My hand was a bit shaky extended like that so that was the way to go.
Bottom line, if your oven won't reach or hold the temp you dial in on the control panel it's the temperature sensor. Now if I set it for 300 deg. that's what I get.
Other Parts Used:
Richard from EVANSTON, WY
Difficulty Level:
Really Easy
Total Repair Time:
15 - 30 mins
Tools:
Screw drivers
2 of 2 peoplefound this instruction helpful.
Was this instruction helpful to you?
Thank you for voting!
The oven was over heating because it wasn’t reading the temperature
Pulled the stove out, unscrewed the back and plugged the new thermostat in. Screwed the back back on
Other Parts Used:
LAURIE from BILTMORE LAKE, NC
Difficulty Level:
Really Easy
Total Repair Time:
30 - 60 mins
Tools:
Screw drivers
2 of 4 peoplefound this instruction helpful.
Was this instruction helpful to you?
Thank you for voting!
All elements would heat to around 200 degrees, then stop
Disconnect the sensor harness and checked resistance on the sensor,should read around 1100 ohm I only got 25.The sensor is mounted in the oven cavity back wall below upper element,the door must be removed. Unscrew 2 Philips head screw,unhook the harness,install new sensor,reconnect harness,install screws.
Other Parts Used:
frank from Wilmington, NC
Difficulty Level:
Really Easy
Total Repair Time:
15 - 30 mins
Tools:
Screw drivers
1 personfound this instruction helpful.
Was this instruction helpful to you?
Thank you for voting!
< Prev
1
Next >
Questions and Answers
Ask our experts a question about this part and we'll get back to you as soon as possible!
30 questions answered by our experts.
< Prev
1
2
3
Next >
Sort by:
Search filter:
Clear Filter
Your search term must have 3 or more characters.
Keep searches simple. Use keywords, e.g. "leaking", "pump", "broken" or "fit".
Sorry, we couldn't find any existing answers that matched.Try using some different or simpler keywords, or submit your new question by using the "Ask a Question" button above!
Sean
October 17, 2017
When I turn on my top oven after about 5 minutes of preheating the door lock engages and i get the error code f3 e2. Do you know what can cause this? Thank you
For model number RBD245PDQ15
Hi Sean, Thank you for the question. The error indicates an issue with the Temperature Sensor. You can try to disconnect power or unplug the appliance. Check the temperature sensor wire to see if it is loose. Measure the oven temperature sensor resistance using a volt/ohm meter. If the resistance isn’t 1080 ohms at room temperature (70 degrees F), replace the oven temperature sensor. If the oven temperature sensor resistance and wire harness connections are okay, replace the electronic oven control (EOC). Hope this helps!
24 peoplefound this helpful.
Was this helpful?
Thank you for voting!
Ellen
November 29, 2018
Whirlpool built in oven model #rbs305pd016. When the oven reaches the "set" temp. It doesn't shut off and just keeps getting hotter. Do i need a new heat sensor? Do you know the part number?
For model number RBS305PD016
Hello Ellen, thank you for your question. Yes, it sounds like a temperature sensor issue. Measure the oven temperature sensor resistance using a volt/ohm meter. If the resistance isn’t 1080 ohms at room temperature (70 degrees F), replace the oven temperature sensor. If the oven temperature sensor resistance and wire harness connections are okay, replace the electronic oven control (EOC). Hope this helps!
6 peoplefound this helpful.
Was this helpful?
Thank you for voting!
Rick Szymanski
January 30, 2018
Oven will only heat up to 300 degrees no matter what i set the temperature at ,also will stop the heating process after it reaches the set temp. Act like its working fine ,just wont restart,to maintain set temp
For model number kgrk806pss00
Hello Rick, Thank you for your inquiry. We would recommend checking the following parts to fix your issue: temperature sensor, high limit thermostat, thermal protector thermostat, fixed thermostat, and control board. You can test the parts with a multimeter. If you are unfamiliar with how a multimeter functions, there are YouTube videos available to assist you. Hope this helps!
5 peoplefound this helpful.
Was this helpful?
Thank you for voting!
Dale
September 5, 2017
Can you provided directions for installing the oven temperature sensor. My oven does not heat; it does not even begin to heat. Yet the indicator shows that the oven is on. I please.
For model number KDR 463LSSO
Hi Dale,
Thank you for your inquiry. For information on how to install the temperature sensor, there is a video listed under the photo of the part that you may reference on how to install the part. I hope this helps. Thank you and have a great day!
4 peoplefound this helpful.
Was this helpful?
Thank you for voting!
Amanda
August 8, 2019
My oven will sometimes heat fine, but other times will not heat to set temp. It used to be mostly after i had been using the oven, then turned off, then back on after a brief rest. It seems to be more frequent and unpredictable now.Thanks for you help
For model number KDRP467KSS0
Hello Amanda, thank you for your question. It sounds like you have a bad oven sensor. We would recommend testing/replacing this part. PartSelect Number: PS11748765. I suggest testing the sensor. Measure the oven temperature sensor resistance using a volt/ohm meter. If the resistance isn’t 1080 ohms at room temperature (70 degrees F), replace the oven temperature sensor. If the oven temperature sensor resistance and wire harness connections are okay, replace the electronic oven control (EOC). Hope this helps!
3 peoplefound this helpful.
Was this helpful?
Thank you for voting!
Temeka
February 18, 2020
Hello, we are getting a error message when turning the oven on.Error code f3 eo it says oven sensor - upper.
what is the part i need for this?
or how can i correct this error because sometime it works and other nothing.
For model number KDSS907XSP01
Hello Temeka, thank you for your question. The oven temperature sensor for this unit is PartSelect Number: PS11748765. Yes, that error code is in relation to the sensor and replacing this part should fix the issue. I hope this helps.
3 peoplefound this helpful.
Was this helpful?
Thank you for voting!
Carole
March 18, 2018
Do you have a video for installation of temperature sensor for my slide-in stove?
For model number Kgrs807sss01
Hello Carole, Thank you for your inquiry. We do have an installation video for this part and I have included the link below. Hope this helps!
https://www.partselect.com/PS11748765-Whirlpool-WPW10131825-Temperature-Sensor.htm?SourceCode=4&SearchTerm=KGRS807SSS01&ModelNum=KGRS807SSS01#RepairVideo
2 peoplefound this helpful.
Was this helpful?
Thank you for voting!
Michael
August 31, 2017
My upper oven does not always heat up, wonder what my problem may be? Thanks.
For model number G80309PVS02
Hi Michael,
Thank you for your inquiry. If your upper oven is not heating up, the majority of the time it is the temperature probe, part number PS11748765, that will fix the issue. I hope this helps. Thank you and have a great day!
2 peoplefound this helpful.
Was this helpful?
Thank you for voting!
Dean
December 18, 2019
The element on this oven fried and needed to be replaced, so i ordered a new one from partselect and installed it. The oven would not come up to baking temperature as the preheating element shut off prior to getting up to temp. I surmised that the temperature sensor was likely damaged when the element was melting down, so i ordered that and replaced it. The oven still does not come up to temperature. What else could be the issue?
For model number KEMS308SSS05
Hello Dean and thanks for writing.
You might have to calibrate the oven. Check the manual for instructions. We hope this helps. Please contact us anytime.
1 personfound this helpful.
Was this helpful?
Thank you for voting!
Richard
July 29, 2025
A couple questions..
1) I had replaced the broil element and secured the connections. Its a dual element and the inside element turns on. The outside element however does not. Does it not come on when the stove heats up? I tried broil, or does it come on with self cleaning?
2) Also when I turn the temperature up to say 400 it heats up to that temperature no problem. I was just checking and I would turn it down to 300 it does not show the temperature lowering to the 300.
Note: I did check the Range Temp Sensor and it showed 1077 ohms I suspect that is within range but not sure if its faulty or not.
For model number YKESS907SS03
Hi Richard, thank you for the question. The dual broil element is designed to work in a specific way. The inner element usually comes on first, and the outer element may come on later, depending on the oven's temperature and the broil setting. However, it's not uncommon for the outer element to only come on when the oven is at a high temperature. This is because the outer element is usually designed to provide additional heat for broiling or high-temperature cooking. If you are using the broil setting, try setting to the highest broil setting to see if the outer element comes on. It is unlikely that the outer element would come on during self-cleaning, as self-cleaning uses the bake element. As the temperature sensor resistance is with in the range, it means it is fine. The issue could be with the oven control board, part number PS11749720. You may need to replace it to fix the issue. We hope this solves your problem!
Fresh Flow Produce Preserver is made for your refrigerator to help keep produce fresh for longer by absorbing the chemical, ethylene, that causes your fruits and vegetables to ripen quicker. Your produce could be fresh f...
Having a problem with a funky-smelling washing machine, or one that just doesnt seem to clean your clothes as well as it used to? Say hello to the Affresh Washing Machine Cleaner by Whirlpool. This powerful washing helpe...
Affresh dishwasher Cleaner is specially formulated to help remove limescale and mineral build-up that can be unsightly and could affect your dishwasher's performance. Each tablet is designed to clean inside your machine ...
Make your cooktop shine with Frigidaire ReadyClean Glass and Ceramic Cleaner. Our scratch-free, streak-free formula removes smudges, grease, burnt-on food, dirt and oil, while protecting and polishing to repel dust and d...