


Get in touch, we're here to help!
1-866-883-8386
Monday to Saturday
8am - 8pm EST
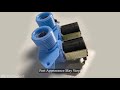
Washer Water Inlet Valve And Thermistor Assembly WP3979346
Does this part fit my model?
Need help finding your model number?Washer Water Inlet Valve And Thermistor Assembly Specifications

How Buying OEM Parts Can Save You Time and Money
Replacing your Whirlpool Washer Washer Water Inlet Valve And Thermistor Assembly

- < Prev
- 1
- 2
- Next >
- < Prev
- 1
- 2
- Next >
- < Prev
- 1
- 2
- Next >
Unplug the washer.
Turn the water off and unscrew the hoses from the inlet.
Unsnap the end caps from the top control panel.
Remove the exposed screws from each end of the panel (#2 Phillips).
Pull the panel out of the way and pop out the two retaining clips that hold the back of the machine to the cabinet. They are located under the control panel.
Remove the mounting screw from the valve assembly (1/4-inch driver).
Pull the back away from the cabinet far enough to remove the valve, but don't let the wires get cut.
Disconnect the wires. To unplug the solenoid connectors, lift the long tab with a screwdriver.
Disconnect the water outlet hose.
Connect the wires and hose to the new valve assembly. The red connector goes to the hot water valve. The thermistor wires (the two individual connectors) can be connected to either terminal. It does not matter if they are reversed.
Put the valve back in place and install the screw.
Hook up and turn the water on.
Plug in the machine and test the valve.
Unplug the power and reinstall the back and the control panel. The back-to-cabinet clips can be snapped back in place easily.
-
Pat from Hilliard, FL
-
Difficulty Level:Easy
-
Total Repair Time:30 - 60 mins
-
Tools:Nutdriver, Pliers, Screw drivers
which is held in plsce by two bolts on the bottom and one plastic clip.After that i removed the solnoid
wires after marking them (hot and cold) the removed the hose clamp then removed the valve it self.Attached the new valve reconnected the hose and re attached the panels and now it works great.
-
Jerry from Camarillo, CA
-
Difficulty Level:Easy
-
Total Repair Time:15 - 30 mins
-
Tools:Nutdriver, Pliers

-
Harry from Bensalem, PA
-
Difficulty Level:Easy
-
Total Repair Time:1- 2 hours
-
Tools:Nutdriver, Pliers, Screw drivers, Socket set
-
Jon from Lafayette, IN
-
Difficulty Level:Really Easy
-
Total Repair Time:15 - 30 mins
-
Tools:Screw drivers, Socket set
-
Steve from Bethel, ME
-
Difficulty Level:Easy
-
Total Repair Time:30 - 60 mins
-
Tools:Nutdriver, Pliers, Screw drivers, Wrench (Adjustable)
-
james from arlington, WA
-
Difficulty Level:Easy
-
Total Repair Time:30 - 60 mins
-
Tools:Nutdriver, Pliers, Screw drivers
-
Brian from Saint Clair Shores, MI
-
Difficulty Level:Easy
-
Total Repair Time:30 - 60 mins
-
Tools:Nutdriver, Pliers, Screw drivers

-
michael from mcloud, OK
-
Difficulty Level:Really Easy
-
Total Repair Time:30 - 60 mins
-
Tools:Nutdriver, Pliers, Screw drivers
-
John from Prince Frederick, MD
-
Difficulty Level:Easy
-
Total Repair Time:30 - 60 mins
-
Tools:Nutdriver, Screw drivers, Socket set
-
Michel from Lynnwood, WA
-
Difficulty Level:Easy
-
Total Repair Time:15 - 30 mins
-
Tools:Nutdriver, Pliers, Screw drivers, Socket set
- < Prev
- 1
- 2
- Next >
We're sorry, but our Q&A experts are temporarily unavailable.
Please check back later if you still haven't found the answer you need.
- < Prev
- 1
- 2
- 3
- Next >

13 people found this helpful.
6 people found this helpful.
5 people found this helpful.
3 people found this helpful.
2 people found this helpful.
2 people found this helpful.
1 person found this helpful.
1 person found this helpful.
1 person found this helpful.
1 person found this helpful.
- < Prev
- 1
- 2
- 3
- Next >


Manufacturer Part Number: WP3979346
Get in touch, we're here to help!
1-866-883-8386
Monday to Saturday
8am - 8pm EST