


YKDRP467RS01 KitchenAid Range - Overview
Sections of the YKDRP467RS01
[Viewing 8 of 8]


Manuals & Care Guides for YKDRP467RS01
Click to downloadKeep searches simple, eg. "belt" or "pump".

Range Inner Door Glass
PartSelect #: PS11742543
Manufacturer #: WP4449259
Glass ONLY. This inner door glass is a heat resistant part that fits into a stove, oven, wall oven, cooktop, or range as the inner glass panel of the appliance door.
$153.77
In Stock
Order within the next 9 hrs and your part ships today!

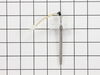
Range Temperature Sensor
PartSelect #: PS11748765
Manufacturer #: WPW10131825
This temperature sensor detects the temperature within the oven cavity.
$114.05
In Stock
Order within the next 9 hrs and your part ships today!

Screw
PartSelect #: PS12349731
Manufacturer #: W11233072
This is a multi-use and multi-appliance screw. It can be used on a microwave, refrigerator, range/oven, air conditioner, dehumidifier, washer, or dryer. The measurements of this screw are 8 x 1/2 inch...
$28.95
In Stock
Order within the next 9 hrs and your part ships today!

Range Torx Screw
PartSelect #: PS11741257
Manufacturer #: WP3368921
7-18 x 3/4-Inch - sold individually.
$8.82
In Stock
Order within the next 9 hrs and your part ships today!

Light Bulb
PartSelect #: PS11749457
Manufacturer #: WPW10169757
This is a replacement light bulb to illuminate the inside of your oven. It is 25 watts and 120 volts. Please wear gloves during replacement if your existing bulb is shattered. Consider ordering a spar...
$58.44
In Stock
Order within the next 9 hrs and your part ships today!

Range Igniter Screw
PartSelect #: PS11745563
Manufacturer #: WP8273062
This screw is sold individually.
$10.09
In Stock
Order within the next 9 hrs and your part ships today!

Range Surface Ignitor
PartSelect #: PS11747432
Manufacturer #: WP9782116
Also known as Spark Electrode. This part helps your burner ignite and produce flame.
$61.24
In Stock
Order within the next 9 hrs and your part ships today!

Door Hinge
PartSelect #: PS11747290
Manufacturer #: WP9760574
This hinge is for a stainless steel door and is located on the left side of the oven door.
$72.44
In Stock
Order within the next 9 hrs and your part ships today!

Range Inner Oven Door Glass
PartSelect #: PS11747242
Manufacturer #: WP9759225
This inner glass panel helps your oven stay hot and lets you check on your food without opening the door. If it’s cracked or broken, replacing it can improve cooking performance and keep things safe. ...
$157.59
In Stock
Order within the next 9 hrs and your part ships today!

Burner Cap
PartSelect #: PS11745641
Manufacturer #: WP8284669
Burner Cap - 6000 BTU
Sold individually.
$73.00
In Stock
Order within the next 9 hrs and your part ships today!

Range Main Power Terminal Block
PartSelect #: PS11745232
Manufacturer #: WP8203546
Sold individually.
$32.57
In Stock
Order within the next 9 hrs and your part ships today!

Screw
PartSelect #: PS11742539
Manufacturer #: WP4449154
Sold individually.
$10.09
In Stock
Order within the next 9 hrs and your part ships today!
Questions And Answers for YKDRP467RS01
We're sorry, but our Q&A experts are temporarily unavailable.
Please check back later if you still haven't found the answer you need.
Common Symptoms of the YKDRP467RS01
[Viewing 8 of 8]Oven is too hot
Fixed by
these parts
these parts
Show All
Will Not Start
Fixed by
these parts
these parts


Show All
Little to no heat when baking
Fixed by
these parts
these parts
Show All
Oven not heating evenly
Fixed by
these parts
these parts
Show All
Gas igniter glows, but will not light
Fixed by
these parts
these parts


Show All
Door won’t close
Fixed by
these parts
these parts


Show All
Element will not heat
Fixed by
these parts
these parts
Show All
Door won’t open after self cleaning cycle
Fixed by
these parts
these parts
Show All


Keep searches simple. Use keywords, e.g. "leaking", "pump", "broken" or "fit".
Broke the glass panel inside the oven door -- dropped a baking dish on the glass!
Easily removed the door from the oven by releasing clips attached to the door hinge -- very nicely engineered. Removed about 6 philips head screws to allow the door assembly to be taken apart for access to the glass. Lifted out the broken glass, cleaned the inside of the door, installed the new glass, reassembled the door (a two minute project), and reattached the door to the oven. Cleaning the inside of the door took longer than the actual repair!
Parts Used:
-
Robert from Wildwood, MO
-
Difficulty Level:Easy
-
Total Repair Time:30 - 60 mins
-
Tools:Screw drivers
237 of 298 people
found this instruction helpful.
Was this instruction helpful to you?
Thank you for voting!
Cracked the inner door glass by wiping with wet rag when hot
Removed the oven door by following the straightforward instructions in the user's manual. Removed philips head screws to take the door assembly apart. Removed clips holding the two inner door glass plates, and the two plates. Removed the clamp holding the broken glass plate, then the glass and associated glass fragments. Then cleaned and re-installed the three glass plates and their clamps in reverse order. Re-assembled the door and re-attached to the oven. Only cautionary note is to be careful when removing, handling and re-installing the various glass plates. Watch out for fragments from the broken plate; they can cut you and/or fall on the floor.
Parts Used:
-
James from Renton, WA
-
Difficulty Level:Easy
-
Total Repair Time:30 - 60 mins
-
Tools:Screw drivers
66 of 78 people
found this instruction helpful.
Was this instruction helpful to you?
Thank you for voting!
cracked iner door glass
Important note: hinges are left and right do not mix them up or door will not re-assemble properly and you'll get to do it twice.
Steps I took:
Removed the oven door per the instructions in the oven operator manual. Removed several screws to release the interior steel liner.
Removing the steel liner was a bit of a hassle, Had to manipulate it to get it loose but it eventually came away from the stainless steel exterior door panel.
Disassembled the interior glass layers, there are three. The glass you need to replace is the last layer, of course. removed and discarded the broken glass. Note: the interior glass is not secured by a bracket or screws, it is held in place by compression of the interior steel liner and a another liner that is inside the door assembly (you'll figure this out when you dis-assemble).
Another note: there is a fluffy material gasket between these two liners, use care when you disassemble or the fluffy gasket will turn into confetti.
Take the opportunity to clean all glass and parts of the accumulated oven grease.
Re-assembled door and re-installed...looks good.
Another note, getting the door back together requires a little patience because there are clamping overlaps of the steel liner to the SS exterior door panel. Be prepared to jockey things around a little and make sure all your screw holes are all lined up before you begin to button it up. Remember, hinges are left and right they are not interchangeable.
Parts Used:
-
william from albuquerque, NM
-
Difficulty Level:A Bit Difficult
-
Total Repair Time:30 - 60 mins
-
Tools:Screw drivers
46 of 52 people
found this instruction helpful.
Was this instruction helpful to you?
Thank you for voting!