The drum support roller kit (Dryer Repair Kit) allows the dryer to tumble properly by supporting the drum cylinder. The idler pulley provides the tension required for a multi-ribbed belt. The belt att...
This thermal cut-off kit for a dryer includes one high limit thermostat with a limit of 250 degrees Fahrenheit, and one thermal cut-off fuse (309 degrees). This kit also includes flat heaters with jumper wires.
This dryer drum roller kit is designed to restore smooth and quiet operation in a wide range of dryer models. It includes two drum rollers, four tri-rings, and one to two retaining washers, providing ...
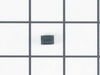
If you notice that your dryer is noisy or will not tumble, you may need to replace the tri ring. This part is triangular, and is less than an inch in size. Tri rings can be found both on the idler pul...
This 18 ml bottle of white appliance touch-up paint is used to cover scratches or marks on your appliance. The white touch-up paint can be used on refrigerators, microwaves, ranges, clothes dryers, an...
This high-limit thermostat with Terminal Extension Arm acts as as safety mechanism that keeps the dryer from overheating. Once the dryer temperature reaches 221 degrees Fahrenheit, this piece will shu...
This manufacturer-certified dryer lint filter is used to collect lint during the dryer cycle, to prevent damage to the machine and to prevent lint from sticking to clothes. This model comes in white a...
If your dryer drum isn’t spinning, the motor might be the issue. This replacement motor works with many Whirlpool-brand dryers made before 1996 and comes with the pulley already attached. It powers th...
First tried heating element and thermal fuse with no luck. Ordered thermal cutoff and fixed problem. Had I used an ohm meter first I would have determined problem before having ordered heating element and fuse, as both had resistance. I wast just lazy and ordered the took the most common failed components first before taking dryer back off.
I ordered all the thermal sensors for the dryer. They arrived two days later and they were the correct parts. It took me about 1/2 hour to replace all three sensors and now the dryer works like new again. My wife was very pleased, so was I.
First I shut off the gas supply and disconnected the dryer vent and unpluged the unit so you can access the rear of the dryer. Then I removed the rear cover. This is where you will find your thermostats and fuses. Holding the new part next to the one to be replaced I transfer the wires one at a time so as not to get them mixed up, then unscrew the old part and install the new one. Insert a flat blade screwdriver under the top cover in the 2 front corners to unsnap it from it's clips, also at this time you need to remove the 2 screws that hold the upper part of the lint filter tube to the lid, then lift the lid to expose the drum ( I tilted the dryer back as far as the flex gas line would allow me to and rested the top lid against the wall without removing it, to many wires). Behind the front cover in the top right corner is the plug for the door switch,un-plug it and also there are 2 screws one in each corner. After that lift the front cover straight up and pull it away from the cabinet ( it has clips at the bottom to hold it in place). Reaching under the drum on the right side pull down on the belt tensioner and release the belt from the motor then you can remove the drum. Laying the drum down on it's front edge I removed the rear felt seal and took a piece of sand paper to rough up th old glue and clean off some of the felt that was still stuck to the drum. Following the directions from the seal package I put the glue around the edge of the drum and re-installed the new felt. This is a good time to clean out your dryer, while the glue sets up. A shop vac works the best, but be carefull not to suck up the money, it will help pay for the repair ( I found over a dollar in change ). At this time I also changed the coils on the gas valve, remove the 2 screws that hold the clamp and replace them one at a time. Re-install the drum with the belt on it, fold it and push it through the tensioner and put it on the motor pulley. rotate the drum to make sure that the felt is not kinked under itself, re-install the front cover bottom clips first, then the 2 screws and the plug for the door switch, pull down the lid and snap it in place, before installing the rear cover this is a good time to remove the rear cover to the lint chute and clean in there also ( it's easy to see why there are so many dryer fires). Re- install that cover and the rear cover and vent tube, turn your gas back on and check it for leaks ( even if you didn't disconnect it) plug your dryer back in and get busy catching up on the laundry that you haven't had a chance to do because your dryer broke, then smile and think about all the money you saved by doing this simple repair your self. Thanks Parts Select


 Diagram and Parts List for Admiral Dryer")