WWFU14M1SW0 Westinghouse Freezer - Overview

Sections of the WWFU14M1SW0

[Viewing 3 of 3]

Manuals & Care Guides for WWFU14M1SW0

Click to download
Keep searches simple, eg. "belt" or "pump".
Run Capacitor - 120V – Part Number: 297286803
Run Capacitor - 120V
★★★★★
★★★★★
(7)
PartSelect #: PS3495561
Manufacturer #: 297286803
The run capacitor is attached to the compressor. This part is 120 volts and 15 mfd. The run capacitor helps the compressor kick on and off while maintaining a constant temperature to keep things froze...
$48.68
  In Stock
Adjustable Leveling Foot - Black – Part Number: 216396900
Adjustable Leveling Foot - Black
★★★★★
★★★★★
(2)
PartSelect #: PS425733
Manufacturer #: 216396900
Sold Individually.
$41.81
  In Stock
Hinge Bearing – Part Number: 5304511026
Hinge Bearing
★★★★★
★★★★★
(5)
PartSelect #: PS12364740
Manufacturer #: 5304511026
This part is sold individually.
$21.50
  In Stock
Hinge Mounting Hexagonal Screw – Part Number: 240578902
Hinge Mounting Hexagonal Screw
PartSelect #: PS1526054
Manufacturer #: 240578902
Sold individually.
$32.89
  In Stock
Screw – Part Number: 218755504
Screw
PartSelect #: PS1525803
Manufacturer #: 218755504
Sold individually. 
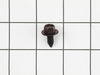
This is a genuine part. The handle mounting shoulder screw (no.10 ab) is made for use with many refrigerators. The metal screw helps to fasten the handle assembly to the outer do...
$27.85
  In Stock
SCREW – Part Number: 216858001
SCREW
PartSelect #: PS2331296
Manufacturer #: 216858001
Sold Individually.
$22.77
  In Stock
Door Closing Cam – Part Number: 297415900
Door Closing Cam
PartSelect #: PS10060260
Manufacturer #: 297415900
Sold individually.
$25.31
  In Stock
Upper Hinge – Part Number: 297283803
Upper Hinge
★★★★★
★★★★★
(1)
PartSelect #: PS11775577
Manufacturer #: 297283803
Sold individually.
$35.46
  In Stock
Interior Drain Plug – Part Number: 216502600
Interior Drain Plug
★★★★★
★★★★★
(1)
PartSelect #: PS426014
Manufacturer #: 216502600
$31.65
  On Order
Shelf Support - Right Side – Part Number: 297001500
Shelf Support - Right Side
★★★★★
★★★★★
(1)
PartSelect #: PS977265
Manufacturer #: 297001500
$32.93
  In Stock
Shelf Support - Left Side – Part Number: 297001600
Shelf Support - Left Side
PartSelect #: PS977266
Manufacturer #: 297001600
Sold individually.
$32.93
  In Stock
Gasket Retainer Clip Kit - 24 Pieces – Part Number: 5303922007
Gasket Retainer Clip Kit - 24 Pieces
PartSelect #: PS469567
Manufacturer #: 5303922007
These are used to hold your gasket in place.
$84.63
  Special Order

Questions And Answers for WWFU14M1SW0

Be the first to ask our experts a question about this model!

Common Symptoms of the WWFU14M1SW0

[Viewing 10 of 10]
Fridge too warm
Fixed by
these parts
Fixing Fixing
Show All
Won’t start
Fixed by
these parts
Fixing
Show All
Frost buildup
Fixed by
these parts
Fixing Fixing Fixing
Show All
Will Not Start
Fixed by
these parts
Fixing
Show All
Too warm
Fixed by
these parts
Fixing
Show All
Fridge and Freezer are too warm
Fixed by
these parts
Fixing
Show All
Freezer section too warm
Fixed by
these parts
Fixing
Show All
Clicking sound
Fixed by
these parts
Fixing
Show All
Door won’t open or close
Fixed by
these parts
Fixing
Show All
Noisy
Fixed by
these parts
Fixing
Show All
Keep searches simple. Use keywords, e.g. "leaking", "pump", "broken" or "fit".
Coming from the refrigerator, there was an intermittent "clicking noise", occurring about every 30 seconds. The frig. eventually failed .
I removed the back cover and removed the clip holding the compressor- run capacitor and start relay. I replaced these 2 components and clean the dust from the frig., and from the bottom of the floor. I replaced the back cover ; Loss about $300 worth of meat when when the frig. failed. Then I thought that, during these turbulent times, there are many which don't have a refrigerator or any meat to place in it, The refrigerator is "running" normal again.
Parts Used:
Run Capacitor - 120V
  • winifred from LOUISVILLE, KY
  • Difficulty Level:
    Easy
  • Total Repair Time:
    30 - 60 mins
  • Tools:
    Nutdriver, Pliers
11 of 13 people found this instruction helpful.
Was this instruction helpful to you?
Thank you for voting!
While defrosting freezer tossed the drain plug with ice and water into the sewer system.
Opened mailer and bag and place the drain plug into the drain. fit perfectly. In fact it is better than the one lost since the original needed a screwdriver or tool to remove the plug. This one has a flang or finger turner on it so that it can be removed. Also, does not interfere with items in bottom of freezer.
Parts Used:
Interior Drain Plug
  • paul from LISLE, IL
  • Difficulty Level:
    Very Easy
  • Total Repair Time:
    Less than 15 mins
4 of 5 people found this instruction helpful.
Was this instruction helpful to you?
Thank you for voting!
Freezer door stopped opening fully
I recommend completing steps 1-3 before purchasing your part, so as to avoid my mistakes.

1) Unplug the freezer and clear whatever is currently in the door. This fix is fast enough you don't need to empty the whole freezer.

2) Use a socket wrench to remove the two bolts holding the top hinge to the freezer. Once they're off, the hinge can pulled up and off.

3) Lift the door free from the bottom hinge. Important Note! Check that it's the door closing cam that's broken, and not, for example, the bearing that seats with the door cam that is listed on the freezer part of the schematic, and not the door part. If you're a smarty pants, you order(ed) the right part. If you're me, you continue with this tutorial but still need to order another part to complete the fix. Don't be like me.

4) Using your philips-head screwdriver, remove the screw holding the remnants of the old door cam to the bottom of the door. Pull out the old cam and insert the new one. Rescrew.

5) Grab your extra person put of your toolbox and have them help you guide the door back onto the bottom hinge. The door is not heavy but no one wants to play blind Battleship while your freezer contents actively defrost.

6) Stick the top hinge back into place and reattach the bolts.

7) PLUG YOUR FREEZER BACK IN! And also check that the door works now.
Parts Used:
Door Closing Cam
  • Dana from TALLAHASSEE, FL
  • Difficulty Level:
    Very Easy
  • Total Repair Time:
    Less than 15 mins
  • Tools:
    Screw drivers, Socket set
2 of 2 people found this instruction helpful.
Was this instruction helpful to you?
Thank you for voting!