


WTW8000DW3 Whirlpool Washer - Overview
Sections of the WTW8000DW3
[Viewing 6 of 6]


 Diagram and Parts List for Whirlpool Washer")


Keep searches simple, eg. "belt" or "pump".

Touch-Up Paint - White
PartSelect #: PS385132
Manufacturer #: 72017
This 18 ml bottle of white appliance touch-up paint is used to cover scratches or marks on your appliance. The white touch-up paint can be used on refrigerators, microwaves, ranges, clothes dryers, an...
$15.95
In Stock
Order within the next 12 hrs and your part ships today!

Affresh Washing Machine Cleaner - 3 pack
PartSelect #: PS1960673
Manufacturer #: W10135699
Having a problem with a funky-smelling washing machine, or one that just doesnt seem to clean your clothes as well as it used to? Say hello to the Affresh Washing Machine Cleaner by Whirlpool. This po...
$25.31
In Stock
Order within the next 12 hrs and your part ships today!

Washer Drain Hose
PartSelect #: PS12578897
Manufacturer #: W11244231
The drain hose carries used water from the washer to your house drain.
$31.91
In Stock
Order within the next 12 hrs and your part ships today!

Hose Clamp
PartSelect #: PS11740613
Manufacturer #: WP285655
This hose clamp is sold individually.
$14.95
In Stock
Order within the next 12 hrs and your part ships today!

Washer Washplate
PartSelect #: PS10064549
Manufacturer #: W10752283
If your washer isn’t cleaning clothes like it used to or making strange noises, the washplate might be the problem. This part sits at the bottom of the tub and helps move clothes through the water for...
$141.16
In Stock
Order within the next 12 hrs and your part ships today!

Washer Washplate Screw
PartSelect #: PS10064547
Manufacturer #: W10752187
Are you dealing with a faulty washplate in your washing machine? Meet the Whirlpool Washer Washplate Screw, your personal helper for securing loose or broken washplates. This genuine OEM part is highl...
$10.59
In Stock
Order within the next 12 hrs and your part ships today!

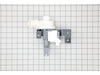
Lid Lock Assembly
PartSelect #: PS11722981
Manufacturer #: W10810403
This lid lock assembly is designed for use in various top-load washing machines and serves as a critical safety feature. Located beneath the washer lid, it includes the locking mechanism and wiring ha...
$115.70
In Stock
Order within the next 12 hrs and your part ships today!

Gearcase
PartSelect #: PS12741641
Manufacturer #: W11393685
If your washer isn’t spinning, agitating, or cleaning clothes like it used to, the gearcase might be the issue. This part powers the agitator and spin basket, helping your machine run smoothly. It fit...
$351.59
In Stock
Order within the next 12 hrs and your part ships today!

Washer Hose Clamp
PartSelect #: PS11741854
Manufacturer #: WP356138
This clamp helps to prevent leaking by holding the end of water hose in place.
$14.37
In Stock
Order within the next 12 hrs and your part ships today!

Water-Pump
PartSelect #: PS11738156
Manufacturer #: W10876600
This drain pump is engineered for top-load washing machines and plays a vital role in the appliance’s drainage system. During the drain cycle, it efficiently removes water from the washer tub and chan...
$166.89
In Stock
Order within the next 12 hrs and your part ships today!

Washer Screw
PartSelect #: PS12741703
Manufacturer #: W11404293
Sold individually.
$28.95
In Stock
Order within the next 12 hrs and your part ships today!

SLIDER
PartSelect #: PS10060062
Manufacturer #: W10734521
This clutch slider kit is part of the transmission system in select washing machines, helping control the movement and speed of the agitator during wash and spin cycles. The kit includes a clutch band...
$58.55
In Stock
Order within the next 12 hrs and your part ships today!
Questions And Answers for WTW8000DW3
We're sorry, but our Q&A experts are temporarily unavailable.
Please check back later if you still haven't found the answer you need.
- < Prev
- 1
- Next >
Sort by:
Search filter:
Clear Filter
Your search term must have 3 or more characters.
Keep searches simple. Use keywords, e.g. "leaking", "pump", "broken" or "fit".
Sorry, we couldn't find any existing answers that matched.Try using some different or simpler keywords, or submit your new question by using the "Ask a Question" button above!
Scott
November 11, 2019
Will only fill with water 1/4 of the way on any setting. I have replaced the water inlet valve so that is not the problem
For model number WTW8000DW3

Hello Scott, thank you for your question. It sounds like a pressure switch issue. This part regulates the level of water. The pressure switch is part of the board, which is Part #: PS12346918. We would recommend replacing that part. I hope this helps.
Was this helpful?
Thank you for voting!
Leon
November 30, 2019
How to replace the lid lock and how to open the control panel
For model number WTW8000DW3
Hello Leon and thanks for writing.
We have attached the link to a repair video we think might answer some questions for you. We hope this helps. Please contact us anytime.
https://www.youtube.com/watch?v=zFTUxHgxlFs
Control panel
Unplug the washing machine from the wall outlet. ...
Locate the screws on the left and right sides of the bottom of the front or rear of the control panel, depending on the model.
Remove the two screws and then rotate the control panel up 180-degrees to access the interior components of the panel. Good luck with your repair.
Was this helpful?
Thank you for voting!
- < Prev
- 1
- Next >
Common Symptoms of the WTW8000DW3
[Viewing 15 of 15]Leaking
Fixed by
these parts
these parts


Show All
Will not agitate
Fixed by
these parts
these parts


Show All
Lid or door won’t close
Fixed by
these parts
these parts


Show All
Spinning Issues
Fixed by
these parts
these parts


Show All
Will not drain
Fixed by
these parts
these parts
Show All
Shaking and Moving
Fixed by
these parts
these parts


Show All
Will Not Start
Fixed by
these parts
these parts
Show All
Locking Issues
Fixed by
these parts
these parts
Show All
Water Filling Issues
Fixed by
these parts
these parts
Show All
Noisy and Marks Left on Clothes
Fixed by
these parts
these parts
Show All
Draining Issues
Fixed by
these parts
these parts
Show All
No hot or cold water
Fixed by
these parts
these parts
Show All
Cycle Not Advancing
Fixed by
these parts
these parts
Show All
Does not dispense fabric softener or detergent
Fixed by
these parts
these parts

Show All
Spins slowly
Fixed by
these parts
these parts
Show All


Keep searches simple. Use keywords, e.g. "leaking", "pump", "broken" or "fit".
Loud grinding noise when the washer was in use.
1.) disconnect power to your washer. Turn off water supply and disconnect from the washer.
open the washer top and remove plastic cap from the wash plate
2.) using 7/16 socket, remove bolt from the wash plate. If you can't remove it with a socket , I recommend using impact wrench.
3.) remove wash plate ( you might need to spray penetrating oil or wd40 inside the bolt hole to loosen it.
Check to make sure the wash plate gear grooves are not worn down, if they are, replace it.
4.) using your Maytag specific spaner nut wrench, remove the spaner nut from the shaft of the gear case. This should be right underneath where the wash plate was. If you can't turn it by hand , use a rubber mallet or hammer to encourage it.
5.) some people remove the wash basket at this point. I don't think it is necessary.
6.) close your washing machine. Tape the top closed to keep it from flying open. Tilt your washer back and prop it up where you have access to the underside of the washing machine.
7) remove motor rotor bolt and pull rotor off of the motor.
8.) disconnect the two wire connectors that supply power to motor. using a socket, remove bolts that are keeping motor attached to the gear case.
9.) Now that the gear case is all the is remaining on the underside, you can remove the 4 bolts that are holding the gear case to the washer. Now try to pull gear case out.
10.) if gearcase will not pull out, lower washer back to upright position. Spray penetrating oil or wd40 around the shaft of the gearcase and allow it to sit for 5-10 minutes. Using a hammer, lightly tap on the shaft of the gearcase and it should now fall out. ( you might have to apply penetrating oil again, or apply more force with the hammer.
11.) reinstall motor to new gearcase. Insert new gear case to the washer. Reinstall bolts and reconnect power supply wires.
12. ReInstall spaner nut inside the washer, reinstall wash plate.
Parts Used:
-
Charles from STARKVILLE, MS
-
Difficulty Level:Easy
-
Total Repair Time:1- 2 hours
-
Tools:Nutdriver, Screw drivers, Socket set
59 of 72 people
found this instruction helpful.
Was this instruction helpful to you?
Thank you for voting!
Scratches in Surface
This product comes in a bottle with a brush like Liquid Paper. It goes on incredibly easy. A second coat might be needed. I wanted to prevent rust from setting in so I covered the scratches and dings. The paint is a little brighter since my washer is 10 years old but it still looks great.
Parts Used:
-
Michelle from Richardson, TX
-
Difficulty Level:Really Easy
-
Total Repair Time:Less than 15 mins
81 of 208 people
found this instruction helpful.
Was this instruction helpful to you?
Thank you for voting!
Washer making noise on spin cycle
Removed two screws on back of lid to raise top removed tub one bolt and one spanernut pulled tub lowered top reinstalled screws laid washer down to get to bottom of washer unplugged wiring removed four bolts pulled gear box and motor removed motor from gear box installed motor on new gear box reassemble washer
Parts Used:
-
Roy from MAYNARDVILLE, TN
-
Difficulty Level:Really Easy
-
Total Repair Time:30 - 60 mins
-
Tools:Nutdriver, Pliers, Screw drivers
20 of 29 people
found this instruction helpful.
Was this instruction helpful to you?
Thank you for voting!