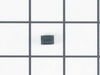
These agitator directional cogs are commonly referred to as dog ears. They come four to a package and are usually used with direct drive washing machines.
This 18 ml bottle of white appliance touch-up paint is used to cover scratches or marks on your appliance. The white touch-up paint can be used on refrigerators, microwaves, ranges, clothes dryers, an...
If your washer is noisy, spins slowly, or leaves clothes soaking wet, this splutch cam kit might be the fix. It helps your machine switch between washing and spinning by connecting the motor to the ba...
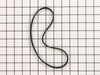
If your washer isn’t spinning or making strange noises, the drive belt might be worn out. This genuine replacement belt connects the motor to the drum, helping it spin and tumble your clothes properly...
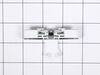
This lid switch assembly is for a top load washer. The lid switch assembly detects if the washer lid is open or closed and prevents the washer from spinning when the lid is open.
This 6-pin shift actuator is a genuine replacement part designed for use in select washing machines. It plays a critical role in controlling the movement of the transmission, allowing the appliance to...
This water inlet valve is for washers.
The water inlet valve controls the water flow into the washer.
Unplug the washer and shut off the water supply before installing this part. Wear work glove...
This suspension rod kit includes four rods that stabilize the wash tub, reducing vibrations and movement during cycles. It is compatible with a range of washing machines and helps improve performance ...
$113.97
In Stock
Questions And Answers for WTW4616FW2
We're sorry, but our Q&A experts are temporarily unavailable.
Please check back later if you still haven't found the answer you need.
15 questions answered by our experts.
< Prev
1
2
3
Next >
Sort by:
Search filter:
Clear Filter
Your search term must have 3 or more characters.
Keep searches simple. Use keywords, e.g. "leaking", "pump", "broken" or "fit".
Sorry, we couldn't find any existing answers that matched.Try using some different or simpler keywords, or submit your new question by using the "Ask a Question" button above!
Juan
August 6, 2021
When is spinning is go out of ballans and make a lot of nois for a few second then spinning normal . What is the problem ?
For model number WTW4616FW2
Hello Juan, Thank you for your question. It does sound like your suspension parts PartSelect Number PS11703288 would be the issue. I do not think that it would be anything else in this particular case. You should be able to tell if you take a look at your springs. If they pull apart very easily, then they have just worn out and need to be replaced. The springs should be very tough to actually pull on. I hope that helps. Good luck with your repair.
Hello and thank you for writing.
With the washer shut off, the basket empty (no water or clothes) and the lid closed, enter the diagnostic mode:
Turn the control dial 1 complete rotation counterclockwise.
Quickly (within about 6 seconds) turn the control dial 3 clicks clockwise, one-click counterclockwise, and one more click clockwise. All the status lights blink green when you successfully activate the diagnostic mode. If the status lights don’t blink, turn the control dial one complete rotation counter-clockwise to reset the control and then repeat steps 1 and 2, this time turning the knob faster during step 2.
Turn the control dial 4 clicks clockwise.
When the Rinse light turns on, press Start to begin the calibration cycle
The calibration cycle runs for 2 to 3 minutes. When the calibration cycle ends, the lid unlocks, and the washer shuts off.
We hope this helps. Please contact us anytime if you require further assistance.
Hola y gracias por escribir.
Con la lavadora apagada, la canasta vacía (sin agua ni ropa) y la tapa cerrada, ingrese al modo de diagnóstico:
Gire el dial de control 1 rotación completa en sentido antihorario.
Rápidamente (dentro de unos 6 segundos) gire el dial de control 3 clics en el sentido de las agujas del reloj, un clic en el sentido contrario y otro en el sentido de las agujas del reloj. Todas las luces de estado parpadean en verde cuando activa con éxito el modo de diagnóstico. Si las luces de estado no parpadean, gire el dial de control una rotación completa en sentido antihorario para restablecer el control y luego repita los pasos 1 y 2, esta vez girando la perilla más rápido durante el paso 2.
Gire el dial de control 4 clics en sentido horario.
Cuando la luz de Enjuague se enciende, presione Iniciar para comenzar el ciclo de calibración
El ciclo de calibración dura de 2 a 3 minutos. Cuando finaliza el ciclo de calibración, la tapa se desbloquea y la lavadora se apaga.
Esperamos que esto ayude. Póngase en contacto con nosotros en cualquier momento si necesita más ayuda.
2 people found this helpful.
Was this helpful?
Thank you for voting!
RANDY
February 5, 2020
Washer won't advance stages
For model number WTW4616FW2
Hello Randy, thank you for your question. If you can change the cycles on the timer manually and get the unit to finish a cycle by manually turning the dial to the different settings the issue would be with the timer, PartSelect Number PS12348148. If the unit is only filling and will not advance the issue could be the the lid lock, PartSelect Number PS12704713. I hope this helps.
Hello, starts the spin and drain cycle, then stops.
For model number WTW4616FW2
Hello Daniel, thank you for your question, there’s a few reasons your washer could stop during the spin or drain cycle. First, make sure the drain hose is not kinked and unplug your washer. A defective lid switch assembly could be causing the problem. You can test the lid switch with a multimeter. Set your multimeter to the lowest ohms of resistance and test your lid switch. If it does not read any continuity, then your lid switch is indeed faulty. Part number PS12704713. It is also a good idea to remove the hose from the drain pump and check the pump and drain hose for any blockages. Your washer has a filtering device down and near the pump called a drain filter, check this filter for debris. You can test the drain pump with a multimeter. Unplug the appliance from the electrical outlet before you begin. Touch a probe to each of the terminals on the pump. A reading of zero or infinity, means the pump requires replacement. Part number: PS11770076. The belt may also be worn or stretched. If there are visible signs of wear, replace the belt. Part number: PS11747978. It could also be the control board. Part number: PS12348148. Good luck with your repair!
Why isn't this machine spinning on rinse cycle
It spins on the wash cycle
For model number WTW4616FW2
Hello Keith, thank you for contacting us. Please make sure the machine is draining properly and there is no issue with the door lock, part number PS12704713. The issue can possibly be caused by a faulty shift actuator, part number PS11769864. The actuator has an optical sensor that tells the washing machine when to shift from one function to another. It shifts the transmission from agitating to spinning. Customer service is available 7 days a week if you require assistance placing an order. Thanks again for reaching out!
First pry off the cap of the agitator. Then using a socket remove the bolt that holds the plastic cup in place. Remove this cup by prying it loose from the two tabs that hold it in place. Once this cup is removed you can get to the broken cogs. Slip the new cogs into the underside of the cup, and slide the cup back down in the agitator housing using the slots on the side for a guide. (You may want to remove the entire agitator and assemble everything upside down, then flip it all back over to mount, so the cogs don't fall out). Tighten the bolt, snap the cap back in place on top of the agitator and your'e done. Easy repair.
pull off softner dispenser, pop off agitator cap by inserting straight screw driver into small slot, remove bolt inside agitator with socket wrench and long extension, pull agitator straight up off shaft, place agitator on floor, with feet holding bottom half pull top half apart from bottom half by pulling straight up, note direction of old cogs remove and replace with new, reassemble
Pulled off the dispenser. Used socket set to remove bolt. Removed entire agitator out of washer. Placed both feet on bottom of agitator and then pulled up on the upper agitator. It took some muscle due to the years of washer use. I used a flat-head screwdriver to weaken the plastic clips holding down the old bearing-driven cam. Once I got the upper agitator off, the guts were easy to pull out. Then I just re-assembled with the 3 new parts (the Cam Driven, the Dog Ears, and the Bearing-Driven Cam).


 Diagram and Parts List for Whirlpool Washer")