This part is known as a pulsator cap or washplate cap, and is designed for your LG washer. It fits over the washplate mounting bolt and prevents clothes from getting caught on the washplate during a w...
This is a pulsator assembly, also known as an agitator, for your washing machine. This pulsator sits at the bottom of your washer and is what is used as the main driving force to wash your clothes. Th...
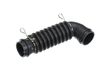
This inlet valve assembly controls the flow of hot and cold water into your washer, ensuring the drum fills at the correct temperature during each cycle. Located at the back of the machine where the w...
Got an LG washer that needs a fix? We have the perfect solution for you! Here is our bespoke screw, made just for LG washing machines. It's crafted to meet safety and efficiency standards, ensuring a ...
This part is the replacement switch assembly for your top-load washer. It contains the switch mechanism and the connecting wire that hooks the door latch to the electrical system of the washer. The li...
Keep your washer running smoothly with this clutch motor assembly. It helps the drum switch between washing and spinning so clothes get clean and water is removed efficiently. If your washer won’t spi...
Removed the center cover cap carefully on top of the agitator with a small screw driver. There are 3 (on mine) little slots around the edge of the bottom of the cap where it meets the agitator. Insert the small flat blade screwdriver and gently twist at each one till the cap pops loose and comes off.
There was a 10MM bolt under the cap on mine that you need to remove. I used an cordless impact driver but you could use a socket wrench as well. Remove the bolt and the agitator comes off. May take a little wiggling or it may come right off.
The teeth on the agitator were wore all the way down and gone on mine so it came off easy and this was the issue I had why it was spinning freely. I took the small flat blade screwdriver and used the edge and corner of the blade to clean the teeth on the shaft where the agitator attaches and wiped it down before installing the new part as there was quite a bit of metal shavings from the damaged part.
I just reversed the order of removal to install the new part. Took about 15 min. I ran a rinse and spin cycle to remove any additional metal shavings and to check to see if it all worked properly. THATS IT! TOO EASY!
I found the pulsator just spun freely, I determined the hole on underside should ribbed to align with the ribbed shaft. But it was wore away. I purchased the new part and replacement was simple. It slide right on and I replaced the bolt. Pulsator works great, washing again.