


WD-12415BD LG Washer - Overview
Sections of the WD-12415BD
[Viewing 1 of 1]
Keep searches simple, eg. "belt" or "pump".

Water Inlet Valve - Hot
PartSelect #: PS3527427
Manufacturer #: 5220FR2006H
This hot water inlet valve is designed to regulate water flow into the washing machine during operation. Featuring a standard hose fitting inlet and a single water outlet, it opens as needed to allow ...
$78.09
In Stock

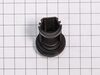
SENSOR ASSEMBLY
PartSelect #: PS16556422
Manufacturer #: 6501KW2002B
This washer sensor assembly, also known as a motor rotor position sensor, is a genuine OEM replacement part designed to monitor the direction and speed of the rotor during operation. By communicating ...
$80.21
In Stock


Tub-to-Pump Drain Hose
PartSelect #: PS3523345
Manufacturer #: 4738ER1002A
This hose has bellows to allow for flexibility during the wash and spin cycles.
$80.21
In Stock

Washer Gasket
PartSelect #: PS3522859
Manufacturer #: 4036ER4001B
This round rubber tub seal is designed to prevent water leakage between the front and rear halves of the outer tub in select washing machines. Positioned at the junction of the tub components, it comp...
$43.85
In Stock

Pump Filter
PartSelect #: PS3522306
Manufacturer #: 383EER2001A
This replacement pump filter, also known as a filter assembly, is a genuine OEM part for your washer or washer/dryer combo. Before beginning this repair, turn off the power and water supply to your wa...
$33.92
In Stock

MOTOR ASSEMBLY,AC,PUMP
PartSelect #: PS16223509
Manufacturer #: EAU61383518
On a washer, this part is used for circulating the water. On a dishwasher, it is used for draining the water.
$141.13
In Stock

Locking Pin
PartSelect #: PS3523451
Manufacturer #: 4774FR3118B
The locking pin is used to hold the shock absorber on the washer. There is a pin used at the bottom and top of the shock absorber. Sold individually.
$21.76
Special Order

Clamp Assembly
PartSelect #: PS3517812
Manufacturer #: 2W20017E
The door boot seal clamp, also referred to as an outer door gasket clamp, holds the door boot in place in a front-loading washer. If your washer is leaking from the door and there are no signs of dama...
$26.22
In Stock


Hose
PartSelect #: PS3523351
Manufacturer #: 4738ER2002A
When your LG washing machine isn't performing like it used to, this Vent Hose with Bellow is just what you need to bring it back to life. Crafted as a genuine OEM part, it offers the guaranteed qualit...
$56.87
In Stock

Questions And Answers for WD-12415BD
We're sorry, but our Q&A experts are temporarily unavailable.
Please check back later if you still haven't found the answer you need.
Common Symptoms of the WD-12415BD
[Viewing 12 of 12]Leaking
Fixed by
these parts
these parts


Show All
Will not drain
Fixed by
these parts
these parts

Show All
Spinning Issues
Fixed by
these parts
these parts


Show All
Will not agitate
Fixed by
these parts
these parts
Show All
Water Filling Issues
Fixed by
these parts
these parts
Show All
Not draining
Fixed by
these parts
these parts
Show All
Will Not Start
Fixed by
these parts
these parts
Show All
No hot or cold water
Fixed by
these parts
these parts
Show All
Noisy and Marks Left on Clothes
Fixed by
these parts
these parts

Show All
Burning smell
Fixed by
these parts
these parts
Show All
Spins slowly
Fixed by
these parts
these parts
Show All
Noisy
Fixed by
these parts
these parts
Show All


Keep searches simple. Use keywords, e.g. "leaking", "pump", "broken" or "fit".
LE Error Message and won't spin drum properly
I first tested the motor per the service manual. I checked the resistance between the terminals of the 3 pin connector. It's supposed to be 5-15 ohms. The motor checked out so I replaced the main electrical board. It turns out that wasn't the problem. After a brief web search I found out that the hall sensor (which is attached to the motor stator) was the likely cause of the failure. I replaced that and everything works great now. And now I have a spare main board in case that ever fails. I also want to mention that I took the time to remove the dispenser box (where the water comes in and is directed to the different cleaning products) and cleaned it with a very strong bleach solution. It got rid of the mildew and funky smell. It seems that the fabric softener caused a lot of mildew to form inside the dispenser directly above the fabric softener tray. The bleach took care of that. This is probably something that should be done routinely to keep the mildew from forming.
Parts Used:
-
Mark from Harrisburg, PA
-
Difficulty Level:Easy
-
Total Repair Time:30 - 60 mins
-
Tools:Screw drivers, Socket set
253 of 334 people
found this instruction helpful.
Was this instruction helpful to you?
Thank you for voting!
Worn bearings
To replace the bearings a complete disassembly of the washer was required. After pulling the tube assembly from the cabinet and separating the tube enclosure halves and removing the rotor and stator, since the washer uses direct drive, a gear puller was required to push the drive shaft through the old bearings since they didn’t separate easily as seen in several YouTube videos. After removing the tube assembly it is recommended that you also separate from the spider, which contains the drive shaft, from the tube itself since a significant amount of sediment had caked inside the indentations on the inside of the spider. Since the front bearing, part number 4280FR4048D, was no longer available I used an NTN double sealed bearing, part number 6306LLUC3/L627. The only other tricky aspect of the repair was pushing the drive shaft through the new bearings since pushing it by hand did not produce enough force to get it through to expose enough of the shaft on the other side to be able to reconnect the rotor. The solution was to pull the shaft through rather than pushing it. To do this I placed a 1 3/4 inch drive socket over the outer ring of the rear bearing, and then I used a 3 inch 10mm x 1.50 mm bolt through the drive socket with enough large washers to use as spacers between the bolt head and the drive socket. I then threaded about a half inch of the bolt into the center of the drive shaft by hand to remove any gap between the bolt head and the washers. As I turned the bolt clockwise with a 17mm drive socket wrench the bolt pulled the drive shaft through the bearings with ease. I did follow the manufacturer’s recommendation to replace the seal between the two tube enclosure halves and the three dampers with new ones since they do eliminate much of the vibration during the spin cycle. I also replace the top bellows since I noticed that a large hole had been formed on it by rubbing against the inlet hoses which are situated directly above. The repair took a week only because I had to wait for parts.
Parts Used:

-
Anthony from Crystal Lake, IL
-
Difficulty Level:Difficult
-
Total Repair Time:More than 2 hours
-
Tools:Pliers, Screw drivers, Socket set, Wrench (Adjustable), Wrench set
97 of 164 people
found this instruction helpful.
Was this instruction helpful to you?
Thank you for voting!
leaking tub-to-pump drain hose
Pull washer away from wall. Unplug cord and remove drain hose from receptacle. Remove 4 screws holding panel to rear of washer. Squeeze and slide back hose clamps on each end of drain hose and loosen center clamp with screwdriver. Remove old hose. Reinstall new hose in reverse order using existing clamps. Re-install back panel.
Parts Used:
-
Leslie from STOWE, VT
-
Difficulty Level:Easy
-
Total Repair Time:30 - 60 mins
-
Tools:Screw drivers
51 of 71 people
found this instruction helpful.
Was this instruction helpful to you?
Thank you for voting!