


RT14DKXSQ01 Roper Refrigerator - Overview
Sections of the RT14DKXSQ01
[Viewing 5 of 5]


Manuals & Care Guides for RT14DKXSQ01
Click to downloadKeep searches simple, eg. "belt" or "pump".

Touch-Up Paint - White
PartSelect #: PS385132
Manufacturer #: 72017
This 18 ml bottle of white appliance touch-up paint is used to cover scratches or marks on your appliance. The white touch-up paint can be used on refrigerators, microwaves, ranges, clothes dryers, an...
$15.95
In Stock

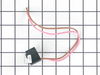
Refrigerator Bimetal Defrost Thermostat
PartSelect #: PS11750673
Manufacturer #: WPW10225581
If ice is building up in your freezer or if your freezer is getting too warm on the defrost cycle you may need to replace the bi-metal thermostat.
$43.07
In Stock

Refrigerator Door Switch
PartSelect #: PS12728638
Manufacturer #: W11384469
Door switch turns the light off when you close the door.
$48.68
In Stock

Defrost Timer
PartSelect #: PS11723171
Manufacturer #: W10822278
This eight-hour defrost timer will replace most other defrost timers. This device acts like a clock. It continually advances and alternates between activating the cooling cycle and the defrost heater....
$45.48
In Stock

Refrigerator Evaporator Fan Motor
PartSelect #: PS11749890
Manufacturer #: WPW10189703
This evaporator fan motor is located in the back of the freezer, and circulates air over the refrigerator coils. These coils will convert the heat into cool air, which is then circulated.
NOTE: ...
$78.06
In Stock

ICE MAKER KIT-PKG ASSEMBLY (EZ
PartSelect #: PS17629131
Manufacturer #: W11700559
This genuine OEM ice maker kit is designed to fit refrigerators that did not originally come with an ice maker. This kit contains everything needed to install the new ice maker on your refrigerator in...
$271.97
In Stock

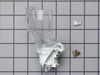
Ice Maker Water Fill Tube Kit
PartSelect #: PS11739222
Manufacturer #: WP2196157
This kit comes with a fill tube and a compression nut.
$16.95
In Stock

Refrigerator Door Shelf Retainer Bar End Cap
PartSelect #: PS11738927
Manufacturer #: WP2156003
The door shelf retainer bar end cap connects to the retainer bar on your refrigerator’s door shelf, and attaches it to the refrigerator door. If your shelf retainer bar has become disconnected, a dama...
$16.69
In Stock

Evaporator Fan Blade
PartSelect #: PS11738973
Manufacturer #: WP2169142
If your refrigerator or freezer is too warm, or making noises, you may need to replace the fan blade. The fan blade attaches to the evaporator motor, which is in the freezer section, to help circulate...
$47.08
In Stock

Refrigerator Door Shelf End Cap
PartSelect #: PS11739204
Manufacturer #: WP2195916K
Sold Individually.
$22.16
In Stock

Refrigerator Screw
PartSelect #: PS11742758
Manufacturer #: WP489497
Sold individually.
$17.70
In Stock

Questions And Answers for RT14DKXSQ01
We're sorry, but our Q&A experts are temporarily unavailable.
Please check back later if you still haven't found the answer you need.
Common Symptoms of the RT14DKXSQ01
[Viewing 18 of 18]Fridge too warm
Fixed by
these parts
these parts


Show All
Light not working
Fixed by
these parts
these parts

Show All
Freezer not defrosting
Fixed by
these parts
these parts
Show All
Leaking
Fixed by
these parts
these parts

Show All
Freezer section too warm
Fixed by
these parts
these parts
Show All
Noisy
Fixed by
these parts
these parts


Show All
Ice maker not making ice
Fixed by
these parts
these parts


Show All
Will Not Start
Fixed by
these parts
these parts


Show All
Fridge and Freezer are too warm
Fixed by
these parts
these parts
Show All
Fridge too cold
Fixed by
these parts
these parts
Show All
Frost buildup
Fixed by
these parts
these parts
Show All
Freezer too cold
Fixed by
these parts
these parts
Show All
Fridge runs too long
Fixed by
these parts
these parts
Show All
Too warm
Fixed by
these parts
these parts
Show All
Door won’t open or close
Fixed by
these parts
these parts


Show All
Ice maker won’t dispense ice
Fixed by
these parts
these parts
Show All
Not dispensing water
Fixed by
these parts
these parts
Show All
Won’t start
Fixed by
these parts
these parts
Show All


Keep searches simple. Use keywords, e.g. "leaking", "pump", "broken" or "fit".
Fridge was getting too warm, ice buildup on coils.
WARNING: REPLACING THIS PART REQUIRES CUTTING AND SPLICING ELECTRICAL WIRES. RISK OF ELECTRICAL SHOCK OR FIRE. DO NOT ATTEMPT THIS REPAIR IF YOU ARE NOT EXPERIENCED WITH ELECTRICAL WIRING.
Part Info:
The bi-metal strip is clipped onto the evaporator coils and is designed to regulate the defrost coil temperature. If it is not functioning properly you may notice ice buildup preventing air flow (and preventing proper refrigeration), or more rarely the freezer side may get too warm during the defrost cycle.
Materials:
* Replacement bi-metal strip
* Wire cutters
* Wire strippers
* Wire nuts
* Electrical tape
* 10MM socket
Steps:
1: UNPLUG THE FRIDGE! If there is ice buildup, wait until the ice has melted. A box fan blowing at the ice will help melt it more quickly.
2: Remove the panel covering the evaporator coils. It's located inside the fridge, on the freezer side.
3: Un-clip the bi-metal strip from the evaporator coils.
4: Unplug the wires from the evaporator fan, defrost coil and bi-metal strip, then disconnect the main connector that is plugged into the rear wall.
5: Clip both wires to the old ( bad ) bi-metal strip. Cut close to the casing of the bi-metal strip so there are long wires to splice onto.
6: Strip 1/4 to 1/2 inches of insulation off of the ends of the wires ( depending on the size of the wire-nuts you use). Twist the bare wires slightly to prevent fraying.
7: Do the same for the ends of the wires on the (new) bi-metal strip.
8: Take the ends of the wires belonging to the (new) bi-metal strip and the wires coming from the main plug. Take the like-colored wires, and twist the bare metal ends together.
9: Twist on wire nuts, for both sets of wires. Make sure they are snug, with no bare wire showing.
10: Tape over the wire nuts with electrical tape. Tape over the wires nuts in a spiral fashion, completely covering the nut and both wires that are now spliced together. This will prevent accidental shorting.
11: Plug the main plug back into the rear wall of the fridge. Also re-connect the connectors to the evaporator fan and defrost coil. Make sure the clips on the connectors are snug to ensure a good connection.
12: Clip the new bi-metal strip onto the coils, in the same spot as before. ( Usually just after the small incoming copper tubing that connects to the coils, known as the expansion valve. That is usually the coldest spot on the coils during operation).
13: Replace the panel that covers the coils.
14: Plug the fridge back in... Now you fridge should defrost correctly. If it does not, your defrost coil could be burned out, or the control board could be faulty.
Parts Used:
-
Cathy from Winter Park, FL
-
Difficulty Level:A Bit Difficult
-
Total Repair Time:15 - 30 mins
-
Tools:Nutdriver
159 of 186 people
found this instruction helpful.
Was this instruction helpful to you?
Thank you for voting!
Broken elbow on icemaker water fill tube.
Removed 2 screws holding water fill tube to rear of refrigerator and pulled out, matched old part with new to make sure of proper match. Guide new fill tube thru hole, making sure it is aligned with slot in ice cube tray on inside of freezer. Install new plastic line from water pump outlet to water fill tube, check for leaks, job done.
Parts Used:
-
Charles from Orland Hills, IL
-
Difficulty Level:Really Easy
-
Total Repair Time:Less than 15 mins
-
Tools:Nutdriver
130 of 142 people
found this instruction helpful.
Was this instruction helpful to you?
Thank you for voting!
Fridge was warm. No air circulating at all. Food was spoiling Fridge was just over 1 year old
First I removed the two screws that secure the guard in bottom back of the freezer and removed it . Next I removed the two screws that secure the guard on the back wall of the freezer and removed it. There are three wires connected to the motor, I unplugged those and removed the two screws that secure the motor and removed it. I swapped the grommets, blade and support bracket from the old motor. I put it back together in reverse steps and its working great. My mother-in-law can,t stop thanking me ! I saved her at least $400 to buy a new fridge. Thank You, Brian Miner
Parts Used:
-
Brian from Smock, PA
-
Difficulty Level:Easy
-
Total Repair Time:30 - 60 mins
-
Tools:Nutdriver, Screw drivers
107 of 122 people
found this instruction helpful.
Was this instruction helpful to you?
Thank you for voting!