


RF27T5201WW (AA-00) Samsung Refrigerator - Overview
Sections of the RF27T5201WW
[Viewing 1 of 1]
Keep searches simple, eg. "belt" or "pump".

Ice Maker Assembly
PartSelect #: PS12115595
Manufacturer #: DA97-15217D
Introducing the Samsung Refrigerator Ice Maker Assembly, an authentic and high-quality component crafted to ensure optimal performance for your appliance. This component is developed by Samsung, a rel...
$151.44
On Order

Ice Container Assembly
PartSelect #: PS11766800
Manufacturer #: DA97-14474C
Enhance the functionality of your Samsung refrigerator with the Ice Container Assembly. Designed and crafted with precision, this Samsung part is an essential for those looking to do a maintenance upg...
$188.95
In Stock
Order within the next 8 hrs and your part ships today!

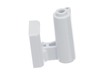
Hinge
PartSelect #: PS4145262
Manufacturer #: DA61-08305A
Ensure the seamless operation of your Samsung Refrigerator with our efficient and reliable French Door Hinge. This crucial component is designed to improve the functionality of your fridge, ensuring y...
$11.95
In Stock
Order within the next 8 hrs and your part ships today!
 – Part Number: DA63-09775A")
Door Bin (Right)
PartSelect #: PS16622103
Manufacturer #: DA63-09775A
Upgrade your Samsung refrigerator with this genuine Door Bin (Right). Specifically designed by Samsung, this component ensures an exact fit and optimal performance. It significantly enhances your frid...
$69.95
On Order

Grommet Hinge
PartSelect #: PS4151521
Manufacturer #: DA63-06410A
The Grommet Hinge Middle is an essential component of your Samsung refrigerator. This top-quality appliance part facilitates the easy and seamless functioning of the fridge door, ensuring greater long...
$6.95
In Stock
Order within the next 8 hrs and your part ships today!

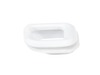
Filter Cover
PartSelect #: PS4144722
Manufacturer #: DA61-04809A
Improve the functionality of your refrigerator with this Shelf Support End Cap from the trusted brand, Samsung. This essential appliance part provides a cover for the end of the shelf support, providi...
$6.95
In Stock
Order within the next 8 hrs and your part ships today!

Temperature Sensor
PartSelect #: PS4138666
Manufacturer #: DA32-10104N
The Temperature Sensor is designed exclusively for your Samsung Refrigerator, ensuring a seamless fit and reliable performance. This high-quality component monitors and relays the temperature inside t...
$34.95
In Stock
Order within the next 8 hrs and your part ships today!

Upper Hinge Assembly
PartSelect #: PS4176617
Manufacturer #: DA97-12573A
Need a new upper door hinge for your Samsung refrigerator? You've come to the right place. This Samsung-made replacement part is designed especially for a range of Samsung refrigerator models, ensurin...
$77.95
In Stock
Order within the next 8 hrs and your part ships today!

Assembly Cap - Chute Ice;AW4,T
PartSelect #: PS4176621
Manufacturer #: DA97-12594A
Boost the performance of your Samsung refrigerator with this Dispenser Ice Chute Cap and Gasket assembly. Its key role is to adeptly guide ice from the container straight into the ice chute, making it...
$65.95
In Stock
Order within the next 8 hrs and your part ships today!

Ice Chute Gasket
PartSelect #: PS12082548
Manufacturer #: DA63-08248A
This Ice Chute Gasket, a premium component crafted by Samsung, ensures the optimal performance of your refrigerator. Specifically designed for Samsung refrigerators, this gasket serves as an essential...
$46.95
In Stock
Order within the next 8 hrs and your part ships today!
 – Part Number: DA97-12574A")
Upper Door Hinge (Right)
PartSelect #: PS4176618
Manufacturer #: DA97-12574A
Discover the right replacement for your Samsung Refrigerator with the Upper Door Hinge. This crucial part is designed specifically for the right side of your appliance, ensuring a perfect fit and seam...
$69.95
In Stock
Order within the next 8 hrs and your part ships today!

Tapping Screw
PartSelect #: PS4133148
Manufacturer #: 6002-000213
$6.95
In Stock
Order within the next 8 hrs and your part ships today!
Questions And Answers for RF27T5201WW
We're sorry, but our Q&A experts are temporarily unavailable.
Please check back later if you still haven't found the answer you need.
Common Symptoms of the RF27T5201WW
[Viewing 6 of 6]Ice maker not making ice
Fixed by
these parts
these parts


Show All
Ice maker won’t dispense ice
Fixed by
these parts
these parts
Show All
Door won’t open or close
Fixed by
these parts
these parts
Show All
Fridge too warm
Fixed by
these parts
these parts

Show All
Leaking
Fixed by
these parts
these parts

Show All
Fridge too cold
Fixed by
these parts
these parts
Show All
Keep searches simple. Use keywords, e.g. "leaking", "pump", "broken" or "fit".
Evaporator frozen (refrigrator section) and allowing top section to lose cooling
This is the Samsung French door refrigerator style that so many people have complained about freezing up and not cooling the top section. I first changed out the defrost thermostat and this did not correct the problem. I done a quick resistance check on the temp sensor that's mounted on the evaporator itself. The resistance would change when holding an ice cube on the sensor so I just assumed it was ok. PLEASE TAKE NOTE: When performing a resistance check on this sensor, make sure your readings match the Samsung temp/resistance chart in their literature. My sensor was way off calibration and was causing the freeze up. Its working as designed now and DW is happy again. Learn from my mistake.
Parts Used:
-
Richard from GULFPORT, MS
-
Difficulty Level:Easy
-
Total Repair Time:30 - 60 mins
-
Tools:Screw drivers
97 of 157 people
found this instruction helpful.
Was this instruction helpful to you?
Thank you for voting!
Ice container assembly cracked
I simply removed the old container & carefully removed all built up ice from the area that was to house the new container. This site helped me find the correct container in minutes. Will definitely use them again.
Parts Used:
-
Guy from PENDLETON, OR
-
Difficulty Level:Very Easy
-
Total Repair Time:Less than 15 mins
3 of 3 people
found this instruction helpful.
Was this instruction helpful to you?
Thank you for voting!
Friend lost balance, grabbed refrigerator door and it broke the hinges.
Was incredibly easy.
1. Top front of fridge: remove cover, about 4 Philips Head screws, lift up and slide back, being careful of small wires (door position sensing magnetic switches).
2. We are working on the upper right door hinge: this was way too simple, there is a toggle lever that locks the upper bearing plate in position; flip toggle up and remove, remove hinge.
3. lower right hinge: using the metric Allen Key, unscrew the fasteners on hinge plate (right tightly, lefty loosey) turn counter clockwise to remove screws.
4. There exists a small black thimble sized bushing on the old hinge that goes onto the new one. It didn't come with the lower right hinge but is a part the fits onto the pivot. If you need a new one, remember it doesn't come with the hinge. (check the door for it too, maybe it got stuck in there.
Place the black bushing onto the new hinge pivot point; there is a slight flat in this part so you may need to rotate it before it will push on.
5. Mount new lower right hinge; using the metric Allen key, evenly screw in all screws, then put a final tightness (about the same torque effort to open a twist cap beer).
6. Now the door: make sure you placed the new upper hinge with arms reach on top of the fridge. Lift door, balance and bring it to the position slightly above where it will be in, lower it onto the lower right hinge pivot, allow the hinge to take the weight but hold the upper.
7. You are holding the door and need to place the upper right hinge into the door and also the mounting plate, this is easy and the door is not heavy. Once the upper hinge finds its location, you can put that metal toggle back on and swing down. It is not a tight fit, there is some wiggle room, that is normal. The plastic cover we removed in the first step, also prevents that latching toggle from being opened accidentally.
8. Put the plastic cover back, watch those small wires, screw torque is lightly, just screw them all back in but don't overly tighten.
9. The door is now back on!
Are we finished yet? We'll I thought I was too but the door height wasn't quite right. I went online and learned that the lower right hinge, also has an adjustment.
Open up the lower freezer door several inches.
Using a philips head screwdriver, at the bottom facing up, there is a hole where you put the screwdriver, screw clockwise to raise door. This is basically pushing up on that black plastic bushing you put back on the new hinge.
Parts Used:

-
JOSEPH from WILMINGTON, NC
-
Difficulty Level:Very Easy
-
Total Repair Time:15 - 30 mins
-
Tools:Screw drivers
4 of 7 people
found this instruction helpful.
Was this instruction helpful to you?
Thank you for voting!