This part is the replacement drum support roller for your dryer. The roller is approximately 3 inches in diameter and is sold individually. The main reason to replace the drum support roller is if the...
Have you noticed that the door handle on your dryer is not what it used to be? Our GE stainless steel door handle might be just what you need to get your dryer back to its best. This handle, crafted w...
Ask our experts a question about this model and we'll get back to you as soon as possible!
1 question answered by our experts.
< Prev
1
Next >
Sort by:
Search filter:
Clear Filter
Your search term must have 3 or more characters.
Keep searches simple. Use keywords, e.g. "leaking", "pump", "broken" or "fit".
Sorry, we couldn't find any existing answers that matched.Try using some different or simpler keywords, or submit your new question by using the "Ask a Question" button above!
Rick
March 6, 2020
How to disassemble this dryer. My first time with this model.
For model number PTDS855EM0MS
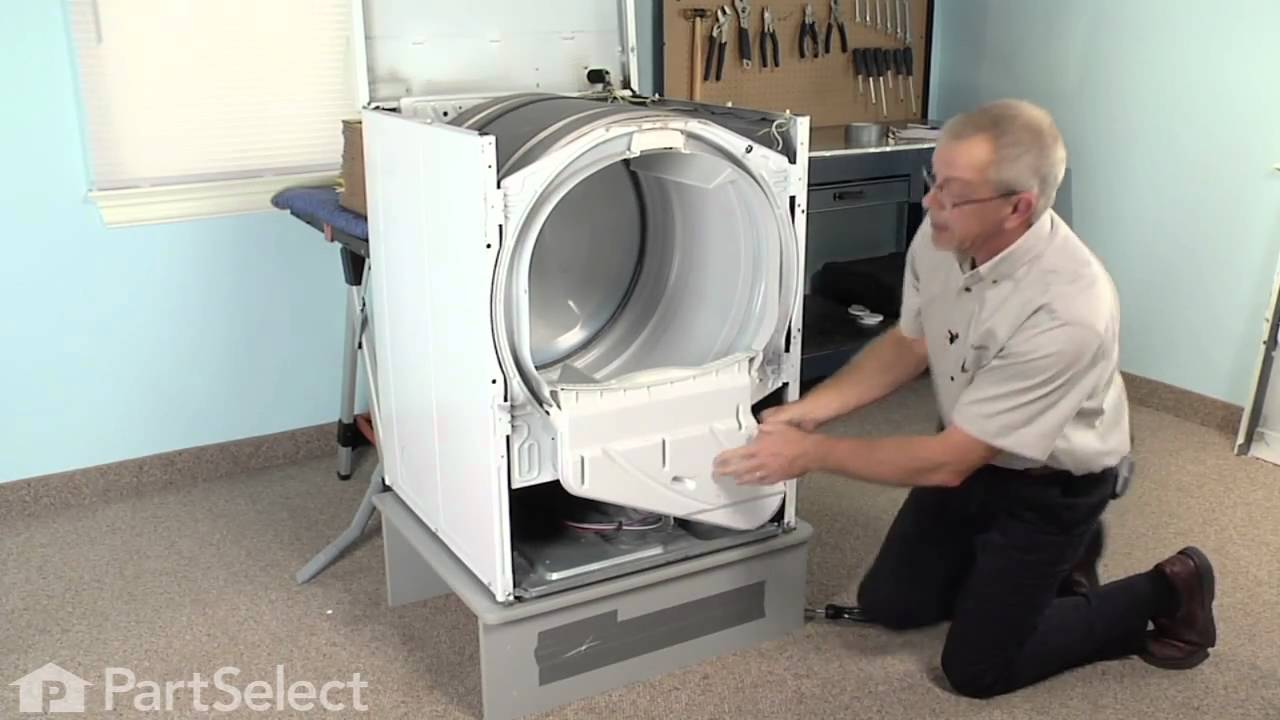
Hi Rick,
Thank you for your question. Here is a link to one of our videos from YouTube that you may reference on how to disassemble the dryer, https://www.youtube.com/watch?v=uYUdpJySHnU. The dryer in the video may not show exactly like the one you have and the part being referenced is the dryer drum, but it will give you a general idea on how to take the dryer apart. We hope this helps. Thank you and have a great day.
Was this helpful?
Thank you for voting!
< Prev
1
Next >
✖
Ask a Question
Ask our experts a question on this model and we'll respond as soon as we can.
We removed the top and front of the dryer and found that the drum roller bearings had gone out on one side. All this happenend on a weekend with no reair store open. We googled the cut sheet for the dryer, found the part number we needed and ordered the parts (we went ahead and replaced both rollers) from partselect.com. For $70 and our own labor, we completed the repair by Wednesday evening. I feel certain we saved at least $100 if not more by doing the work ourselves.
Front roller bearings were bad and figured to do the belt while in there. I bought the manual online which was very helpful. ?? Unplug dryer Remove 4 screws behind touch panel Tilt panel forward then up leaving wires attached Rear has 2 screws on the rear ends facing down remove them at ends Lift rear up then forward push and top will be freed (keep on top) Front edges have 1 screw each but sharp areas watch Open door and remove x 4 screws then lift up and forward bottom has tabs each end to hold in place Wires for light and switch can stay attached, move front/door to side Exposed will be the drum brace.. I changed the x 2 rollers while the drum brace was in place. To undo the rollers you have to use a wrench to reach in as you use a nut driver to remove then re-install new roller with washer on inside and outside (pay attention when you remove) Remove x 4 small screws..... hold drum inside then lift brace up and forward Have assistance hold drum steady with pressure to the back otherwise you will have to align back to the rear rollers Reach into the bottom for the idle pulley to remove drive belt tension... drive belt is VERY SKINNY and has ribbed side that faces the drum. Reverse the steps..