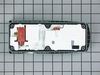
This water inlet valve should be located behind the lower kickplate panel in either the right or left corner. The attaching solenoid on the valve open and close according to the desired amount of water needed.
The circulation pump adapter, or pump adapter assembly connects the circulation pump to the tub of your dishwasher. If your dishwasher is leaking around this adapter, check the connection to ensure ev...
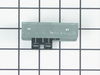
The hinge link on your dishwasher connects the spring to the dishwasher door hinge. If the hinge link becomes cracked or damaged, you may not be able to shut or lock your dishwasher door properly. In ...
This part is the replacement door hinge cable for your dishwasher. The door hinge cable connects the door spring to the door hinge, and allows the door to open in a controlled fashion. If you open you...
This genuine rinse-aid dispenser cap is an original replacement part from GE, designed for use with GE dishwashers. It covers the rinse agent port and securely seals the dispenser to keep the rinse ai...
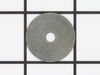
This is the replacement fine filter hub nut for your dishwasher. It is made of white plastic and is approximately 3 inches in diameter. The fine filter hub nut is also known as the lower spray arm hub...
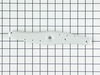
This kit includes the drain hose with black rubber end fittings and a clamp.
$93.94
Special Order
Questions And Answers for PDWT280V00SS
Ask our experts a question about this model and we'll get back to you as soon as possible!
5 questions answered by our experts.
< Prev
1
Next >
Sort by:
Search filter:
Clear Filter
Your search term must have 3 or more characters.
Keep searches simple. Use keywords, e.g. "leaking", "pump", "broken" or "fit".
Sorry, we couldn't find any existing answers that matched.Try using some different or simpler keywords, or submit your new question by using the "Ask a Question" button above!
Donald
May 4, 2023
How do I remove the upper rack?
For model number PDWT280V00SS
Hello Donald, thank you for contacting us. Based on our research, we are providing you with instructions that will help you replace the upper dishrack.
1- Pull out the upper dishrack.
2- Open the locking tab by using a flat-blade screwdriver.
3- Slide the upper rack off the rails.
4- Remove the screw that holds the middle spray arm.
5- Remove the screws securing the middle spray arm hub.
6- Install the middle spray arm on the new upper dishrack.
7- Slide the new dishrack roller into the rails.
8- Install the dishrack stopper.
We hope this helps!
1 person found this helpful.
Was this helpful?
Thank you for voting!
Lorenzo
July 18, 2023
The machine fills with water, but the cycle won’t start.
For model number PDWT280V00SS
Hi Lorenzo, thank you for reaching out. We would suggest making sure the filter, tubing, and the spray arm are not clogged. If the issue remains, the problem might be with the circulation pump, part number PS3652479. We hope this information helps!
Not draining. I replaced drain pump and cleaned out sump and all internals. It will drain manually for 15 seconds using the reset button. Just won't complete draining final rinse. Never has over flowed during operation. Could it be control board?
Thanks
For model number PDWT280V00SS
Hi Dane,
Thank you for your question. If you have just replaced the drain pump and the dishwasher is not draining as it should, we would recommend checking the electronic control board and the door latch and switch assembly. We hope this helps!
The dishwasher is not heating. Does the flood switch faulty?
For model number PDWT280V00SS
Hello Alan, Thank you for the question. This could be caused by a defective Heating Element. No continuity means the electrical path is broken and the element is burned out. We hope this helps!
Unable to remove the sump basket, white plastic or rubber parts are disintegrating is it repairable?
For model number PDWT280P00SS
Hello Dale, thanks for your question. Once the plastic/rubber parts start disintegrating, the sump filter and cover, part number PS2370522, needs to be replaced. It can not be repaired. We hope this helps.
Turned off power to unit, 'cuz it has a solenoid lead to open the soap door. Removed the phillips head screws that held the door together. The screw are located on the inside edge of the door, there are 10-12 of them. Spearated the door shells carefully, trying not to disturb the location of the wiring in the middle of the door.
Found the 4 screws that hold the module assembly to the door from the inside, and removed them. Popped the assembly out, cleaned the gasket-seat area and placed the new one in place. Carefully tightened the 4 screws. It is easy to over-tighten them, so only turn them until you feel they are snug. Let the gasket do the work. Attached the two solenoid control wires in the same positions they were in before they were removed from the old assembly. Re-assembled the door halves, again taking care to not over-tighten the phillips-head screws. One got "spun" and I removed it and re-set it into some epoxy. Returned power to the dishwasher, and stopped washing dishes by hand. Note: the latch is now made with a plastic that is more dense, and likely will not fail as soon as the original one did. I think GE learned something about the durability of their component plastics since this was originally built.
The hardest part for me was pulling the dishwasher out from under the countertop. Once it is out all you have to do is disconnect the power (or power off the fuse going to the dishwasher) then look underneath the dishwasher and you will see where the two ends of the heating element come through. Disconnect the wires connected to the ends by simply sliding off the connector. Then remove the plastic "nuts" that screw onto the ends of the heating element by turning them counterclockwise counterclockwise. Once the nuts are removed you can reach inside the dishwasher and remove the old heating element and replace it with the new one. Then simply replace the plastic nuts and reconnect the wires and you are good to go.
You'll need to remove the front toe kick and (if installed, the GE Profile baffling for additional silencing action).
You will need to disconnect the right wire connection to access the right screw (and may need to use a flat head screwdriver). You can then remove the 2 screws that hold the Valve Water Inlet on.
You will then need to loosen and the hose clamp that attaches the water line to the Valve Water Inlet. You may need to force it undone since the rubber connection is pretty secure around the water tube inlet.
Disconnect the plastic wire housing from the Valve Water Inlet and you should now have the Valve Water Inlet disconnected.
Reverse the order and reconnect everything and you should be good to go!
Double-check for any leaks prior to pushing everything back in :)