


P364GECS (06) Thermador Range - Overview
Sections of the P364GECS
[Viewing 1 of 1]
Keep searches simple, eg. "belt" or "pump".

Bake Igniter
PartSelect #: PS8722793
Manufacturer #: 00492431
If your gas oven is failing to heat or not reaching the proper temperature, the most common culprit is a malfunctioning igniter. This bake igniter is designed for use in gas ovens and ranges, where it...
$224.78
In Stock


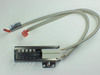
TEMPERATURE SENSOR
PartSelect #: PS8729210
Manufacturer #: 00627375
This oven temperature sensor is designed to accurately measure the internal temperature of the oven cavity and relay that information to the appliance’s electronic control system for precise heat regu...
$199.26
In Stock

Control Board
PartSelect #: PS8728435
Manufacturer #: 00619016
Restore your oven’s performance with this control board fixing kit. It comes with everything you need to replace or secure the electronic control board—the part that manages temperature and cooking se...
$294.31
In Stock


Questions And Answers for P364GECS
We're sorry, but our Q&A experts are temporarily unavailable.
Please check back later if you still haven't found the answer you need.
Common Symptoms of the P364GECS
[Viewing 4 of 4]Will Not Start
Fixed by
these parts
these parts
Show All
Little to no heat when baking
Fixed by
these parts
these parts
Show All
Element will not heat
Fixed by
these parts
these parts
Show All
Gas igniter glows, but will not light
Fixed by
these parts
these parts
Show All
Keep searches simple. Use keywords, e.g. "leaking", "pump", "broken" or "fit".
Oven does not maintain consistent temperature
Remove slide racks from oven. At the back right corner of oven unscrew heat sensor probe. Access rear of range. Remove screws holding back panel. Find wire from temperature probe where it passes through back wall of over and unclip it pulling probe wire and probe out back of oven. From the inside of oven, push chopstick through hole probe wire was routed through, to find hole in back wall of oven. Once chopstick is visible from back of oven, with chopstick enlarge hole through visible insulation. This is the opening the new probe wire needs to be routed through. From inside oven push new wire, using chopstick, through this hole and reattach wire at back of oven using the plastic clip on the wire. From inside oven screw probe to back of oven wall, reattach outside panel to back of oven, turn gas back on, plug range back in, check oven operates, and push range back in place, reinstall racks. You may have to remove oven door if you have trouble reaching to the back of the oven to access the probe. YouTube videos are easy to find showing how to do that.
Parts Used:
-
David from LONG BEACH, CA
-
Difficulty Level:Easy
-
Total Repair Time:30 - 60 mins
-
Tools:Screw drivers
2 of 6 people
found this instruction helpful.
Was this instruction helpful to you?
Thank you for voting!