Upgrade the efficiency of your Samsung Range or Samsung Microwave Oven Combo with our top-quality Oven Burner Igniter. Crafted specifically for Samsung appliances, this product ensures a perfect fit a...
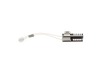
Enhance the functionality of your Samsung Range, Samsung Microwave Oven Combo, Samsung Wall Oven, or Samsung Cooktop with the Samsung Thermostat, DE47-20037A. This high-quality, original Samsung part ...
Presenting the Convection Fan Motor - Lower, exclusively designed for your Samsung Range, Samsung Wall Oven, and Samsung Microwave Oven Combo by the renowned brand, Samsung. This high-end part ensures...
Introducing the Samsung Oven Temperature Sensor! An essential component specifically designed to steadfastly monitor and regulate the temperature in your Samsung Range, Microwave Oven Combo, and Wall ...
This Samsung convection fan blade is designed for use with ranges. It plays a vital role, rotating on the motor shaft to distribute hot air throughout the oven, thus guaranteeing uniform heating. Prio...
Enhance your kitchen functionality with the Samsung Upper Fan Blade, designed for top-notch compatibility with your Samsung Range, Microwave Oven Combo, and Wall Oven. This crucial component guarantee...
Introducing the Screw, a superbly designed and reliable part for various appliances from top-tier manufacturers like Samsung, Kenmore, Amana, Maytag, and Jenn-Air. This functional item is suitable for...
Enhance your Samsung Range, Microwave Oven Combo, or Wall Oven with our premium Convection Motor Cap. Specially designed by Samsung, this durable part ensures your oven performs effectively and effici...
Introducing the Convention Fan Motor exclusively designed for your Samsung Range, Samsung Microwave Oven Combo, and Samsung Wall Oven. This essential appliance part ensures proper air circulation for ...
If you're noticing uneven cooking or lacking heat distribution on your Samsung kitchen range, it might be time to replace your small-sized burner cap. This genuine Samsung Small Burner Cap can solve y...
Discover the exceptional quality and performance of this Samsung-made nut, essential for your cooking appliances. Crafted with precision and in accordance with top-notch manufacturing standards, it se...
Designed for optimal performance and durability, the Samsung Convection Fan Blade Spacer is a must-have for maintaining your Samsung Range, Microwave Oven Combo, or Wall Oven. This component ensures t...
$12.95
In Stock
Questions And Answers for NX36R9966PM
Be the first to ask our experts a question about this model!
✖
Ask a Question
Ask our experts a question on this model and we'll respond as soon as we can.
The Samsung stove I have has had the igniter replaced several times. It seems to wear out over a couple years time. I did the repair with a Philips #2 screw driver. Open the oven door, remove the grates. unscrew the bottom cover and expose the heat shield. Unscrew the heat shield. This exposes the burner. Unscrew the burner from the center of the plate/lower heat shield. Unscrew the burner from the front and back of the oven. Carefully lift up the burner to expose the igniter and clip. Unscrew the igniter from the burner and set the burner aside. Unclip the igniter from the power cable. If it falls below, it won't go far just reach in a lift it back up to fasten the new igniter to the power clip. Refasten to the burner with new clips and screws provided. Re-insert the burner to the gas jet that is below the bottom plate which will not be visible to you unless you place your head towards the rear of the stove and look down. Once the Jet is back into the hole of the burner, re fasten it to the middle back and front of the stove. Replace the covers and grates. Close the oven and test it. A new igniter does wonders. You can remove the stove door for a less intrusive install, but I found it unnecessary to do so and saved a step and time. I was done well under 30 minutes.
I took off the back cover after I looked at youtube similar problems. Then removed the little thermostat and un hooked the 2 wires. I looked up the part and after is was delivered couple days later I connected the 2 wies and after putting the back cover on the oven was back to normal. Was such an easy repair and the part was only $11.
First we unplugged the oven and shut off the gas. We then began removing the two plates on the floor, inside of the oven, to reveal the pipe with the dead heating element. You remove the screws from the back of the first plate, pop it out from the front, then remove the screws from the front of the second plate and pop it out from the back. The only issue we encountered was when we attempted to remove the two screws for the pipe: the front screw was stuck (possibly from old oil) and stripped easily. to fix that, we took a metal handsaw, and sawed a new cut into the screw to fit a flathead. After dealing with the screw, we removed the pipe and unplugged the old heating element. We removed the bottom drawer for extra room to assist with unplugging the heating element, and for removing the pipe from the gas line. We removed two screws with nuts that were attaching the element to the pipe, and replaced it with the new element. after reattaching the element and placing the pipe back onto the line, before we placed the plates back, we turned the oven and gas back on to test if it was working. One successful test later, we placed the plates and bottom drawer back and we were done.


(0000) Samsung Microwave Oven Combo")