Update your Samsung kitchen appliances with this top-quality Range Convection Fan Motor Assembly. This essential component ensures convection cooking is smooth and effective in your Samsung Range, Wal...
Do you need to stabilize a wobbly Samsung kitchen appliance? Our Black Leveling Leg from Samsung is not only a robust, original part but also the perfect answer to your misalignment problem! Simple ...
Enhance the functionality of your Samsung Range, Samsung Microwave Oven Combo, Samsung Wall Oven, or Samsung Cooktop with the Samsung Thermostat, DE47-20037A. This high-quality, original Samsung part ...
The Main Control Board from Samsung is an essential component for your Samsung Range. This crucial part ensures that all your appliance's functions operate seamlessly. Manufactured with precision from...
Presenting the Convection Fan Motor - Lower, exclusively designed for your Samsung Range, Samsung Wall Oven, and Samsung Microwave Oven Combo by the renowned brand, Samsung. This high-end part ensures...
Improve your Samsung Range, Wall Oven, or Microwave Oven Combo's functionality with this Samsung Original Convection Fan Motor Assembly. Keeping your appliance operating smoothly, this component assis...
Introducing the Samsung Oven Temperature Sensor! An essential component specifically designed to steadfastly monitor and regulate the temperature in your Samsung Range, Microwave Oven Combo, and Wall ...
This Samsung convection fan blade is designed for use with ranges. It plays a vital role, rotating on the motor shaft to distribute hot air throughout the oven, thus guaranteeing uniform heating. Prio...
Enhance the efficiency of your Samsung appliances with the Micro Door Switch. This crucial component is compatible with a variety of Samsung products including the Range, Microwave, Microwave Oven Com...
Enhance your kitchen functionality with the Samsung Upper Fan Blade, designed for top-notch compatibility with your Samsung Range, Microwave Oven Combo, and Wall Oven. This crucial component guarantee...
This heater sheath is a protective component designed to enclose and shield a convection heating element. It helps ensure safe, even heat distribution and is commonly replaced if cracked, warped, or d...
Introducing the Samsung Cavity Floor Coating, an exceptional maintenance and repair essential for your Samsung range, wall oven, and microwave oven combo. This product demonstrates Samsung's consisten...
$165.82
In Stock
Questions And Answers for NE58R9560WG/AA
Be the first to ask our experts a question about this model!
✖
Ask a Question
Ask our experts a question on this model and we'll respond as soon as we can.
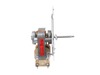
This oven has two fans that counter rotate. One spins clockwise, the other counterclockwise. Because of this, the motors and the fan blades are different. The schematic shows the counter clockwise rotating fan with a right hand threaded shaft/nut on the bottom and the clockwise motor and fan with the left hand nut on the top. My range had the motors in the exact opposite orientation, but the fan blades on the motors as shown on the schematic. The incorrect assembly at the factory (I bought new in the box, so I know this is the first repair) meant that nether fan blade was turning the correct direction. So do yourself a favor, be sure you’re buying the right motor (clockwise or counterclockwise) and be sure you put the right fan blade on the right motor. The Samsung motor ending in F is the counterclockwise motor that has the right hand threaded shaft the clockwise motor with the left hand threaded shaft ends in E.
I took off the back cover after I looked at youtube similar problems. Then removed the little thermostat and un hooked the 2 wires. I looked up the part and after is was delivered couple days later I connected the 2 wies and after putting the back cover on the oven was back to normal. Was such an easy repair and the part was only $11.
Slide out the stove. Unplug the electricity. Remove the back panel with a screwdriver. Then go inside the oven and remove the two Philips head screws holding the fan cover. Then remove the nut holding the fan. Note, it is a left handed nut, so turn it right to loosen it. Pull off the fan. Return to the back and remove the nut and two screws that hold the fan. The fan slides right out. The only problem I had was that the electrical contacts on the new motor were wider than the original. I had to break the plastic so I could separate the wire leads, so that they would fit the new motor. Works like a charm. John