


MVWP575GW1 Maytag Washer - Overview
Sections of the MVWP575GW1
[Viewing 5 of 5]


 Diagram and Parts List for Maytag Washer")

Keep searches simple, eg. "belt" or "pump".

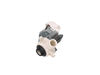
Agitator Directional Cogs
PartSelect #: PS388034
Manufacturer #: 80040
These agitator directional cogs are commonly referred to as dog ears. They come four to a package and are usually used with direct drive washing machines.
$7.31
In Stock

Touch-Up Paint - White
PartSelect #: PS385132
Manufacturer #: 72017
This 18 ml bottle of white appliance touch-up paint is used to cover scratches or marks on your appliance. The white touch-up paint can be used on refrigerators, microwaves, ranges, clothes dryers, an...
$15.95
In Stock

Drive Hub Kit
PartSelect #: PS6012095
Manufacturer #: W10528947
This drive hub kit helps your washer spin and agitate properly by connecting the basket to the motor. If your washer isn’t spinning, is noisy, or wobbles too much, this part might be the fix. It’s a s...
$35.89
In Stock

Screw, 8-16 x 1.000
PartSelect #: PS11746167
Manufacturer #: WP8533953
Sold individually.
$10.09
In Stock

Washer Drain Hose
PartSelect #: PS12578897
Manufacturer #: W11244231
The drain hose carries used water from the washer to your house drain.
$31.91
In Stock

Hose Clamp
PartSelect #: PS11740613
Manufacturer #: WP285655
This hose clamp is sold individually.
$14.07
In Stock

Lid Latch Strike
PartSelect #: PS11750882
Manufacturer #: WPW10240513
This part is the replacement lid latch or latch assembly for your top-load washer. The lid latch holds your washer door closed, and allows the washer to run its cycle. If the lid latch is damaged, you...
$56.29
In Stock

Drain Pump - 120V 60Hz
PartSelect #: PS11751719
Manufacturer #: WPW10276397
This washing machine drain pump is a key component responsible for removing water from the tub during the drain cycle. Designed for select top-load washers, it ensures efficient water expulsion and su...
$151.87
In Stock

Agitator Cam Repair Kit
PartSelect #: PS334655
Manufacturer #: 285825
This kit includes a Driven Cam Bearing, 4 Agitator Dogs, Spring & Spring Retainer.
$94.18
Special Order

Dryer Screw
PartSelect #: PS11746840
Manufacturer #: WP90767
This screw is sold individually.
$10.09
In Stock


Washer Latch
PartSelect #: PS11755478
Manufacturer #: WPW10482836
This part is the replacement lid latch or latch assembly for your top-load washer. It contains the latch mechanism and the connecting wire that hooks the door latch to the electrical system of the was...
$127.52
In Stock
Questions And Answers for MVWP575GW1
We're sorry, but our Q&A experts are temporarily unavailable.
Please check back later if you still haven't found the answer you need.
- < Prev
- 1
- Next >
Sort by:
Search filter:
Clear Filter
Your search term must have 3 or more characters.
Keep searches simple. Use keywords, e.g. "leaking", "pump", "broken" or "fit".
Sorry, we couldn't find any existing answers that matched.Try using some different or simpler keywords, or submit your new question by using the "Ask a Question" button above!
Jim
October 14, 2022
Starts to wash then three lights come on and have to push start button again to finish
For model number MVWP575GW1

Hi Jim, thank you for your question. If your washer does not complete the wash cycle, it could be because of a faulty lid latch assembly, part number PS11755478. A faulty lid switch assembly will prevent the washer from completing the wash cycle. We would also recommend checking the water inlet valve, part number PS12349203, for damages. Let us know if you have further questions!
Was this helpful?
Thank you for voting!
Related Parts:
Washer Latch

$127.52
In Stock
VALVE

$137.96
In Stock
- < Prev
- 1
- Next >
Common Symptoms of the MVWP575GW1
[Viewing 14 of 14]Will not agitate
Fixed by
these parts
these parts


Show All
Leaking
Fixed by
these parts
these parts


Show All
Spinning Issues
Fixed by
these parts
these parts
Show All
Spins slowly
Fixed by
these parts
these parts
Show All
Will not drain
Fixed by
these parts
these parts
Show All
Shaking and Moving
Fixed by
these parts
these parts

Show All
Will Not Start
Fixed by
these parts
these parts


Show All
Lid or door won’t close
Fixed by
these parts
these parts

Show All
Marks left on clothes
Fixed by
these parts
these parts
Show All
Draining Issues
Fixed by
these parts
these parts
Show All
Does not dispense fabric softener or detergent
Fixed by
these parts
these parts
Show All
Noisy and Marks Left on Clothes
Fixed by
these parts
these parts
Show All
Locking Issues
Fixed by
these parts
these parts
Show All
Not cleaning dishes properly
Fixed by
these parts
these parts
Show All


Keep searches simple. Use keywords, e.g. "leaking", "pump", "broken" or "fit".
washer wouldn't agitate
First pry off the cap of the agitator. Then using a socket remove the bolt that holds the plastic cup in place. Remove this cup by prying it loose from the two tabs that hold it in place. Once this cup is removed you can get to the broken cogs.
Slip the new cogs into the underside of the cup, and slide the cup back down in the agitator housing using the slots on the side for a guide. (You may want to remove the entire agitator and assemble everything upside down, then flip it all back over to mount, so the cogs don't fall out).
Tighten the bolt, snap the cap back in place on top of the agitator and your'e done. Easy repair.
Parts Used:
-
mike from Kent, WA
-
Difficulty Level:Easy
-
Total Repair Time:15 - 30 mins
-
Tools:Screw drivers, Socket set
951 of 1052 people
found this instruction helpful.
Was this instruction helpful to you?
Thank you for voting!
top half of agitator did not move during wash cycle
pull off softner dispenser, pop off agitator cap by inserting straight screw driver into small slot, remove bolt inside agitator with socket wrench and long extension, pull agitator straight up off shaft, place agitator on floor, with feet holding bottom half pull top half apart from bottom half by pulling straight up, note direction of old cogs remove and replace with new, reassemble
Parts Used:
-
dennis from new stanton, PA
-
Difficulty Level:Really Easy
-
Total Repair Time:Less than 15 mins
-
Tools:Socket set
283 of 332 people
found this instruction helpful.
Was this instruction helpful to you?
Thank you for voting!
Agitator was not working
Step 1) Take off top cap with a flat head screw driver.
2) unscrew bolt (may need extension as it may be deep in the agitator.)
3) Take upper agitator off.
4) remove clog retainer and clogs.
5) insert new clogs and re-assemble.
total time 10 to 15 min.
2) unscrew bolt (may need extension as it may be deep in the agitator.)
3) Take upper agitator off.
4) remove clog retainer and clogs.
5) insert new clogs and re-assemble.
total time 10 to 15 min.
Parts Used:
-
Michael from Murray, KY
-
Difficulty Level:Really Easy
-
Total Repair Time:Less than 15 mins
-
Tools:Screw drivers, Socket set
71 of 89 people
found this instruction helpful.
Was this instruction helpful to you?
Thank you for voting!