This 18 ml bottle of white appliance touch-up paint is used to cover scratches or marks on your appliance. The white touch-up paint can be used on refrigerators, microwaves, ranges, clothes dryers, an...
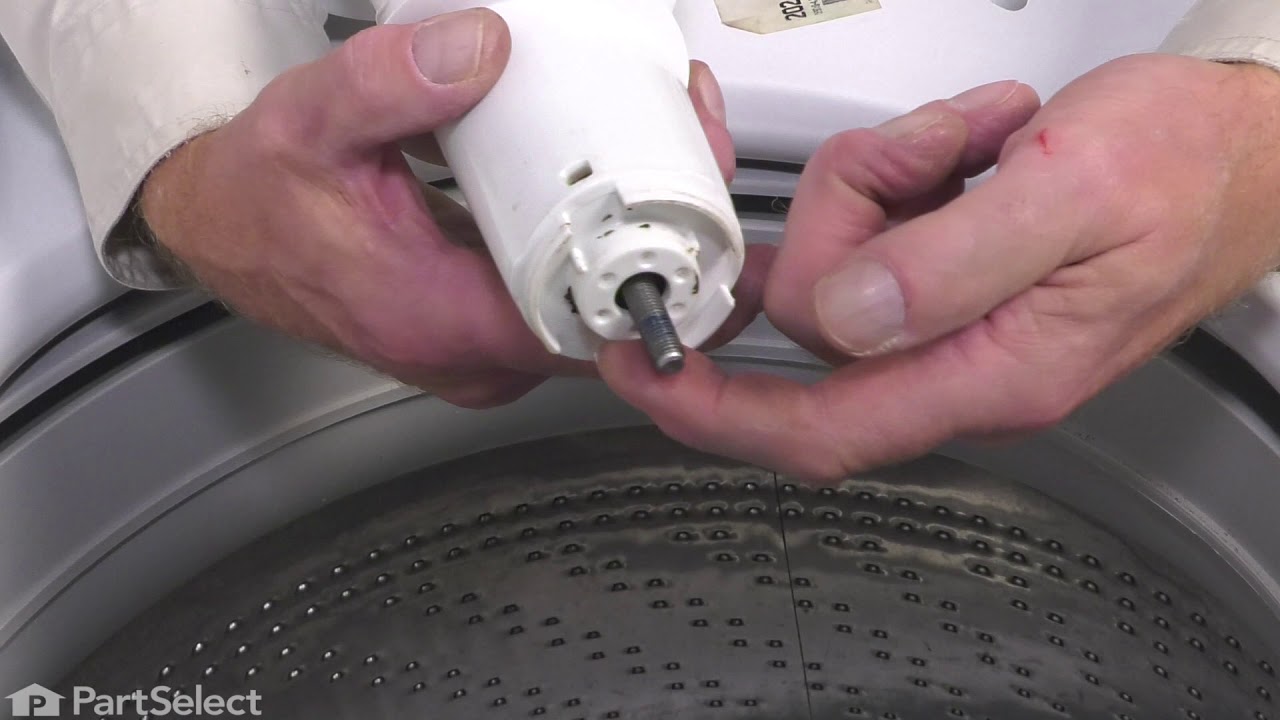
This drive hub kit helps your washer spin and agitate properly by connecting the basket to the motor. If your washer isn’t spinning, is noisy, or wobbles too much, this part might be the fix. It’s a s...
If your washer is noisy, spins slowly, or leaves clothes soaking wet, this splutch cam kit might be the fix. It helps your machine switch between washing and spinning by connecting the motor to the ba...
This agitator is for washers.
Agitator rotates back and forth to move the clothes inside the tub to clean the load.
Unplug the washer before installing this part. Wear work gloves to protect your hands.
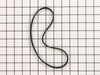
If your washer isn’t spinning or making strange noises, the drive belt might be worn out. This genuine replacement belt connects the motor to the drum, helping it spin and tumble your clothes properly...
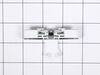
This lid switch assembly is for a top load washer. The lid switch assembly detects if the washer lid is open or closed and prevents the washer from spinning when the lid is open.
This 6-pin shift actuator is a genuine replacement part designed for use in select washing machines. It plays a critical role in controlling the movement of the transmission, allowing the appliance to...
This water inlet valve is for washers.
The water inlet valve controls the water flow into the washer.
Unplug the washer and shut off the water supply before installing this part. Wear work glove...
Having a problem with a funky-smelling washing machine, or one that just doesnt seem to clean your clothes as well as it used to? Say hello to the Affresh Washing Machine Cleaner by Whirlpool. This po...
The drain hose carries used water from the washer to your house drain.
$31.91
In Stock
Questions And Answers for MVWC416FW0
Ask our experts a question about this model and we'll get back to you as soon as possible!
26 questions answered by our experts.
< Prev
1
2
3
Next >
Sort by:
Search filter:
Clear Filter
Your search term must have 3 or more characters.
Keep searches simple. Use keywords, e.g. "leaking", "pump", "broken" or "fit".
Sorry, we couldn't find any existing answers that matched.Try using some different or simpler keywords, or submit your new question by using the "Ask a Question" button above!
Luis
March 29, 2023
Repair the Agitator (It's the one in the middle of the Maytag HE Washer that has a top which Reads : Fabric Softener Dispenser) . The round plastic ring on the bottom broke and fell out of the plate it sits on. I was looking for the tutorial Video Maytag has on how to replace it but none was not available for the Agitator (unless I overlooked it) Can you please help me out on how to repair and replace the part. THANK YOU so MUCH!!
For model number MVWC416FW0
Hello Luis, thank you for contacting us. We are providing you with a relevant video that will help you in replacing the agitator. We hope this solves your problem!
9 people found this helpful.
Was this helpful?
Thank you for voting!
DAVID
February 5, 2020
This washer is loud when going into a spin cycle alot like the overused washers in the laundermats. It still works but is something starting to wear out on it?
For model number MVWC416FW0
Hello and thank you for writing.
It certainly sounds like it could be a faulty drive pulley PS10057144 and/or a loose or a faulty belt PS11747978 you should check the part(s) for signs of damage, and replace the part(s) as needed. We hope this helps. Please contact us anytime if you require further assistance.
When wash is in spin cycle it makes loud roaring sound.What parts are wearing out?
For model number MVWC416FW0
Hello Deb, thank you for writing. When you Washer is making a loud noise during Spin Cycle it could be a number of parts that may have worn out or gone loose. We advise checking these parts for damage: Main tub bearing faulty, Main drive pulley, Motor coupling worn, Bad clutch, Worn out drive belt.
2 people found this helpful.
Was this helpful?
Thank you for voting!
Frank
February 25, 2020
Green light continues to flash on sensing cycle with no results
For model number MVWC416FW0
Hi Frank,
Thank you for your question. If the sensing light is flashing, then the cycle has paused. To resolve this, press the pause button once. The light should remain on, but it should stop blinking. Depending on the water pressure, the wash cycle should continue. The flashing could also indicate that the water may filling the washer slowly. You will need to check the hoses and the screens and clean them if they are clogged or dirty. You should also check the water inlet valve to make sure that it is working correctly. You will need to test the valve with a multi-meter. Before beginning, ensure that you have unplugged your washing machine. The water inlet valve will most likely be found directly behind the hose connections. You will need to remove the rear panel in order to access it. Once you have located it, remove the valve in order to test it. Before testing it, inspect the screens inside the pump and the pump itself for any debris or damage. Be very careful when doing this as screens cannot be replaced, and if they become damaged the entire valve will need replacing. Set your multi-meter to Rx1 and touch the probes to the terminals. The reading of a functional valve varies from model to model, refer to your owner’s manual to determine what your reading should be. If you do not receive the recommended reading, you will need a replacement water inlet valve. You should check the water level switch and pressure hose to make sure they working. Inspect the switch for any signs of wear, burning, cracking, or damage. If the air dome hose is not damaged or if your switch shows any the symptoms above, you may need a replacement water level switch. Flush the hoses before putting them back on to make sure they are clean and make sure the water pressure is good. We hope this helps. Thank you and have a great day.
1 person found this helpful.
Was this helpful?
Thank you for voting!
Jack
February 12, 2020
How to replace tub ring
For model number MVWC416FW0
Hi Jack,
Thank you for your question. Before you begin any repair please unplug the appliance from the electrical outlet. Before you replace the tub ring on your washer, use tape to secure the lid. Then remove the top 2 rear hinge screws from the rear panel. Then remove the 2 screws securing the wiring and tube cover and pull it off. Next, pull the main top forward and then lift it up and support it. Then use a flathead screwdriver to remove the tabs securing the tub ring and then pull it off. Then install the new tub ring by aligning the tabs on the ring with the catches on the outer tub and snap it into place. Then remove the support and then lower the top and align the slots in the top with the bracket tabs on the frame and push the top back. Then reinstall the wiring and tube cover and then reinstall the hinge screws. Remove the tape securing the lid. Plug the washer back in and it should now work for you. We hope this helps. Thank you and have a great day.
Was this helpful?
Thank you for voting!
< Prev
1
2
3
Next >
✖
Ask a Question
Ask our experts a question on this model and we'll respond as soon as we can.
Well, first investigated and found loose nut on drive clutch. First take off the two screws with nut drive then cover off using a screwdriver blade to snap off the cover. Then socket ratchet to take off the nut on drive clutch. take off belt by slowly rotating the drive gear. two screws that hold the electronics to the upper drive clutch and put aside, so you can snap off the cover for drive clutch on upper part with screwdriver and off the parts come and install whole unit back as took it apart. Line up the new upper clutch so that is position as was before. (Using parts diagram helps a lot as www. partsselect.com has for you or Maytag.com.) Then put the electronic part board back on and the gear and nut. Make sure it is tight by several attempts to make sure it's snugged up good and then slowly roll belt back on the pulley and motor drive. Put your cover guard back on with two screws and done.
ordered hub and it shipped quickly. I was able to put the hub in place and screw the screws in. you want to tighten them down slowly and go around to each screw tightening a little at a time so you don't break the hub. as you tighten the screws down the hub slides down flush. its impossible to just push the hub on with your hand. Buttoned it back up and got caught up on laundry. good day when the washer is fixed.


 Diagram and Parts List for Maytag Washer")