If your oven isn’t heating properly or the flame seems weak, this igniter might be the fix. It helps start the oven by glowing and lighting the gas so you can bake and broil as usual. It works with ma...
$95.65
In Stock
Order within the next 6 hrs and your part ships today!
This part is a replacement halogen lamp for your oven. The bulb is 25 watts and 120 volts. If your light bulb is burned out, this is the part that replaces it. Be sure to turn off power to your range ...
$32.66
In Stock
Order within the next 6 hrs and your part ships today!
This is a multi-use and multi-appliance screw. It can be used on a microwave, refrigerator, range/oven, air conditioner, dehumidifier, washer, or dryer. The measurements of this screw are 8 x 1/2 inch...
$28.95
In Stock
Order within the next 6 hrs and your part ships today!
Keep your oven safe and functional with this replacement interior door glass, the heat-resistant panel that lines the inside of your oven door. With dimensions of approximately 20 5/8" x 13 1/8", it f...
$160.20
In Stock
Order within the next 6 hrs and your part ships today!
This is a replacement screw and washer for your oven/range. It is a Phillips-head screw approximately half an inch long, and the washer is approximately 1 inch in diameter. The screw attaches the oven...
$10.56
In Stock
Order within the next 6 hrs and your part ships today!
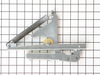
Struggling with a misbehaving range burner that wont light up? Hang tight, weve got just the solution: the Whirlpool Surface Burner Spark Igniter. This is an authentic, OEM part, designed specifically...
$43.07
In Stock
Order within the next 6 hrs and your part ships today!
Order within the next 6 hrs and your part ships today!
Questions And Answers for MGR6875ADS
Ask our experts a question about this model and we'll get back to you as soon as possible!
4 questions answered by our experts.
< Prev
1
Next >
Sort by:
Search filter:
Clear Filter
Your search term must have 3 or more characters.
Keep searches simple. Use keywords, e.g. "leaking", "pump", "broken" or "fit".
Sorry, we couldn't find any existing answers that matched.Try using some different or simpler keywords, or submit your new question by using the "Ask a Question" button above!
Fred
December 29, 2023
None of the 3 igniters (top oven, bottom oven, broiler) will glow.
This is a gas unit.
All of the stove-top burners work fine.
What is the most likely part to replace that is preventing all 3 igniters to fail?
Thank You.
For model number MGR6875ADS
Hello Fred, thank you for the question. Based on the description that you have provided, we would recommend checking the electronic control board, part number PS11742910, to fix the issue. We hope this helps!
lower oven will not turn off
touchpad appears to work
For model number MGR6875ADS
Hello David, thank you for getting in touch. If your lower oven will not turn off and the touchpad seems to be working, the issue could be due to a malfunctioning control board. We would recommend checking the control board, part number PS11742910, to solve the problem. We hope this helps!
How is a lower oven temperature sensor replaced. Do you have a schematic you can attach?
For model number MGR1320BDW
Hi Brad, thank you for reaching out. Regrettably, we do not have the required schematic listed. However, we are linking a video that will help you replace the lower oven temperature sensor, part number PS2003225. We hope that helps!
Hello Gene, Thank you for your inquiry. We have researched the model you have provided and we would recommend checking the following parts to fix your issue: the terminal block, the bake igniter, the broil igniter, the gas safety valve, and the temperature sensor. You can test the parts with a multimeter. If you are unfamiliar with how a multimeter functions, we have videos available to assist you. We also recommend checking the wiring for any visible damage. We hope this helps and if you need help placing an order, customer service is open 7 days a week. Please feel free to give us a call. We look forward to hearing from you!
Repair tech checked oven and said the control panel was bad and needed to be replaced. The new control panel would cost over $450.00! I found that the oven sensor was bad and replaced it for $30.00. The old oven sensor had failed following a self cleaning cycle. I found that the wires coming out of it were burnt.
Replacing the oven sensor was very easy. I removed the back panels 6 screws to gain access to the sensor's connection. I then removed the 2 screw that hold the sensor in place inside the oven and pulled the old sensor out through the oven. I reversed this process to place the new sensor in the oven.
First I removed the lower tray and all parts covering the ignitor on the upper oven. 2. Then I removed the screws holding down the ignitor and flame distributor. 3. I then had to pull out the oven from the wall and remove the back panel to expose the wires connecting the ignitor. This required the removal of about six screws but they were fairly easy to get to. 4. I disconnected the ignitor from the back panel then went around to the front of the oven and pulled out the ignitor and all of the attached parts. 5. Here's the tricky part. The screws holding the ignitor in place had fused from the heat and then the threads stripped when I tried to remove them. I had to use a dremel tool and cutting wheel to carefully cut the screws off and then went to buy some replacement screws from the hardware store. 6. I replaced them with a nut and a bolt, to hopefully avoid the same problem for later replacement if necessary. 7. I then replaced everything the same way it came out and all is working like new!
First removed the old gasket using a needle-nose pliers. Then placed new gasket by inserting the little clips on the gasket. Took 5 minutes. Great instructions from Repair Forum.


 Diagram and Parts List for Maytag Range")
 Diagram and Parts List for Maytag Range")


.gif "SUPPLEMENTAL INFORMATION Diagram and Parts List for Maytag Range")

 Diagram and Parts List for Maytag Range")

 – Part Number: W11665456")


")