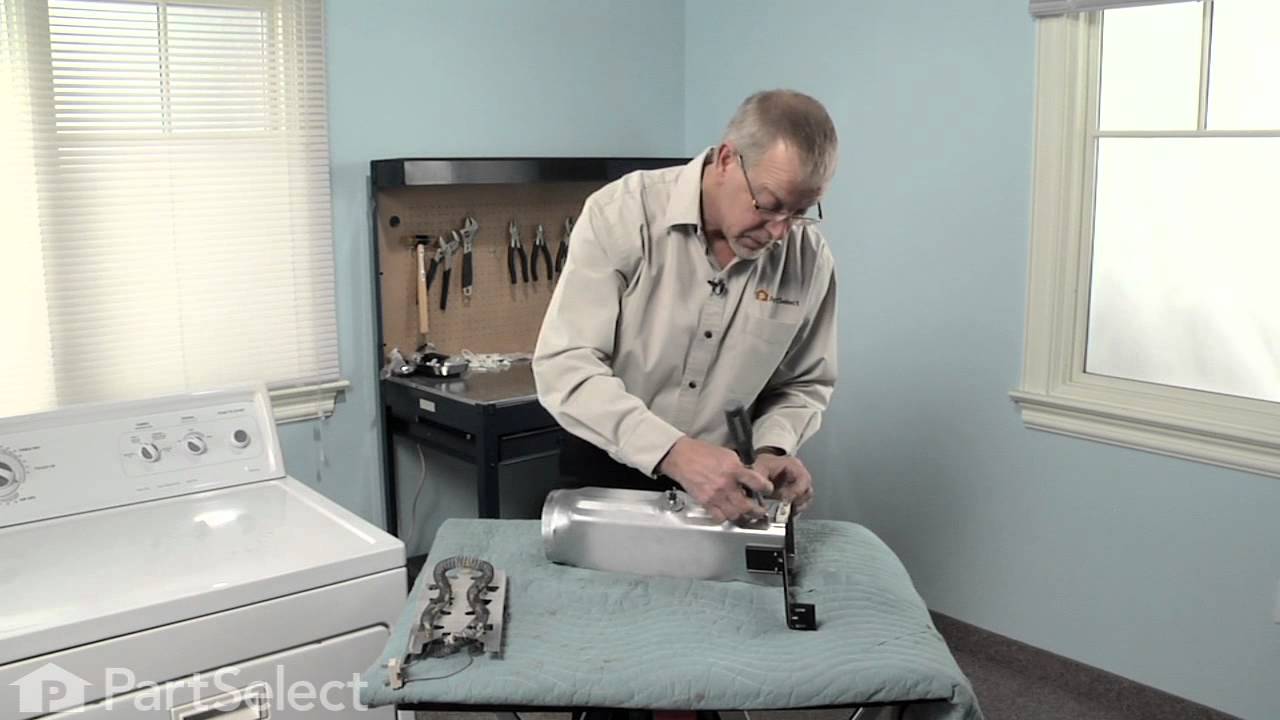
This dryer repair kit consists of five commonly replaced dryer parts: one multi-rib belt (part #661570V and measures 93 1/2 inches long), four drum support rollers, one idler assembly, nine tri-rings,...
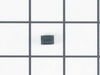
This Idler Pulley includes the tri-ring and gasket and everything included here is manufacturer-certified. This part maintains correct tension on the drive belt in order to spin the drum properly. If ...
When connected to electricity the dryer heating element glows red hot and generates heat. When air is blown over it, it heats the air which is used to dry the clothes. The heating element fits inside ...
This drum support roller is sold individually. Most dryers require two. The tri-rings are included. This is a drum support roller for a dryer. It is a genuine replacement part. This part is sold separ...
This dryer lint filter is designed to capture lint and debris during the drying cycle, helping maintain airflow and prevent potential fire hazards. Measuring approximately 12.5 inches wide by 10.5 inc...
This idler pulley assembly includes the pulley and bracket, ensuring proper tension on the dryer drive belt for smooth drum rotation. Compatible with several Whirlpool, KitchenAid, Maytag, Jenn-Air, A...
This is the moisture sensor for your dryer. It helps detect the amount of moisture in your clothes during the dryer cycle. If you notice your clothes are still wet after an automatic dryer cycle is do...
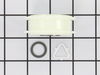
If you notice that your dryer is noisy or will not tumble, you may need to replace the tri ring. This part is triangular, and is less than an inch in size. Tri rings can be found both on the idler pul...
This 18 ml bottle of white appliance touch-up paint is used to cover scratches or marks on your appliance. The white touch-up paint can be used on refrigerators, microwaves, ranges, clothes dryers, an...
$15.95
In Stock
Questions And Answers for MEDC700VW0
Ask our experts a question about this model and we'll get back to you as soon as possible!
5 questions answered by our experts.
< Prev
1
Next >
Sort by:
Search filter:
Clear Filter
Your search term must have 3 or more characters.
Keep searches simple. Use keywords, e.g. "leaking", "pump", "broken" or "fit".
Sorry, we couldn't find any existing answers that matched.Try using some different or simpler keywords, or submit your new question by using the "Ask a Question" button above!
WANDA
July 1, 2021
Why does my dryer make a loud screeching noise while running? Eventually stops
For model number MEDC700VW0
Hi Wanda,
Thank you for your question. If the dryer is squeaking, the issue is with the idler pulley. The idler pulley provides tension to the belt so the belt will stay in place when the dryer is in use. The part number listed under your model number for the idler pulley is PS334244. If you would like to place an order for it, you may order it either online or by calling our customer service line and anyone will be happy to assist you. We hope this helps! Good luck with the repair!
Hello Ron, thank you for getting in touch. We would suggest making sure the vents are not clogged. If the issue remains, the problem might be with the thermal fuse, part number PS11741460. If the fuse is faulty, the dryer may start but will not heat. You may test the thermal fuse for continuity using a multimeter. We hope this helps!
To change the heating element do I remove front panel or back panel?
For model number MEDC700VW0
Hello Mary, Thank you for your inquiry. You can remove the front panel, we have included a link to our installation video on installing the heating element part# PS11741416. We hope this helps you.
Not heating or drying clothes. What is possible solution?
For model number MEDC700VW0
Hi John, thank you for contacting us. The issue is most probably because of the cycling thermostat, part number PS11745959. It controls the internal drying temperature. You may need to replace it to fix the issue. We hope this solves your problem!
Received your parts, Popped them both right into place, Even though only one side needed to be replaced, I wanted them to match up. It was amazing how easy this was. My husband was quite impressed I had ordered these rather then look for either a new or used dryer from some other source.
Pryed dryer top open and opened front door. . Unscrewed the 2 retaining screws. Pulled old switch from the wiring harness. Put new switch in place and replaced the retaining screws. Put new switch wire plug into the wiring harness. Before closing top, checked door switch function with dryer on. Dryer cut off when door open and when closed dryer started normally. . . Maint. Note instruction book should warn that letting door slam, which I did on occaision, broke the switch arm. Might save future problems.